哈曼卡顿Harman Kardon One(哈曼卡顿智能音箱)
156.1MB · 2026-03-12

你是否想过,为什么现在的 AI 编程助手(如 Cursor、Windsurf)不仅能聊天,还能直接帮你创建文件、运行命令、甚至调试项目?
秘密不在于模型本身更聪明,而在于**AI Agent(智能体)**架构。
本文将带你通过几十行 Node.js 代码,结合 LangChain 框架,从零手写一个“迷你版 Cursor”。我们将赋予大模型“手”和“脚”,让它能读写文件、执行终端命令,从而自动完成一个完整的 React TodoList 项目。
很多人认为 AI 只是聊天机器人,但 AI Agent = 大模型 (LLM) + 记忆 (Memory) + 工具 (Tools) + 规划 (Planning) 。
如果把大模型比作一个超级大脑:
我们今天要做的,就是给这个“大脑”装上“手”(File System Tools)和“脚”(Command Line Tools)。
我们需要一个简单的 Node.js 环境。
初始化项目:
mkdir my-cursor
cd my-cursor
npm init -y
npm install @langchain/core @langchain/openai zod chalk dotenv
@langchain/core: Agent 的核心框架。zod: 用于定义工具的输入参数结构(让 AI 知道怎么传参)。chalk: 让终端输出更漂亮。dotenv: 管理 API Key。配置环境变量 (.env):
OPENAI_API_KEY=your_api_key_here
OPENAI_BASE_URL= # 以阿里云/Qwen为例
MODEL_NAME=qwen-coder-plus # 选择一个擅长代码的模型
这是最关键的一步。我们需要用代码定义几个函数,告诉 AI:“如果你需要读文件,就调这个;如果需要运行命令,就调那个。”
read_file, write_file)利用 Node.js 原生的 fs/promises 模块,我们可以轻松实现文件操作。
import { tool } from '@langchain/core/tools';
import fs from 'node:fs/promises';
import path from 'node:path';
import { z } from 'zod';

// 读取文件工具
const readFileTool = tool(
    async ({ filePath }) => {
        const content = await fs.readFile(filePath, 'utf-8');
        return `文件内容: ${content}`;
    },
    {
        name: 'read_file',
        description: '读取指定路径的文件内容',
        schema: z.object({
            filePath: z.string().describe('文件路径,例如 src/App.tsx')
        })
    }
);

// 写入文件工具
const writeFileTool = tool(
    async ({ filePath, content }) => {
        // 自动创建不存在的目录 (递归模式)
        const dir = path.dirname(filePath);
        await fs.mkdir(dir, { recursive: true });
        await fs.writeFile(filePath, content, 'utf-8');
        return `文件写入成功:${filePath}`;
    },
    {
        name: 'write_file',
        description: '向指定路径写入文件内容,如果目录不存在会自动创建',
        schema: z.object({
            filePath: z.string().describe('文件路径'),
            content: z.string().describe('要写入的代码或文本')
        })
    }
);
execute_command)这是让 AI 拥有“执行力”的关键。我们可以让它运行 pnpm install 或 npm run dev。
import { spawn } from 'node:child_process';

const executeCommandTool = tool(
    async ({ command, workingDirectory }) => {
        const cwd = workingDirectory || process.cwd();

        return new Promise((resolve) => {
            // 拆分命令,例如 "pnpm install" -> ["pnpm", "install"]
            const [cmd, ...args] = command.split(' ');

            const child = spawn(cmd, args, {
                cwd, // 指定工作目录
                shell: true, // 允许使用 shell 特性
                stdio: 'inherit' // 直接在终端显示输出
            });

            child.on('close', (code) => {
                if (code === 0) {
                    resolve(`命令执行成功:${command}`);
                } else {
                    resolve(`命令执行失败,退出码: ${code}`);
                }
            });

            child.on('error', (err) => {
                resolve(`命令执行出错: ${err.message}`);
            });
        });
    },
    {
        name: 'execute_command',
        description: '执行 Shell 命令,支持指定工作目录。注意:不要在这个命令里写 cd,直接用 workingDirectory 参数!',
        schema: z.object({
            command: z.string().describe('要执行的命令,如 pnpm install'),
            workingDirectory: z.string().optional().describe('可选:指定在哪个文件夹运行')
        })
    }
);
list_directory)让 AI 能够“看”到当前有哪些文件,方便它进行下一步操作。
const listDirectoryTool = tool(
    async ({ directoryPath }) => {
        const files = await fs.readdir(directoryPath);
        return `目录内容:n ${files.map(f => `- ${f}`).join('n')}`;
    },
    {
        name: 'list_directory',
        description: '列出指定目录下的所有文件和文件夹',
        schema: z.object({
            directoryPath: z.string().describe('目录路径')
        })
    }
);

export { readFileTool, writeFileTool, executeCommandTool, listDirectoryTool };
有了工具,我们需要一个“指挥官”来协调它们。这个指挥官就是一个简单的循环(Loop) :
以下是核心代码 (index.mjs):
import { ChatOpenAI } from '@langchain/openai';
import { HumanMessage, SystemMessage, ToolMessage } from '@langchain/core/messages';
import { readFileTool, writeFileTool, executeCommandTool, listDirectoryTool } from './all_tools.mjs';
import chalk from 'chalk';
import 'dotenv/config';

// 1. 初始化大模型
const model = new ChatOpenAI({
    modelName: process.env.MODEL_NAME,
    apiKey: process.env.OPENAI_API_KEY,
    baseURL: process.env.OPENAI_BASE_URL,
    temperature: 0, // 代码生成需要精确,温度设为0
});

// 2. 绑定工具
const tools = [readFileTool, writeFileTool, executeCommandTool, listDirectoryTool];
const modelWithTools = model.bindTools(tools);

async function runAgent(query) {
    // 系统提示词:赋予 AI 角色和规则
    const messages = [
        new SystemMessage(`
        你是一个全栈编程助手。你的任务是使用提供的工具完成用户的开发需求。
        当前工作目录:${process.cwd()}

        重要规则:
        1. 执行命令时,如果需要切换目录,请使用 workingDirectory 参数,严禁在 command 中使用 'cd' 命令。
        2. 每次只做一个动作,等待结果后再进行下一步。
        3. 遇到错误要分析原因并尝试修复。
        4. 回复要简洁,只汇报关键进展。
        `),
        new HumanMessage(query)
    ];

    // 3. Agent 核心循环 (最多执行 30 步,防止死循环)
    for (let i = 0; i < 30; i++) {
        console.log(chalk.bgGreen(`n 第 ${i+1} 轮思考中...`));

        // 调用大模型
        const response = await modelWithTools.invoke(messages);
        messages.push(response); // 记录 AI 的思考

        // 情况 A: AI 没有调用工具,说明它认为任务完成了,直接输出最终回答
        if (!response.tool_calls || response.tool_calls.length === 0) {
            console.log(chalk.blue("n 任务完成!AI 的最终回复:"));
            console.log(response.content);
            return;
        }

        // 情况 B: AI 调用了工具,我们需要执行这些工具
        for (const toolCall of response.tool_calls) {
            console.log(chalk.yellow(`️ 正在执行工具: ${toolCall.name}`));

            // 找到对应的工具函数并执行
            const foundTool = tools.find(t => t.name === toolCall.name);
            if (foundTool) {
                try {
                    const result = await foundTool.invoke(toolCall.args);

                    // 将工具执行结果作为“观察”反馈给 AI
                    messages.push(new ToolMessage({
                        content: result,
                        tool_call_id: toolCall.id
                    }));
                } catch (error) {
                    messages.push(new ToolMessage({
                        content: `工具执行出错: ${error.message}`,
                        tool_call_id: toolCall.id
                    }));
                }
            }
        }
    }
    console.log("️ 达到最大迭代次数,任务可能未完成。");
}

// 测试任务
const task = `
创建一个 React TodoList 应用:
1. 使用 pnpm create vite 创建项目 react-todo-app (模板 react-ts)。
2. 修改 src/App.tsx,实现带分类筛选、本地存储、精美渐变背景和动画的 TodoList。
3. 安装依赖 (pnpm install)。
4. 启动开发服务器 (pnpm run dev)。
请一步步执行,确保每个步骤成功后再进行下一步。
`;

runAgent(task);
当你在终端运行 node index.mjs 后,你会看到类似以下的过程:
第 1 轮思考:AI 决定先创建项目。
️ 正在执行工具: execute_commandpnpm create vite react-todo-app --template react-ts 的运行日志。 第 2 轮思考:AI 收到“创建成功”的反馈,决定去修改 src/App.tsx。
️ 正在执行工具: write_file第 3 轮思考:AI 决定安装依赖。
️ 正在执行工具: execute_command (workingDirectory: "react-todo-app")pnpm install 的进度条。第 4 轮思考:依赖装好了,启动服务器!
️ 正在执行工具: execute_commandLocal: 。任务完成:AI 告诉你:“项目已创建并启动,请访问 localhost:5173 查看你的 TodoList。”
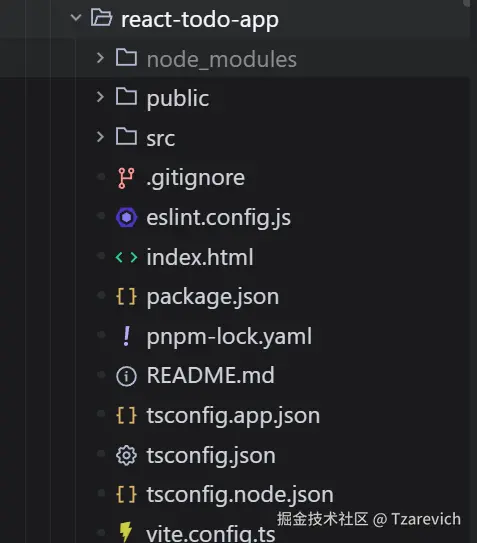
此时,你去文件夹里一看,项目真的存在了! 代码真的写好了!服务器真的跑起来了!
通过这个简单的 Demo,我们揭示了 Cursor 等现代 AI 编程工具的底层原理:
fs 和 child_process 将虚拟的代码转化为现实的文件和进程。接下来你可以做什么?
现在,你不再是 AI 的使用者,你是 AI 能力的构建者。动手试试吧,你的专属“数字员工”就在几十行代码之后!
156.1MB · 2026-03-12
31.0MB · 2026-03-12
117.49M · 2026-03-12

