
以观书法
108.85M · 2026-02-05

Clawdbot(现已更名为 Moltbot)是一个开源的本地 AI 助手,可以通过 T@elegrimm、WhatsApp、Discord 等消息应用与 Claude 模型交互。本文记录了在特殊网络环境下配置 Clawdbot 的完整过程,包括遇到的各种问题和解决方案。
环境信息:
确保 Node.js 版本不低于 22.0.0:
# 使用 nvm 安装
nvm install 22
nvm use 22
nvm alias default 22

# 验证版本
node --version  # 应显示 v22.x.x
npm install -g clawdbot
clawdbot onboard
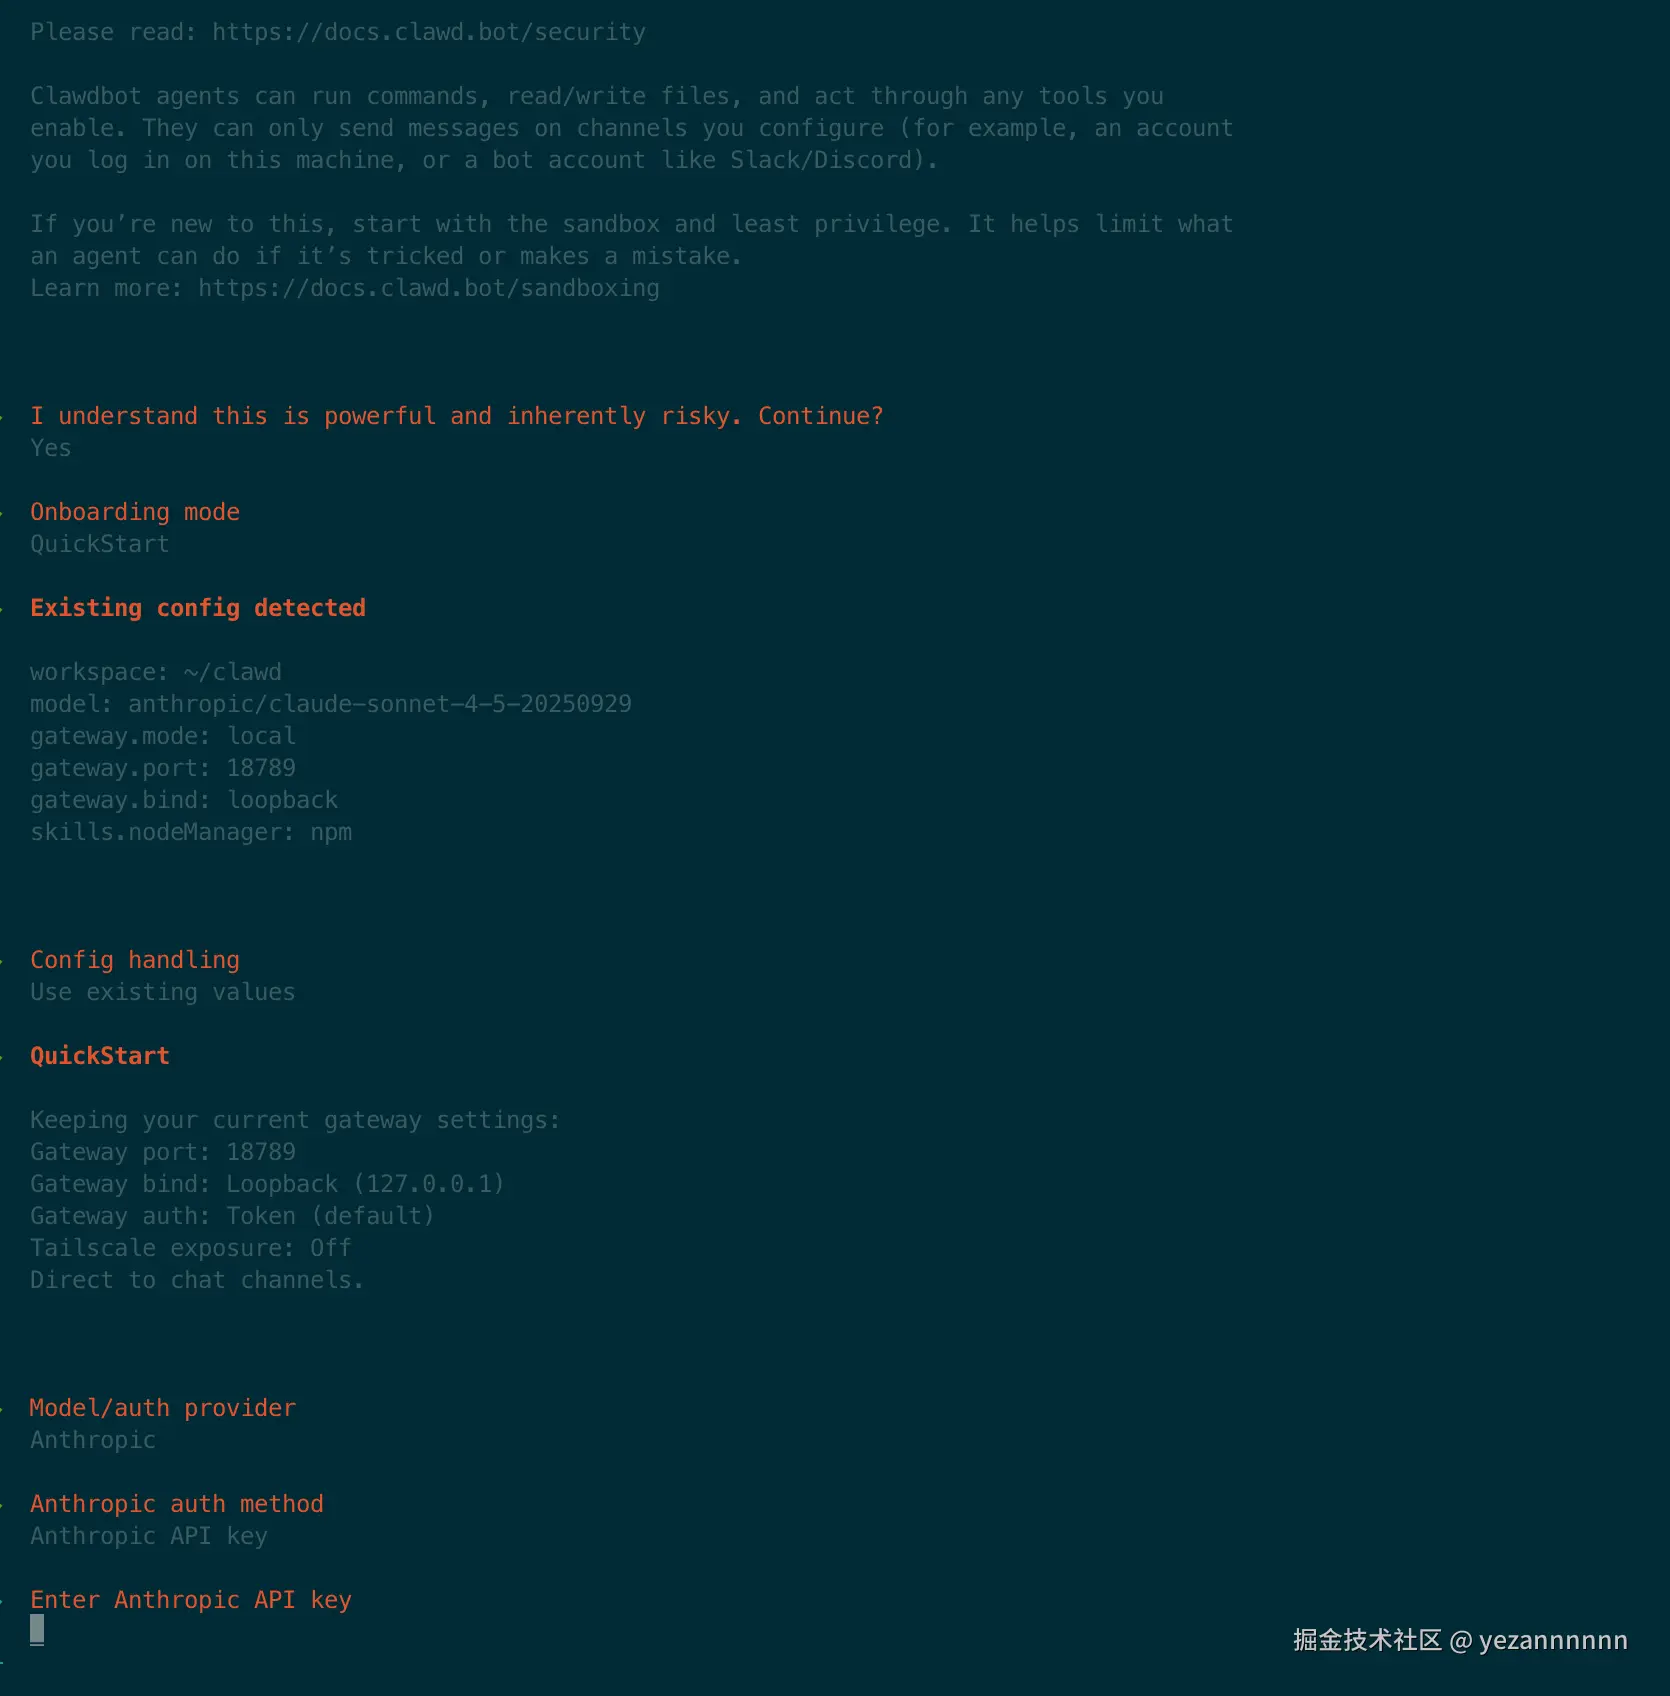
配置向导会引导你完成基本设置:
 Clawdbot 2026.1.24-3
│
◇  安全提示 ───────────────────────────────────────────────────╮
│  Clawdbot 可以运行命令、读写文件,请确保了解相关风险。        │
├──────────────────────────────────────────────────────────────╯
│
◇  我已了解风险,继续?
│  是
│
◇  选择模型/认证提供商
│  Anthropic
│
◇  选择认证方式
│  Anthropic API key
对于需要魔法上网的用户,使用第三方 API 代理服务是最稳定的方案。
~/.clawdbot/
├── clawdbot.json                    # 主配置文件
└── agents/
    └── main/
        └── agent/
            └── auth-profiles.json   # 认证配置文件
文件位置: ~/.clawdbot/clawdbot.json
{
  "models": {
    "providers": {
      "anthropic": {
        "baseUrl": "https://你的代理地址.com",
        "apiKey": "你的API密钥",
        "api": "anthropic-messages",
        "models": []
      }
    }
  },
  "agents": {
    "defaults": {
      "model": {
        "primary": "anthropic/claude-sonnet-4-5-20250929"
      },
      "workspace": "/Users/你的用户名/clawd"
    }
  }
}
| 字段 | 说明 | 必需 |
|---|---|---|
baseUrl | API 代理地址 | |
apiKey | 代理服务的 API 密钥 | |
api | 必须设置为 anthropic-messages | |
models | 必须包含此字段,可以为空数组 [] |
文件位置: ~/.clawdbot/agents/main/agent/auth-profiles.json
{
  "version": 1,
  "profiles": {
    "anthropic:default": {
      "type": "api_key",
      "provider": "anthropic",
      "apiKey": "你的API密钥"
    }
  }
}
配置完成后,用 curl 测试 API 是否可用:
#  这里注意请求的model是自己令牌支持的!
curl -H "x-api-key: 你的API密钥"
  -H "content-type: application/json"
  -H "anthropic-version: 2023-06-01"
  -d '{"model":"claude-sonnet-4-5-20250929","max_tokens":50,"messages":[{"role":"user","content":"你好"}]}'
  https://你的代理地址.com/v1/messages
预期返回类似:
{
  "id": "msg_xxx",
  "type": "message",
  "role": "assistant",
  "content": [{"type": "text", "text": "你好!有什么我可以帮助你的吗?"}]
}
由于 T@elegrimm API 需要魔法访问,这是配置中最复杂的部分。
设置环境变量对 Node.js 22 的网络请求无效:
#  这样做是无效的!
export HTTP_PROXY=
export HTTPS_PROXY=
clawdbot gateway  # T@elegrimm 连接仍会失败
会看到如下错误:
[telegram] telegram setMyCommands failed: HttpError: Network request failed!
[clawdbot] Unhandled promise rejection: TypeError: fetch failed
步骤一:安装 undici
npm install -g undici
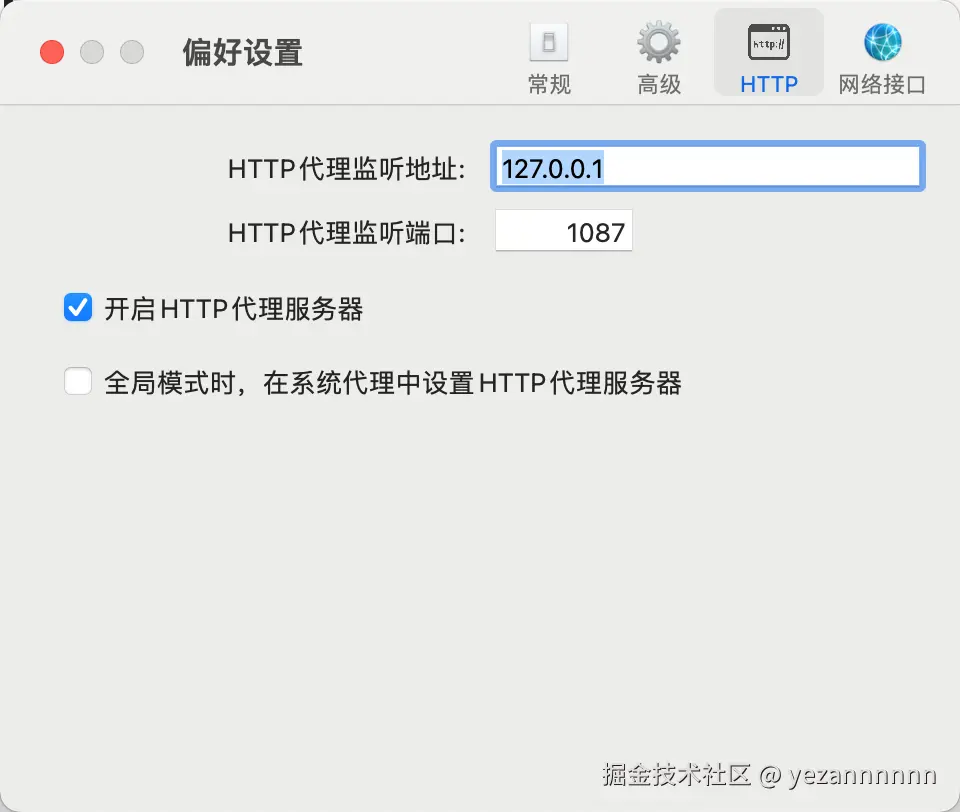
步骤二:创建代理配置脚本
cat > ~/proxy-setup.js << 'EOF'
const { setGlobalDispatcher, ProxyAgent } = require('undici');
setGlobalDispatcher(new ProxyAgent('http://127.0.0.1:1087'));
console.log('[代理] 已设置全局代理: 7');
EOF
步骤三:创建启动脚本
cat > ~/start-clawdbot.sh << 'EOF'
#!/bin/bash
NODE_PATH=$(npm root -g) node --require ~/proxy-setup.js $(which clawdbot) gateway --port 18789
EOF

chmod +x ~/start-clawdbot.sh
步骤四:使用启动脚本运行
~/start-clawdbot.sh
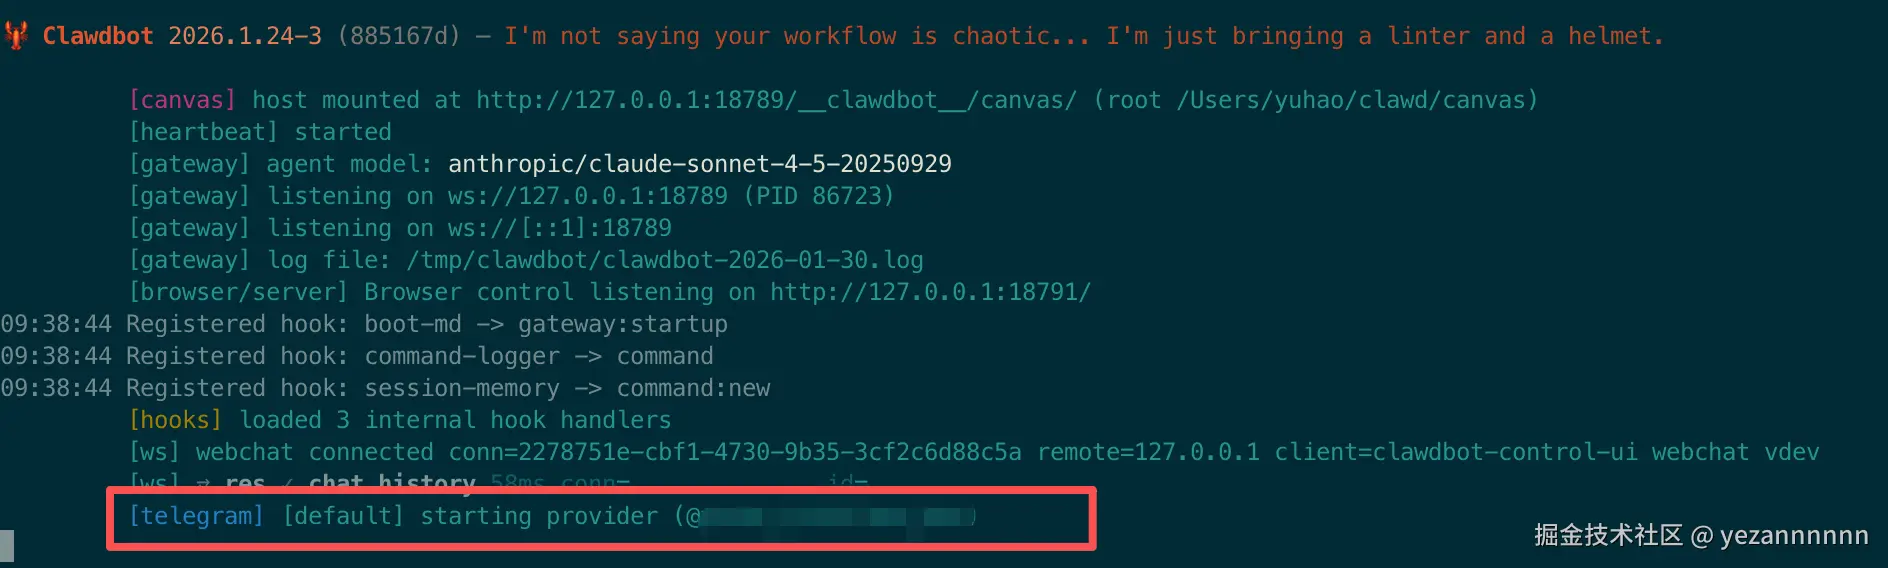
成功启动后会看到:
[代理] 已设置全局代理: http://127.0.0.1:1087
 Clawdbot 2026.1.24-3
[gateway] 正在 ws://127.0.0.1:18789
[telegram] [default] 正在启动...
[telegram] [default] 启动成功 (@你的机器人名)
有这个红框表示telegram也成功连接
测试 T@elegrimm API 连接:
curl -x 你的TOKEN/getMe
如果返回机器人信息,说明代理配置正确。
/newbot123456789:ABCdefGHIjklMNOpqrsTUVwxyz)在 ~/.clawdbot/clawdbot.json 中添加 T@elegrimm 配置:
{
  "channels": {
    "telegram": {
      "enabled": true,
      "dmPolicy": "pairing",
      "botToken": "你的机器人Token",
      "groupPolicy": "allowlist",
      "streamMode": "partial"
    }
  }
}
~/start-clawdbot.sh
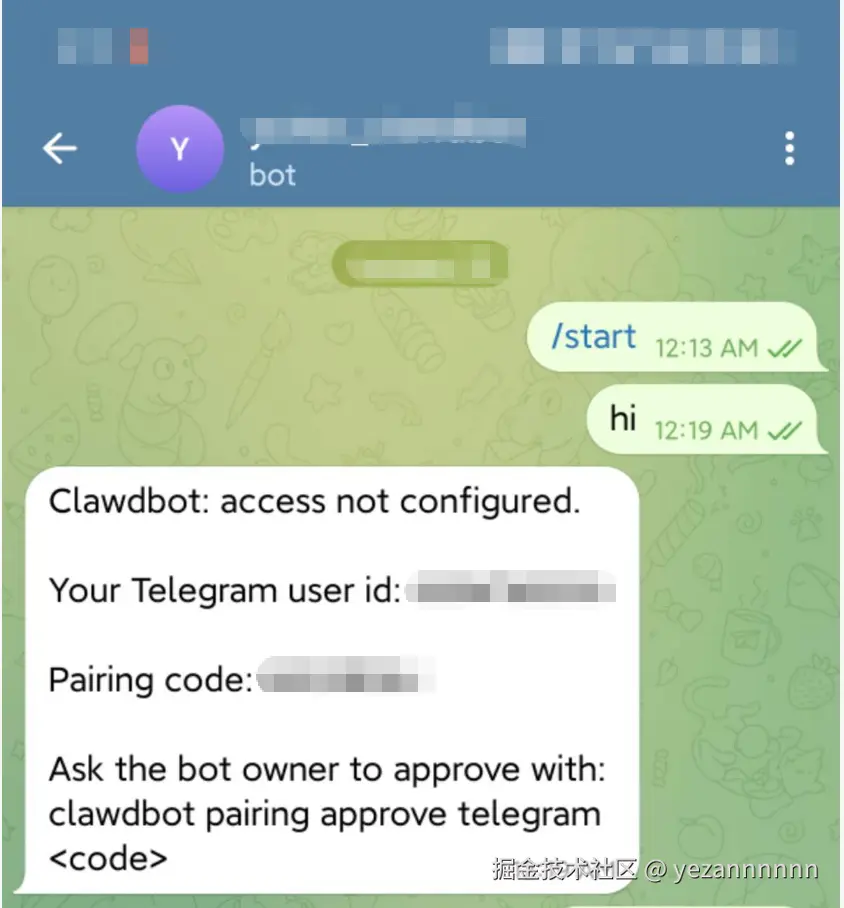
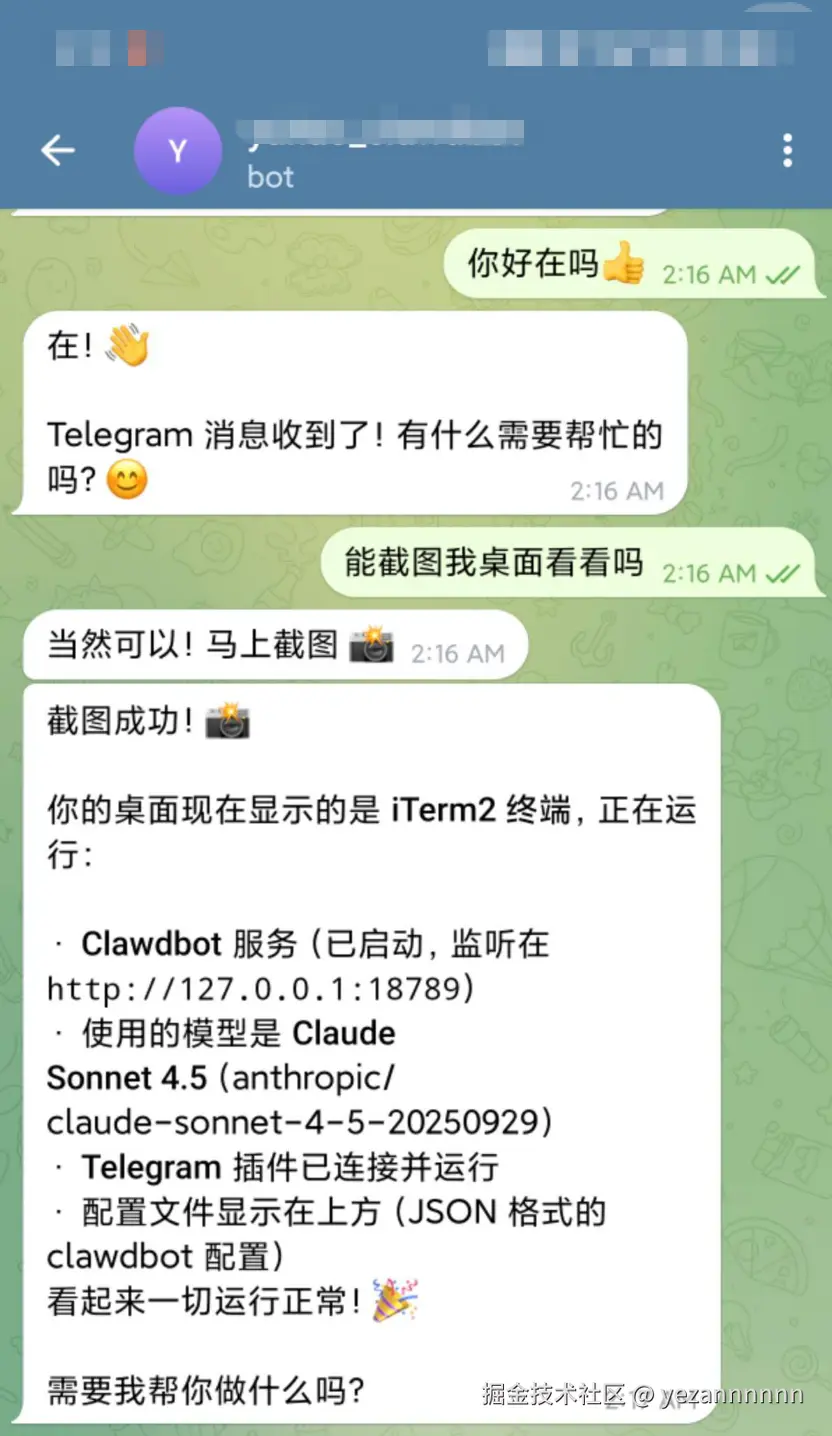
在 T@elegrimm 给你的机器人发送任意消息
机器人会回复配对码:
Clawdbot: 访问未配置

你的 T@elegrimm 用户 ID: 123456789
配对码: ABC12345

请机器人管理员执行以下命令批准:
clawdbot pairing approve telegram ABC12345
clawdbot pairing approve telegram ABC12345
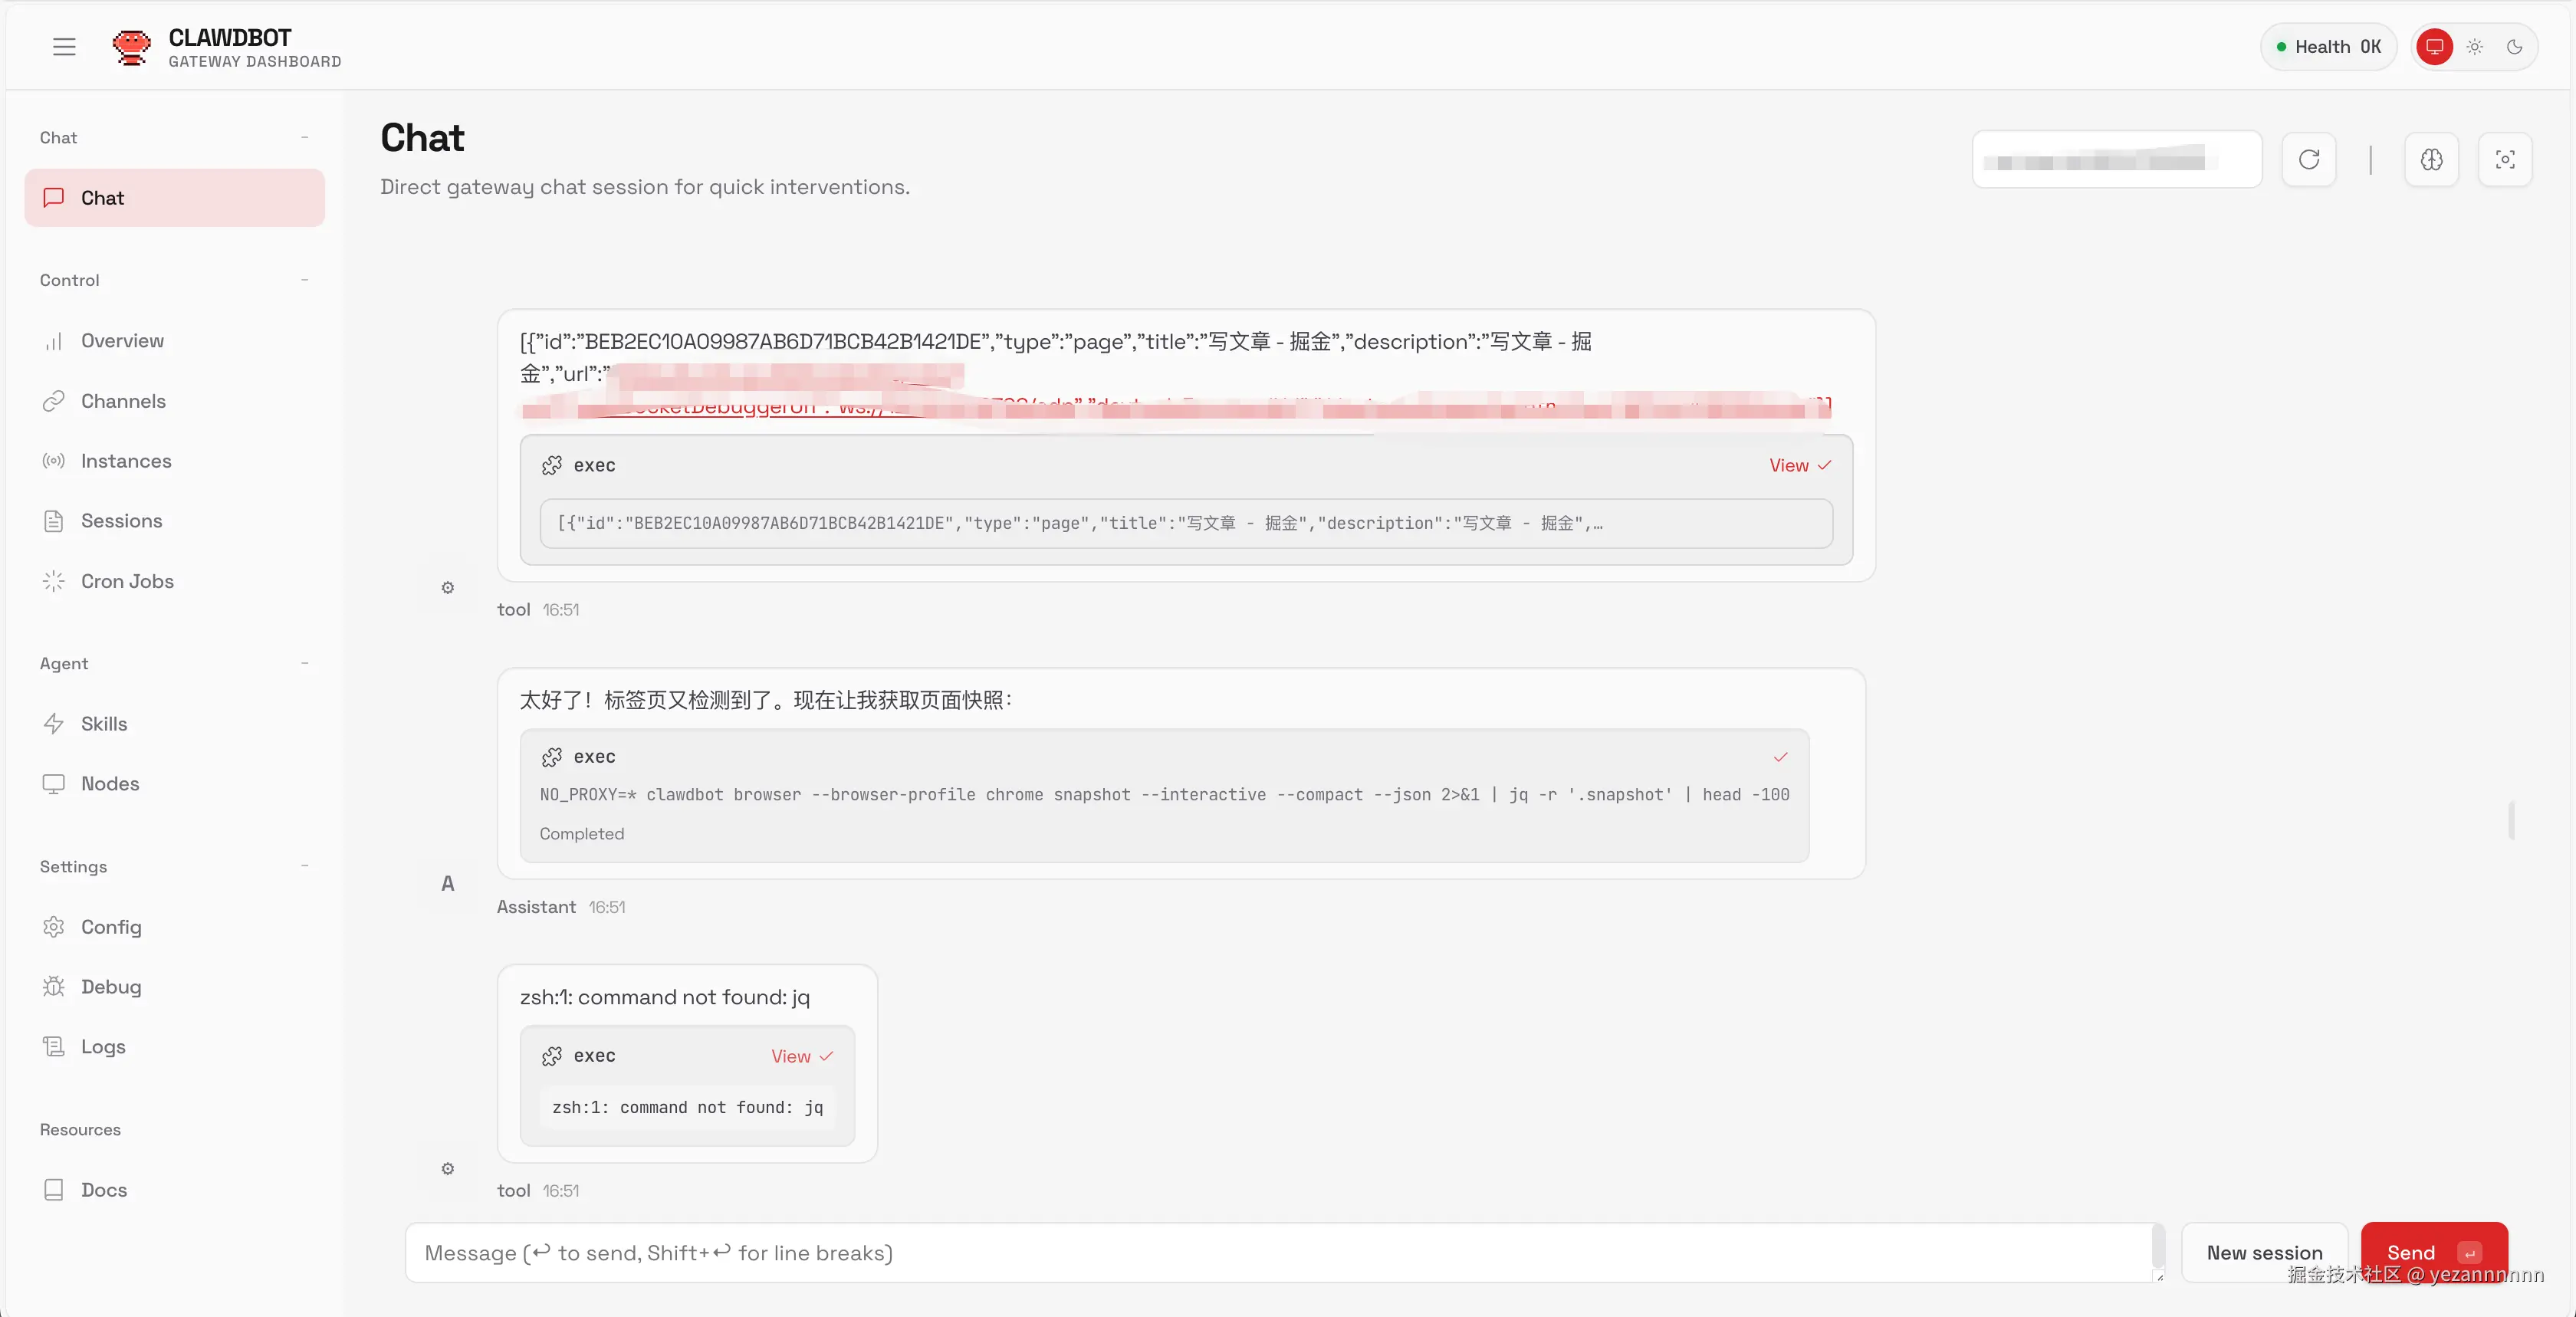
Clawdbot 提供了一个功能丰富的 Web 控制面板。
Gateway 启动后,访问:
?token=你的gateway_token
或者使用命令自动打开:
clawdbot dashboard
笔者让他帮忙编写这篇文档
~/.clawdbot/clawdbot.json{
"meta": {
"lastTouchedVersion": "2026.1.24-3"
},
"models": {
"providers": {
"anthropic": {
"baseUrl": "https://你的代理地址.com",
"apiKey": "你的API密钥",
"api": "anthropic-messages",
"models": []
}
}
},
"agents": {
"defaults": {
"workspace": "/Users/你的用户名/clawd",
"model": {
"primary": "anthropic/claude-sonnet-4-5-20250929"
},
"compaction": {
"mode": "safeguard"
},
"maxConcurrent": 4
}
},
"channels": {
"telegram": {
"enabled": true,
"dmPolicy": "pairing",
"botToken": "你的机器人Token",
"groupPolicy": "allowlist",
"streamMode": "partial"
}
},
"gateway": {
"port": 18789,
"mode": "local",
"bind": "loopback",
"auth": {
"mode": "token",
"token": "你的gateway_token"
}
}
}
~/.clawdbot/agents/main/agent/auth-profiles.json
{
  "version": 1,
  "profiles": {
    "anthropic:default": {
      "type": "api_key",
      "provider": "anthropic",
      "apiKey": "你的API密钥"
    }
  }
}
可能原因:
api: "anthropic-messages" 配置models: [] 字段解决方案: 检查配置文件格式,确保包含所有必需字段。
错误信息:
TypeError: fetch failed
可能原因:
解决方案: 使用 undici 代理方案(见第三节)。
检查步骤:
# 查看状态
clawdbot status

# 查看日志
tail -f /tmp/clawdbot/clawdbot-$(date +%Y-%m-%d).log
可能原因:
解决方案:
curl -x 你的TOKEN/getMe| 命令 | 说明 |
|---|---|
clawdbot status | 查看状态 |
clawdbot status --deep | 查看详细状态 |
clawdbot models status | 查看模型状态 |
clawdbot logs --follow | 实时查看日志 |
clawdbot gateway restart | 重启网关 |
clawdbot configure | 配置向导 |
clawdbot doctor | 诊断问题 |
clawdbot dashboard | 打开控制面板 |
clawdbot pairing approve telegram <码> | 批准配对 |
在特殊网络环境下配置 Clawdbot 的主要挑战:
api 和 models 字段缺一不可,否则会报 403 错误推荐方案:
~/.clawdbot/
├── clawdbot.json                    # 主配置
├── logs/                            # 日志目录
│   ├── gateway.log
│   └── gateway.err.log
└── agents/
    └── main/
        ├── agent/
        │   └── auth-profiles.json   # 认证配置
        └── sessions/                # 会话存储

~/
├── proxy-setup.js                   # 代理配置脚本
└── start-clawdbot.sh               # 启动脚本
yaml
# Clawdbot/Moltbot 配置知识卡片
# 生成时间: 2026-01
# 用途: 供AI模型快速理解本文核心内容

meta:
  project: Clawdbot (已更名 Moltbot)
  repo:
  docs:
  功能: 本地AI助手,支持T@elegrimm/WhatsApp/Discord接入Claude模型

环境要求:
  os: macOS/Linux
  node: ">=22.0.0"
  安装: npm install -g clawdbot
  初始化: clawdbot onboard

配置文件:
  主配置: ~/.clawdbot/clawdbot.json
  认证配置: ~/.clawdbot/agents/main/agent/auth-profiles.json

API代理配置:
  位置: clawdbot.json -> models.providers.anthropic
  必需字段:
    baseUrl: "API代理地址"
    apiKey: "密钥"
    api: "anthropic-messages"  # 关键!缺少报403
    models: []  # 关键!必须存在,可为空数组
  示例: |
    {"models":{"providers":{"anthropic":{
      "baseUrl":"https://proxy.example.com",
      "apiKey":"sk-xxx",
      "api":"anthropic-messages",
      "models":[]
    }}}}

认证配置:
  位置: auth-profiles.json
  格式: |
    {"version":1,"profiles":{"anthropic:default":{
      "type":"api_key","provider":"anthropic","apiKey":"sk-xxx"
    }}}

网络代理问题:
  症状: T@elegrimm连接失败,fetch failed
  原因: Node.js 22 的 fetch 不读取 HTTP_PROXY 环境变量
  错误方式: export HTTP_PROXY=... 无效
  正确方案:
    1_安装: npm install -g undici
    2_创建脚本: |
      # ~/proxy-setup.js
      const {setGlobalDispatcher,ProxyAgent}=require('undici');
      setGlobalDispatcher(new ProxyAgent('http://127.0.0.1:端口'));
    3_启动命令: |
      NODE_PATH=$(npm root -g) node --require ~/proxy-setup.js $(which clawdbot) gateway --port 18789

T@elegrimm配置:
  配置位置: clawdbot.json -> channels.telegram
  必需字段: {enabled:true, botToken:"xxx", dmPolicy:"pairing"}
  配对流程:
    1: 通过@BotFather创建机器人获取token
    2: 配置clawdbot.json
    3: 启动gateway
    4: T@elegrimm发消息给bot
    5: 获取配对码
    6: 执行 clawdbot pairing approve telegram <配对码>

Web控制台:
  地址: >
  命令: clawdbot dashboard

常见错误:
  HTTP_403:
    原因: [缺少api字段, 缺少models字段, apiKey无效]
    解决: 检查配置文件格式
  fetch_failed:
    原因: 代理未生效
    解决: 使用undici方案
  配对码不显示:
    原因: [botToken无效, 代理不稳定]
    解决: curl测试T@elegrimm API

命令速查:
  状态: clawdbot status [--deep]
  日志: clawdbot logs --follow
  重启: clawdbot gateway restart
  诊断: clawdbot doctor
  配对: clawdbot pairing approve telegram <码>
  面板: clawdbot dashboard

文件结构:
  ~/.clawdbot/clawdbot.json: 主配置
  ~/.clawdbot/agents/main/agent/auth-profiles.json: 认证
  ~/proxy-setup.js: 代理脚本
  ~/start-clawdbot.sh: 启动脚本
使用方法: 复制上方 YAML 代码块,直接粘贴给 AI 助手,即可快速获得 Clawdbot 配置相关问题的解答。
本文基于 2026 年 1 月的实际配置经历撰写, 由claude-opus-4.5 + clawdbot整理编写。

