二次元绘画创作
56.21M · 2026-02-04

GroundingDINO发布于2023年,其核心思想是开放集目标检测。
与传统模型(YOLO/SSD等)相比,其革命性在于:直接根据文本描述来检测物体。
工作原理
GroundingDINO 的成功主要归功于其巧妙的架构设计,它本质上是一个双塔编码器-单解码器的结构:
源码:github.com/IDEA-Resear…
论文:arxiv.org/abs/2303.05…
本文主要记录部署过程遇到的一些问题。
我的电脑:
Intel(R) Core(TM) i7
NVIDIA GeForce RTX 4060
Ubuntu 22.04.5 LTS
CUDA v11.8
Python 3.9.18
部署过程主要参考源码GroundingDINO/README.md中给的步骤,然后处理一些遇到的问题。
部署前先下载预训练权重,后面要用
git clone
cd GroundingDINO
如果github无法访问或速度太慢,就用github镜像站
关于各软件包版本的选择,主要依据源码目录中的environment.yaml文件。
安装CUDA 11.8.0:
developer.nvidia.com/cuda-toolki…
安装完成后,修改${HOME}/.bashrc文件,在文件末尾添加:
export CUDA_HOME=/usr/local/cuda
export PATH=$CUDA_HOME/bin:$PATH
export LD_LIBRARY_PATH=$CUDA_HOME/lib64:$LD_LIBRARY_PATH
保存文件,执行
source ${HOME}/.bashrc
使环境变量生效。
这些环境变量的设置,是防止后续安装运行groundingdino时出现报错:
NameError``: name '_C' is not defined
验证一下:
nvcc -V
输出:
nvcc: NVIDIA (R) Cuda compiler driver Copyright (c) 2005-2022 NVIDIA Corporation Built on Wed_Sep_21_10:33:58_PDT_2022 Cuda compilation tools, release 11.8, V11.8.89 Build cuda_11.8.r11.8/compiler.31833905_0
echo $CUDA_HOME
输出:/usr/local/cuda
创建conda虚拟环境,指定python版本,激活虚拟环境,验证。
conda create -n GroundingDINO-py3.9.18 python=3.9.18
conda activate GroundingDINO-py3.9.18
python -V
输出:Python 3.9.18
安装cu118版本torch,torchvision,选择阿里源mirrors.aliyun.com/pytorch-whe…
因为默认安装的numpy版本与torchvision不匹配,所以按照environment.yaml文件中要求的,重新安装一下。
pip install
pip install
pip install numpy==1.26
验证:终端执行python,进入python环境后:
import torch
import torchvision
print(torch.__version__, torch.cuda.is_available(), torchvision.__version__)
输出:
2.0.1+cu118 True 0.15.2+cu118
按照README.md中的安装步骤非常简单,直接cd GroundingDINO目录执行 pip install -e .
但我试了,不行,有两件事要做:
修改requirements.txt文件,这里不改,环境就乱了,所以重要。
  transformers==4.33.2
  addict==2.4.0
  yapf==0.40.1
  timm==0.9.7
  numpy==1.26.4
  opencv-python==4.8.0.76
  supervision>=0.22.0
  pycocotools
2. 因为我们使用的是虚拟环境,所以需要修改执行命令:
pip install -e . --no-build-isolation
稍等一会儿,看到输出:
Successfully built groundingdino
Installing collected packages: groundingdino
  Attempting uninstall: groundingdino
    Found existing installation: groundingdino 0.1.0
    Uninstalling groundingdino-0.1.0:
      Successfully uninstalled groundingdino-0.1.0
Successfully installed groundingdino-0.1.0
安装完成后,需要准备预训练权重,huggingface和github我是访问不了,所以用的魔塔社区modelscope.cn和Github镜像
bert-base-uncased:预训练的BERT语言模型,魔塔下载地址modelscope.cn/models/goog… ,将目录bert-base-uncased放到GroundingDINO目录下。
groundingdino_swint_ogc.pth:GroundingDINO模型的预训练权重,Github镜像,下载后放到GroundingDINO/weights目录下(自行创建)
.
├── Dockerfile
├── LICENSE
├── README.md
├── README_CN.md
├── bert-base-uncased
│   ├── LICENSE
│   ├── README.md
│   ├── config.json
│   ├── configuration.json
│   ├── coreml
│   │   └── fill-mask
│   │       └── float32_ model.mlpackage
│   │           ├── Data
│   │           │   └── com.apple.CoreML
│   │           │       ├── model.mlmodel
│   │           │       └── weights
│   │           │           └── weight.bin
│   │           └── Manifest.json
│   ├── flax _model.msgpack
│   ├── model.onnx
│   ├── model.safetensors
│   ├── pytorch_ model.bin
│   ├── rust _model.ot
│   ├── tf_ model.h5
│   ├── tokenizer.json
│   ├── tokenizer _config.json
│   └── vocab.txt
......
├── environment.yaml
├── groundingdino
    ├──......
......
├── requirements.txt
├── setup.py
├── test.ipynb
└── weights
 └── groundingdino_ swint _ogc.pth
下一步就是执行验证了,用README.md中给的命令,在以下命令中替换{GPU ID}、image_you_want_to_detect.jpg和"dir you want to save the output"为适当的值
CUDA_VISIBLE_DEVICES={GPU ID} python demo/inference_on_a_image.py
-c groundingdino/config/GroundingDINO_SwinT_OGC.py
-p weights/groundingdino_swint_ogc.pth
-i image_you_want_to_detect.jpg
-o "dir you want to save the output"
-t "chair"
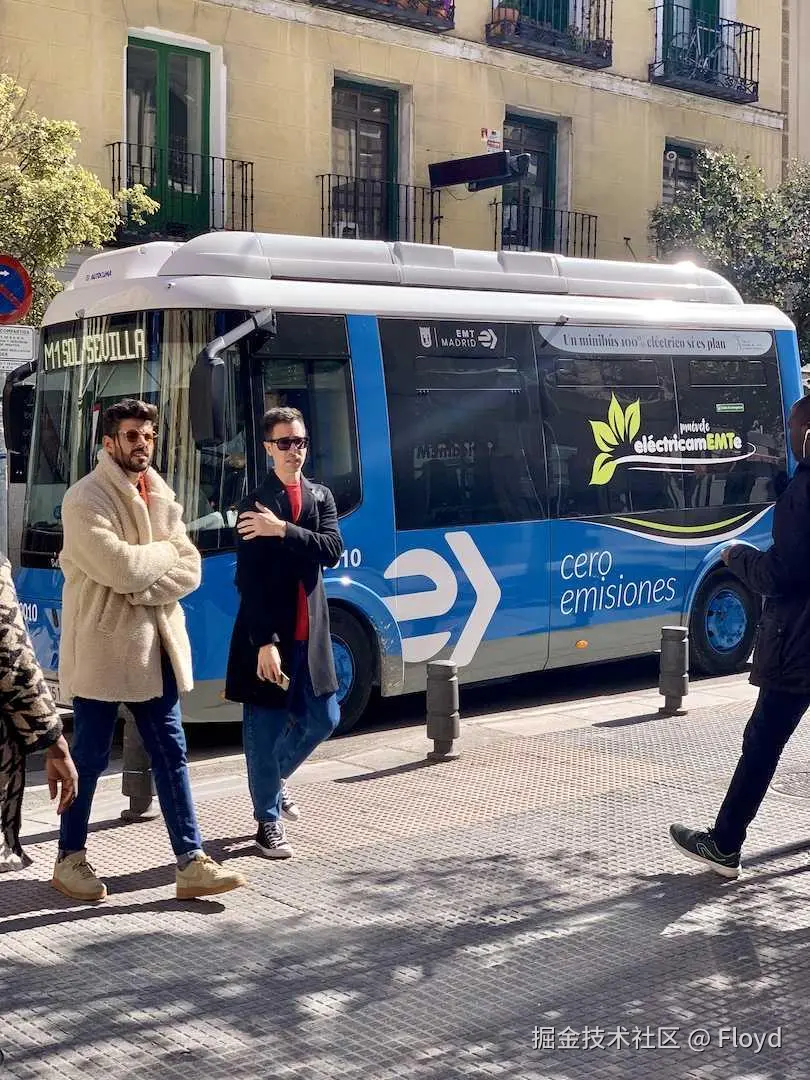
找了个图片,放到image/bus.jpg:
执行:
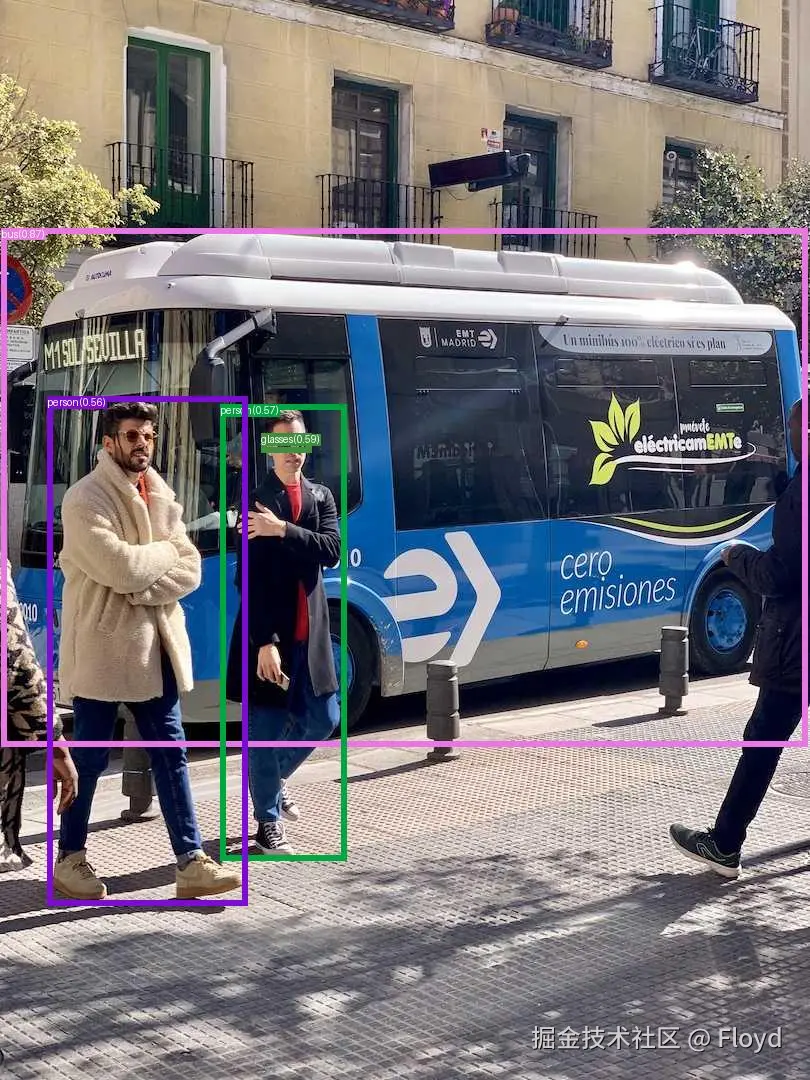
UDA_VISIBLE_DEVICES=0 python demo/inference_on_a_image.py -c groundingdino/config/GroundingDINO_SwinT_OGC.py -p weights/groundingdino_swint_ogc.pth -i image/bus.jpg -o output -t "bus, person, glasses"
output目录输出pred.jpg

