


wifi万能增强器
105.11M · 2026-04-16

编辑界面布局:
图片展示功能:
内容编辑:
话题标签管理:
交互体验:
下面我将为你实现一个仿小红书的笔记修改界面,包含标题编辑、内容编辑、话题标签管理、分类管理等核心功能。
可以基于note-publish.html进行修改,只需要删除”图片上传区域“相关的样式、组件即可,
以下是笔记修改界面note-edit.html的完整实现代码:
<!DOCTYPE html>
<html lang="en" xmlns:th="http://www.thymeleaf.org">
<head>
    <meta charset="UTF-8">
    <meta name="viewport" content="width=device-width, initial-scale=1.0">
    <title>RN - 笔记编辑</title>
    <!-- 引入 Bootstrap CSS -->
    <link href="https://cdn.bootcdn.net/ajax/libs/bootstrap/5.3.6/css/bootstrap.min.css"
          th:href="@{/css/bootstrap.min.css}" rel="stylesheet">

    <!-- 引入 Font Awesome -->
    <link href="https://cdn.bootcdn.net/ajax/libs/font-awesome/4.7.0/css/font-awesome.min.css"
          th:href="@{/css/font-awesome.min.css}" rel="stylesheet">

    <!-- 自定义样式 -->
    <style>
        /* 基础样式 */
        body {
            background-color: #fef6f6;
            font-family: -apple-system, BlinkMacSystemFont, "Segoe UI", Roboto, Helvetica, Arial, sans-serif;
        }

        .container {
            max-width: 768px;
            margin: 0 auto;
            padding: 0 16px;
        }

        /* 顶部导航栏 */
        .header {
            background-color: white;
            border-bottom: 1px solid #eee;
            padding: 12px 0;
            position: sticky;
            top: 0;
            z-index: 100;
        }

        .header .btn {
            padding: 6px 16px;
            border-radius: 20px;
            font-weight: 600;
        }

        .btn-cancel {
            color: #333;
            border: 1px solid #ddd;
        }

        .btn-publish {
            background-color: #ff2442;
            color: white;
            border: none;
        }

        .btn-publish:hover {
            background-color: #e61e3a;
        }

        /* 内容区域 */
        .content {
            padding: 16px 0;
        }

        /* 标题输入框 */
        .note-title {
            border: none;
            width: 100%;
            font-size: 20px;
            font-weight: 600;
            padding: 12px 0;
            outline: none;
        }

        .note-title::placeholder {
            color: #999;
        }

        /* 已上传图片展示 */
        .uploaded-images {
            display: flex;
            flex-wrap: wrap;
            gap: 8px;
            margin-top: 16px;
        }

        .uploaded-image {
            width: 80px;
            height: 80px;
            border-radius: 8px;
            overflow: hidden;
            position: relative;
        }

        .uploaded-image img {
            width: 100%;
            height: 100%;
            object-fit: cover;
        }

        .uploaded-image .delete-btn {
            position: absolute;
            top: 4px;
            right: 4px;
            width: 20px;
            height: 20px;
            background-color: rgba(0, 0, 0, 0.6);
            color: white;
            border-radius: 50%;
            display: flex;
            align-items: center;
            justify-content: center;
            cursor: pointer;
            font-size: 12px;
        }

        /* 笔记内容编辑器 */
        .note-content {
            width: 100%;
            min-height: 200px;
            border: none;
            outline: none;
            font-size: 16px;
            line-height: 1.6;
            padding: 12px 0;
        }

        .note-content::placeholder {
            color: #999;
        }

        /* 话题选择 */
        .topic-input {
            position: relative;
            margin-bottom: 20px;
        }

        .topic-input input {
            width: 100%;
            padding: 12px;
            border: 1px solid #eee;
            border-radius: 8px;
            outline: none;
        }

        /* 分类选择 */
        .category-selector {
            margin-bottom: 20px;
        }

        .category-input i {
            color: #ff2442;
        }

        /* 添加到 style 标签中 */
        .category-selector select {
            width: 100%;
            padding: 12px;
            border: 1px solid #eee;
            border-radius: 8px;
            background-color: white;
            appearance: none;
            -webkit-appearance: none;
            background-image: url("data:image/svg+xml,%3Csvg xmlns='http://www.w3.org/2000/svg' viewBox='0 0 24 24' fill='%23666'%3E%3Cpath d='M7 10l5 5 5-5z'/%3E%3C/svg%3E");
            background-repeat: no-repeat;
            background-position: right 12px center;
            background-size: 16px;
            cursor: pointer;
        }

        .category-selector select:focus {
            outline: none;
            border-color: #ff2442;
            box-shadow: 0 0 0 2px rgba(255, 36, 66, 0.1);
        }

        .btn-view-note {
            background-color: #ff2442;
            color: white;
        }

        .error-message {
            color: #ff2442;
            font-size: 12px;
            margin-top: 4px;
        }
    </style>
</head>
<body>
<!-- 操作栏 -->
<div class="header">
    <div class="container">
        <div class="d-flex justify-content-between align-items-center">
            <button class="btn btn-cancel" id="cancelPublishBtn">
                取消
            </button>
            <button class="btn btn-publish" id="publishNoteBtn">
                保存
            </button>
        </div>
    </div>
</div>

<!-- 主体部分 -->
<div class="container content">
    <form id="noteForm" method="post" th:object="${note}"
          th:action="@{/note/{noteId}(noteId=${note.noteId})}">
        <!-- 标题输入框 -->
        <input type="text" class="note-title" id="title" name="title"
               th:field="*{title}" placeholder="分享你的生活点滴...">
        <div class="error-message" th:if="${#fields.hasErrors('title')}" th:errors="*{title}">
        </div>

        <!-- 已上传图片预览 -->
        <div class="uploaded-images" id="uploadedImages">
            <div class="uploaded-image" th:each="image : ${note.images}">
                <img th:src="${image}" class="preview-img">
            </div>
        </div>
        <!-- 错误消息 -->
        <div class="error-message" th:if="${#fields.hasErrors('images')}" th:errors="*{images}">
        </div>

        <!-- 笔记内容 -->
        <textarea class="note-content" id="content" name="content"
                  th:field="*{content}" placeholder="详细描述你的分享内容..."></textarea>
        <div class="error-message" th:if="${#fields.hasErrors('content')}" th:errors="*{content}">
        </div>

        <!-- 话题 -->
        <div class="topic-input">
            <input type="text" class="form-control" id="topicInput" name="topics"
                   th:field="*{topics}" placeholder="添加话题,多个话题用空格隔开">
        </div>

        <!-- 分类 -->
        <div class="category-selector">
            <label for="categorySelect" class="form-label">请选择一个分类:</label>
            <select class="form-control" id="categorySelect" name="category"
                    th:field="*{category}">
                <option value="穿搭">穿搭</option>
                <option value="美食">美食</option>
                <option value="彩妆">彩妆</option>
                <option value="影视">影视</option>
                <option value="职场">职场</option>
                <option value="情感">情感</option>
                <option value="家居">家居</option>
                <option value="游戏">游戏</option>
                <option value="旅行">旅行</option>
                <option value="健身">健身</option>
            </select>
            <div class="error-message" th:if="${#fields.hasErrors('category')}" th:errors="*{category}">
            </div>
        </div>
    </form>

    <!-- 操作反馈 -->
    <div th:if="${success}" class="alert alert-success mt-4">
        <i class="fa fa-check-circle"></i>
        [[${success}]]
    </div>
    <div th:if="${error}" class="alert alert-danger mt-4">
        <i class="fa fa-exclamation-circle"></i>
        [[${error}]]
    </div>
</div>

<!-- Bootstrap JS -->
<script src="https://cdn.bootcdn.net/ajax/libs/bootstrap/5.3.6/js/bootstrap.bundle.min.js"
        th:src="@{/js/bootstrap.bundle.min.js}"></script>

<script>
    // 笔记发布表单的校验
    // 在发布按钮上设置点击事件
    document.getElementById("publishNoteBtn").addEventListener("click", function (event) {
        // 获取笔记标题
        const title = document.getElementById("title").value;
        if (title.trim() === "") {
            alert("请输入笔记标题");
            return;
        }

        // 获取笔记内容
        const content = document.getElementById("content").value;
        if (content.trim() === "") {
            alert("请输入笔记内容");
            return;
        }

        // 提交表单
        document.getElementById("noteForm").submit();
    })

    // 取消发布的事件处理
    document.getElementById("cancelPublishBtn").addEventListener("click", function (event) {
        // 用户确认是否取消发布
        if (confirm("确定要取消发布吗?所有内容将不会被保存")) {
            window.history.back();
        }
    })
</script>
</body>
</html>
在原有的NoteController基础上,增加方法以实现相关功能。
package com.waylau.rednote.dto;

import jakarta.validation.constraints.NotEmpty;
import jakarta.validation.constraints.NotNull;
import jakarta.validation.constraints.Size;
import lombok.Getter;
import lombok.Setter;

import java.util.ArrayList;
import java.util.List;

/**
 * NoteEditDto 笔记编辑DTO
 *
 * @author <a href="https://waylau.com">Way Lau</a>
 * @version 2025/08/19
 **/
@Getter
@Setter
public class NoteEditDto {
    @NotNull
    private Long noteId;

    @NotEmpty(message = "标题不能为空")
    @Size(max = 60, message = "标题长度不能超过60个字符")
    private String title;

    @NotEmpty(message = "内容不能为空")
    @Size(max = 900, message = "内容长度不能超过900个字符")
    private String content;

    private String topics;

    @NotEmpty(message = "分类不能为空")
    private String category;

    private List<String> images = new ArrayList<>();
}
新增方法如下。
/**
 * 显示笔记编辑页面
 */
@GetMapping("/{noteId}/edit")
public String showEditForm(@PathVariable Long noteId, Model model) {
    // 查询指定noteId的笔记
    Optional<Note> optionalNote = noteService.findNoteById(noteId);

    // 判定笔记是否存在,不存在则抛出异常
    if (!optionalNote.isPresent()) {
        throw new NoteNotFoundException("");
    }

    // 获取当前用户信息
    User user = userService.getCurrentUser();

    Note note = optionalNote.get();

    // 判定笔记是否属于当前用户,不属于则抛出异常
    if (!note.getAuthor().getUserId().equals(user.getUserId())) {
        throw new NoteNotFoundException("");
    }

    // 将Note对象转为NoteEditDto对象
    NoteEditDto noteEditDto = new NoteEditDto();
    noteEditDto.setNoteId(note.getNoteId());
    noteEditDto.setTitle(note.getTitle());
    noteEditDto.setContent(note.getContent());
    noteEditDto.setCategory(note.getCategory());
    noteEditDto.setImages(note.getImages());

    // 话题的List要转为String
    noteEditDto.setTopics(StringUtil.joinToString(note.getTopics(), " "));

    model.addAttribute("note", noteEditDto);

    return "note-edit";
}
当用户使用GET请求访问/note/{noteId}/edit时,则会返回note-edit.html模板页面。
需要注意是的,返回前端的NoteEditDto的topics是字符串类型,因此从Note获取到值之后,需要通过StringUtil.joinToString()工具做转换。
public class StringUtil {
    // ...为节约篇幅,此处省略非核心内容

    // List转字符串
    public static String joinToString(List<String> source, String regex) {
        return String.join(regex, source);
    }
}
新增方法如下。
/**
 * 处理笔记编辑请求
 */
@PostMapping("/{noteId}")
public String updateNote(@PathVariable Long noteId,
                            @Valid @ModelAttribute("note") NoteEditDto noteEditDto,
                            BindingResult result,
                            Model model,
                            RedirectAttributes redirectAttributes) {
    // 验证表单
    if (result.hasErrors()) {
        model.addAttribute("note", noteEditDto);
        return "note-edit";
    }

    // 检查笔记是否存在
    Optional<Note> optionalNote = noteService.findNoteById(noteId);
    if (!optionalNote.isPresent()) {
        throw new NoteNotFoundException("");
    }

    Note note = optionalNote.get();

    try {
        noteService.updateNote(note, noteEditDto);
        redirectAttributes.addFlashAttribute("success", "笔记更新成功");
        return "redirect:/note/" + noteId;
    } catch (Exception e) {
        log.error("笔记更新失败:{}", e.getMessage(), e);

        model.addAttribute("error", "笔记更新失败:" + e.getMessage());
        model.addAttribute("note", noteEditDto);
        return "note-edit";
    }
}
当用户使用POST请求访问/note/{noteId}时,将修改后的笔记数据保存入库。
修改NoteService,增加如下接口:
public interface NoteService {


    /**
     * 更新笔记
     *
     * @param note
     * @param noteEditDto
     */
    void updateNote(Note note, NoteEditDto noteEditDto);
}
``


修改 NoteServiceImpl,实现笔记编辑数据的保存方法:


```java
import com.waylau.rednote.dto.NoteEditDto;

// ...为节约篇幅,此处省略非核心内容

@Service
public class NoteServiceImpl implements NoteService {

    // ...为节约篇幅,此处省略非核心内容

    @Override
    public void updateNote(Note note, NoteEditDto noteEditDto) {
        // 更新基本信息
        note.setTitle(noteEditDto.getTitle());
        note.setContent(noteEditDto.getContent());
        note.setCategory(noteEditDto.getCategory());

        // 字符串转为List
        note.setTopics(StringUtil.splitToList(noteEditDto.getTopics()," "));

        // 保存更新
        noteRepository.save(note);
    }
}
需要注意是的,前端传入的NoteEditDto的topics是字符串类型,在赋值到Note时,需要通过StringUtil.splitToList()工具做转换。
运行应用,试图保存笔记修改后的数据时,报错如下图10-1所示。
执行 noteRepository.save(note) 时候报 java.lang.UnsupportedOperationException:
java.lang.UnsupportedOperationException: null
	at java.base/java.util.AbstractList.remove(AbstractList.java:169) ~[na:na]
	at java.base/java.util.AbstractList$Itr.remove(AbstractList.java:389) ~[na:na]
	at java.base/java.util.AbstractList.removeRange(AbstractList.java:600) ~[na:na]
	at java.base/java.util.AbstractList.clear(AbstractList.java:245) ~[na:na]
	at org.hibernate.type.CollectionType.replaceElements(CollectionType.java:506) ~[hibernate-core-6.6.15.Final.jar:6.6.15.Final]
	at org.hibernate.type.CollectionType.replace(CollectionType.java:719) ~[hibernate-core-6.6.15.Final.jar:6.6.15.Final]
	at org.hibernate.type.TypeHelper.replace(TypeHelper.java:117) ~[hibernate-core-6.6.15.Final.jar:6.6.15.Final]
	at org.hibernate.event.internal.DefaultMergeEventListener.copyValues(DefaultMergeEventListener.java:596) ~[hibernate-core-6.6.15.Final.jar:6.6.15.Final]
	at org.hibernate.event.internal.DefaultMergeEventListener.entityIsPersistent(DefaultMergeEventListener.java:286) ~[hibernate-core-6.6.15.Final.jar:6.6.15.Final]
	at org.hibernate.event.internal.DefaultMergeEventListener.merge(DefaultMergeEventListener.java:220) ~[hibernate-core-6.6.15.Final.jar:6.6.15.Final]
	at org.hibernate.event.internal.DefaultMergeEventListener.doMerge(DefaultMergeEventListener.java:152) ~[hibernate-core-6.6.15.Final.jar:6.6.15.Final]
	at org.hibernate.event.internal.DefaultMergeEventListener.onMerge(DefaultMergeEventListener.java:136) ~[hibernate-core-6.6.15.Final.jar:6.6.15.Final]
	at org.hibernate.event.internal.DefaultMergeEventListener.onMerge(DefaultMergeEventListener.java:89) ~[hibernate-core-6.6.15.Final.jar:6.6.15.Final]
	at org.hibernate.event.service.internal.EventListenerGroupImpl.fireEventOnEachListener(EventListenerGroupImpl.java:127) ~[hibernate-core-6.6.15.Final.jar:6.6.15.Final]
	at org.hibernate.internal.SessionImpl.fireMerge(SessionImpl.java:854) ~[hibernate-core-6.6.15.Final.jar:6.6.15.Final]
	at org.hibernate.internal.SessionImpl.merge(SessionImpl.java:840) ~[hibernate-core-6.6.15.Final.jar:6.6.15.Final]
	at java.base/jdk.internal.reflect.DirectMethodHandleAccessor.invoke(DirectMethodHandleAccessor.java:104) ~[na:na]
	at java.base/java.lang.reflect.Method.invoke(Method.java:565) ~[na:na]
	at org.springframework.orm.jpa.ExtendedEntityManagerCreator$ExtendedEntityManagerInvocationHandler.invoke(ExtendedEntityManagerCreator.java:364) ~[spring-orm-6.2.7.jar:6.2.7]
	at jdk.proxy2/jdk.proxy2.$Proxy120.merge(Unknown Source) ~[na:na]
	at java.base/jdk.internal.reflect.DirectMethodHandleAccessor.invoke(DirectMethodHandleAccessor.java:104) ~[na:na]
	at java.base/java.lang.reflect.Method.invoke(Method.java:565) ~[na:na]
	at org.springframework.orm.jpa.SharedEntityManagerCreator$SharedEntityManagerInvocationHandler.invoke(SharedEntityManagerCreator.java:320) ~[spring-orm-6.2.7.jar:6.2.7]
	at jdk.proxy2/jdk.proxy2.$Proxy120.merge(Unknown Source) ~[na:na]
	at org.springframework.data.jpa.repository.support.SimpleJpaRepository.save(SimpleJpaRepository.java:654) ~[spring-data-jpa-3.5.0.jar:3.5.0]
	at java.base/jdk.internal.reflect.DirectMethodHandleAccessor.invoke(DirectMethodHandleAccessor.java:104) ~[na:na]
	at java.base/java.lang.reflect.Method.invoke(Method.java:565) ~[na:na]
	at org.springframework.aop.support.AopUtils.invokeJoinpointUsingReflection(AopUtils.java:359) ~[spring-aop-6.2.7.jar:6.2.7]
	at org.springframework.data.repository.core.support.RepositoryMethodInvoker$RepositoryFragmentMethodInvoker.lambda$new$0(RepositoryMethodInvoker.java:277) ~[spring-data-commons-3.5.0.jar:3.5.0]
	at org.springframework.data.repository.core.support.RepositoryMethodInvoker.doInvoke(RepositoryMethodInvoker.java:170) ~[spring-data-commons-3.5.0.jar:3.5.0]
	at org.springframework.data.repository.core.support.RepositoryMethodInvoker.invoke(RepositoryMethodInvoker.java:158) ~[spring-data-commons-3.5.0.jar:3.5.0]
	at org.springframework.data.repository.core.support.RepositoryComposition$RepositoryFragments.invoke(RepositoryComposition.java:515) ~[spring-data-commons-3.5.0.jar:3.5.0]
	at org.springframework.data.repository.core.support.RepositoryComposition.invoke(RepositoryComposition.java:284) ~[spring-data-commons-3.5.0.jar:3.5.0]
	at org.springframework.data.repository.core.support.RepositoryFactorySupport$ImplementationMethodExecutionInterceptor.invoke(RepositoryFactorySupport.java:734) ~[spring-data-commons-3.5.0.jar:3.5.0]
	at org.springframework.aop.framework.ReflectiveMethodInvocation.proceed(ReflectiveMethodInvocation.java:184) ~[spring-aop-6.2.7.jar:6.2.7]
	at org.springframework.data.repository.core.support.QueryExecutorMethodInterceptor.doInvoke(QueryExecutorMethodInterceptor.java:174) ~[spring-data-commons-3.5.0.jar:3.5.0]
	at org.springframework.data.repository.core.support.QueryExecutorMethodInterceptor.invoke(QueryExecutorMethodInterceptor.java:149) ~[spring-data-commons-3.5.0.jar:3.5.0]
	at org.springframework.aop.framework.ReflectiveMethodInvocation.proceed(ReflectiveMethodInvocation.java:184) ~[spring-aop-6.2.7.jar:6.2.7]
	at org.springframework.transaction.interceptor.TransactionAspectSupport.invokeWithinTransaction(TransactionAspectSupport.java:380) ~[spring-tx-6.2.7.jar:6.2.7]
	at org.springframework.transaction.interceptor.TransactionInterceptor.invoke(TransactionInterceptor.java:119) ~[spring-tx-6.2.7.jar:6.2.7]
	at org.springframework.aop.framework.ReflectiveMethodInvocation.proceed(ReflectiveMethodInvocation.java:184) ~[spring-aop-6.2.7.jar:6.2.7]
	at org.springframework.dao.support.PersistenceExceptionTranslationInterceptor.invoke(PersistenceExceptionTranslationInterceptor.java:138) ~[spring-tx-6.2.7.jar:6.2.7]
	at org.springframework.aop.framework.ReflectiveMethodInvocation.proceed(ReflectiveMethodInvocation.java:184) ~[spring-aop-6.2.7.jar:6.2.7]
	at org.springframework.data.jpa.repository.support.CrudMethodMetadataPostProcessor$CrudMethodMetadataPopulatingMethodInterceptor.invoke(CrudMethodMetadataPostProcessor.java:165) ~[spring-data-jpa-3.5.0.jar:3.5.0]
	at org.springframework.aop.framework.ReflectiveMethodInvocation.proceed(ReflectiveMethodInvocation.java:184) ~[spring-aop-6.2.7.jar:6.2.7]
	at org.springframework.aop.framework.JdkDynamicAopProxy.invoke(JdkDynamicAopProxy.java:223) ~[spring-aop-6.2.7.jar:6.2.7]
	at jdk.proxy2/jdk.proxy2.$Proxy132.save(Unknown Source) ~[na:na]
	at com.waylau.rednote.service.impl.NoteServiceImpl.updateNote(NoteServiceImpl.java:86) ~[classes/:na]
核心代码位置:
@Override
public void updateNote(Note note, NoteEditDto noteEditDto) {

	// 更新基本信息
	note.setTitle(noteEditDto.getTitle());
	note.setContent(noteEditDto.getContent());
	note.setCategory(noteEditDto.getCategory());

	// 字符串转为List
	note.setTopics(StringUtil.splitToList(noteEditDto.getTopics()," "));

	// 保存更新
	noteRepository.save(note);
}
其中,实体Note的topics是由StringUtil.splitToList()生成的。splitToList实现如下:
public static List<String> splitToList(String source, String regex) {
	if (source.isEmpty()) {
		return Collections.emptyList();
	}

	return  Arrays.asList(source.split(regex));
}
Arrays.asList() 返回的集合是不可变集合,而 Hibernate 在执行持久化操作时需要修改这些集合。
在保存前临时替换集合:
@Override
public void updateNote(Note note, NoteEditDto noteEditDto) {
	// 更新基本信息
	note.setTitle(noteEditDto.getTitle());
	note.setContent(noteEditDto.getContent());
	note.setCategory(noteEditDto.getCategory());

	// 字符串转为List
	// 确保体使用可变集合实现
	// note.setTopics(StringUtil.splitToList(noteEditDto.getTopics()," "));
	note.setTopics(new ArrayList<>(StringUtil.splitToList(noteEditDto.getTopics()," ")));
	// 保存更新
	noteRepository.save(note);
}
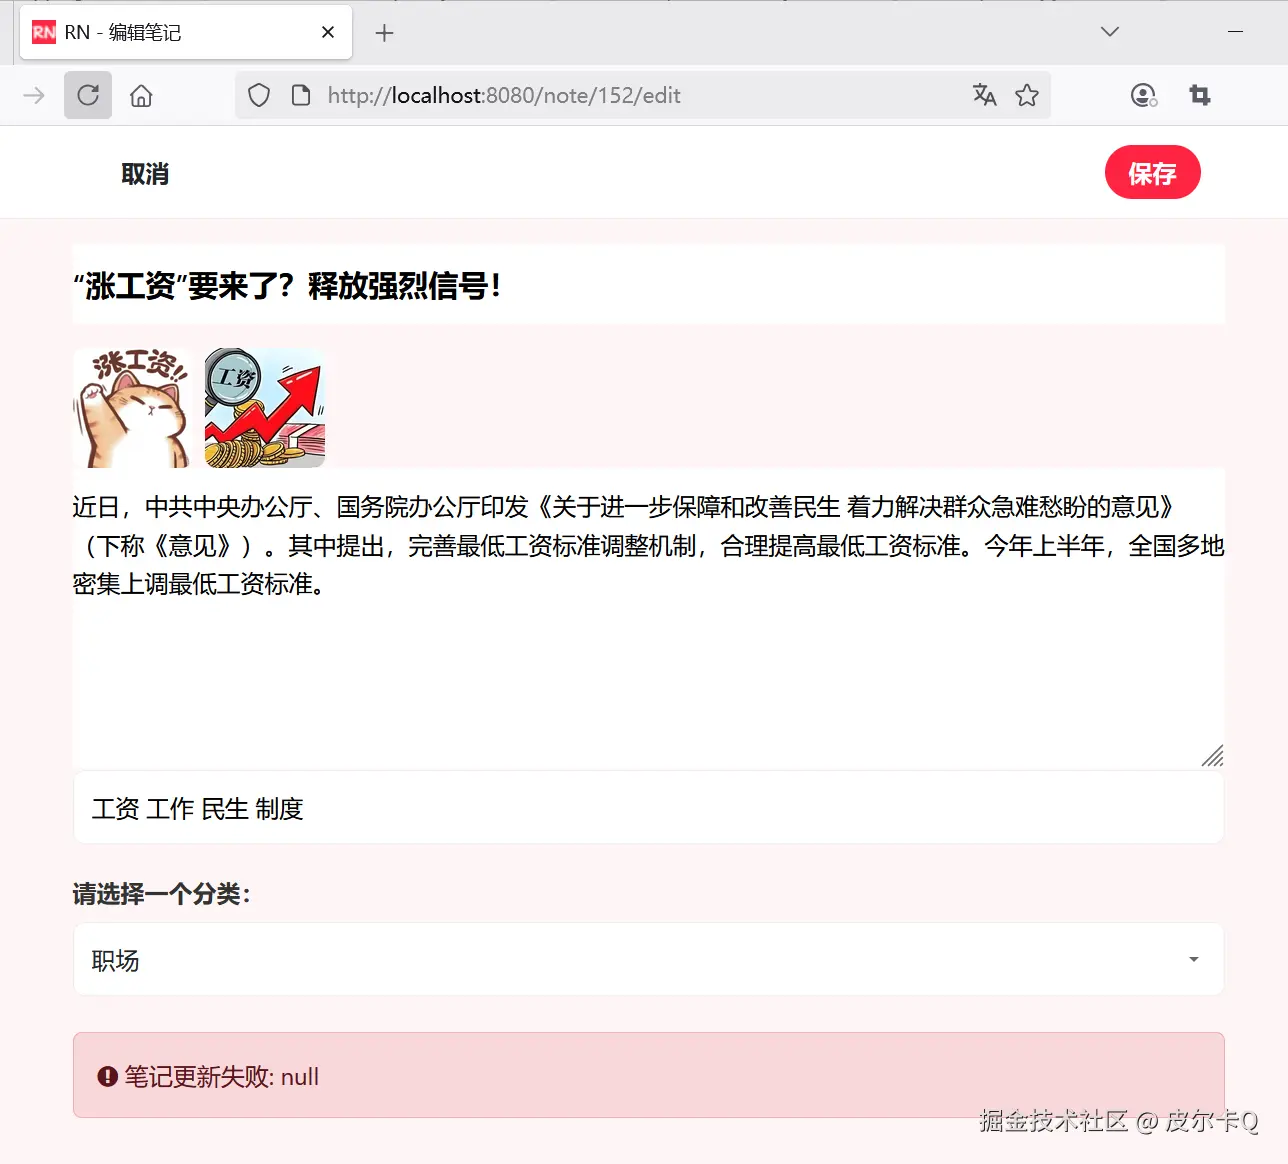
下图10-2所示的是笔记编辑页面。
下图10-3所示的是笔记编辑成功后的页面。
UnsupportedOperationException 通常表示你正在尝试修改一个不可变集合。确保你的实体使用可变集合实现(如 ArrayList),并在DTO到实体转换过程中创建新的可变集合实例。
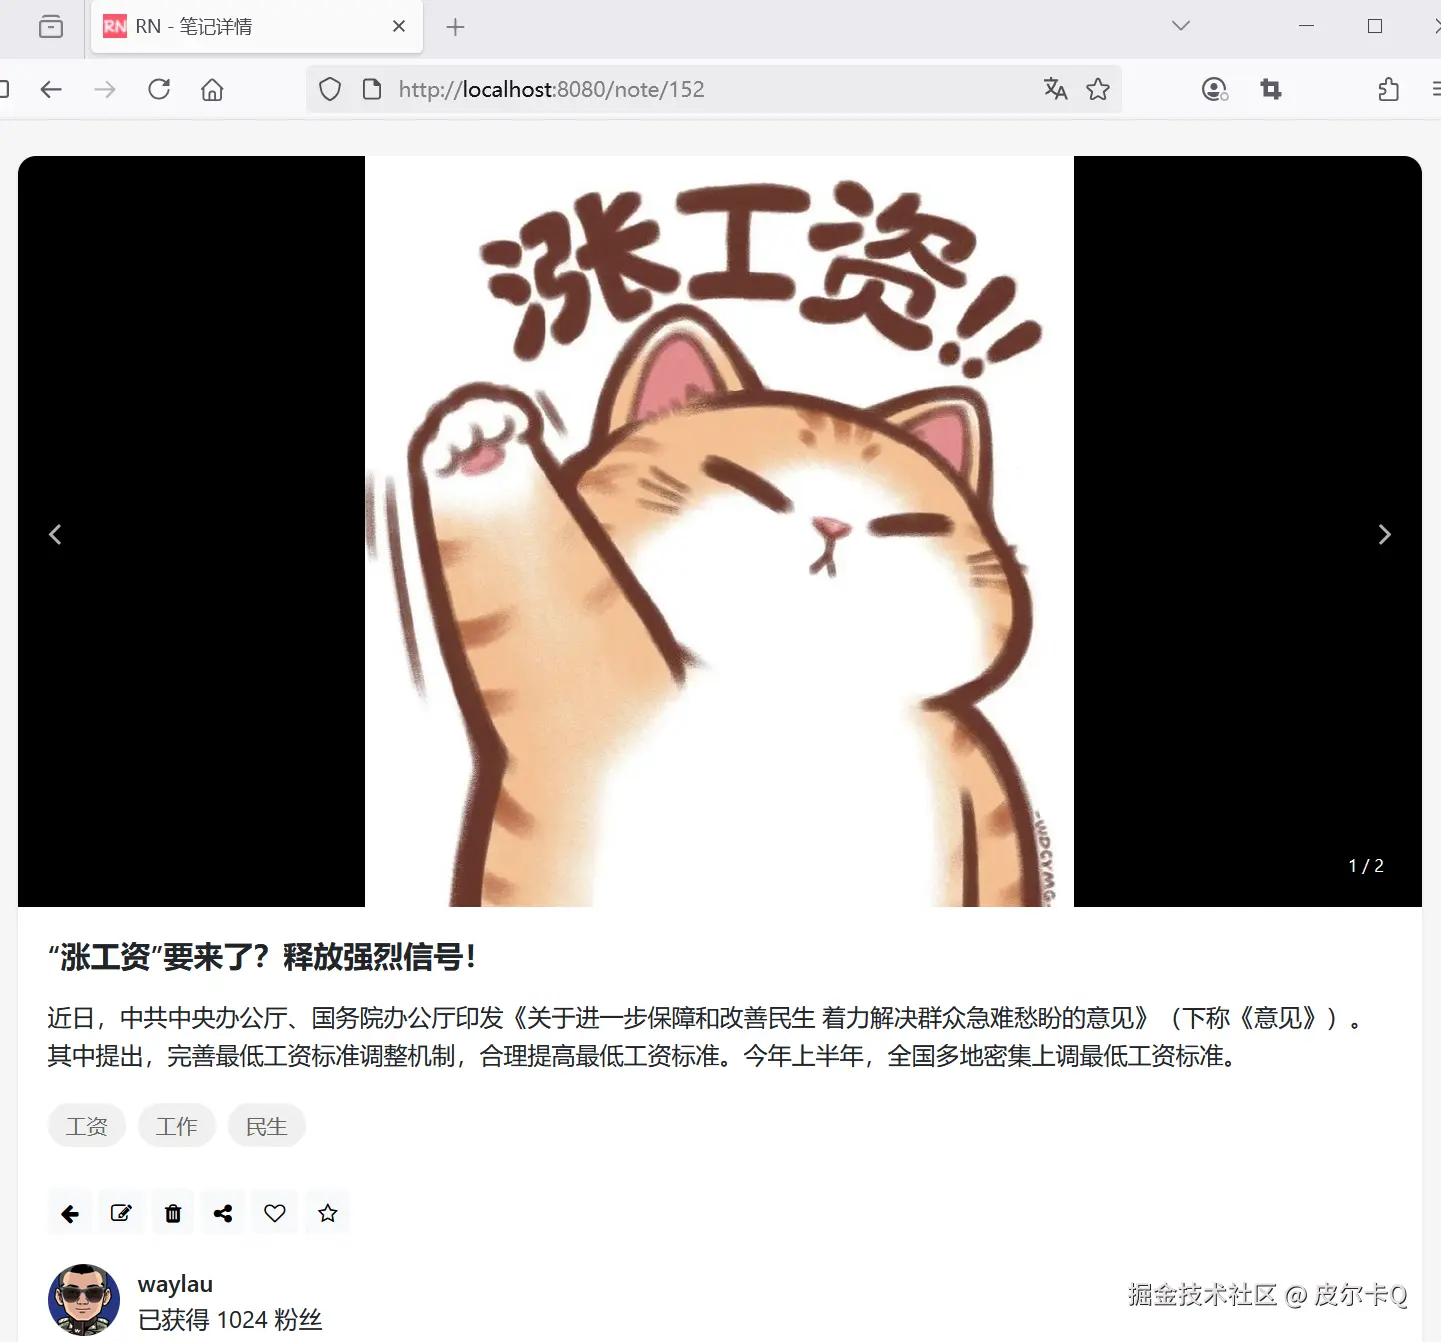
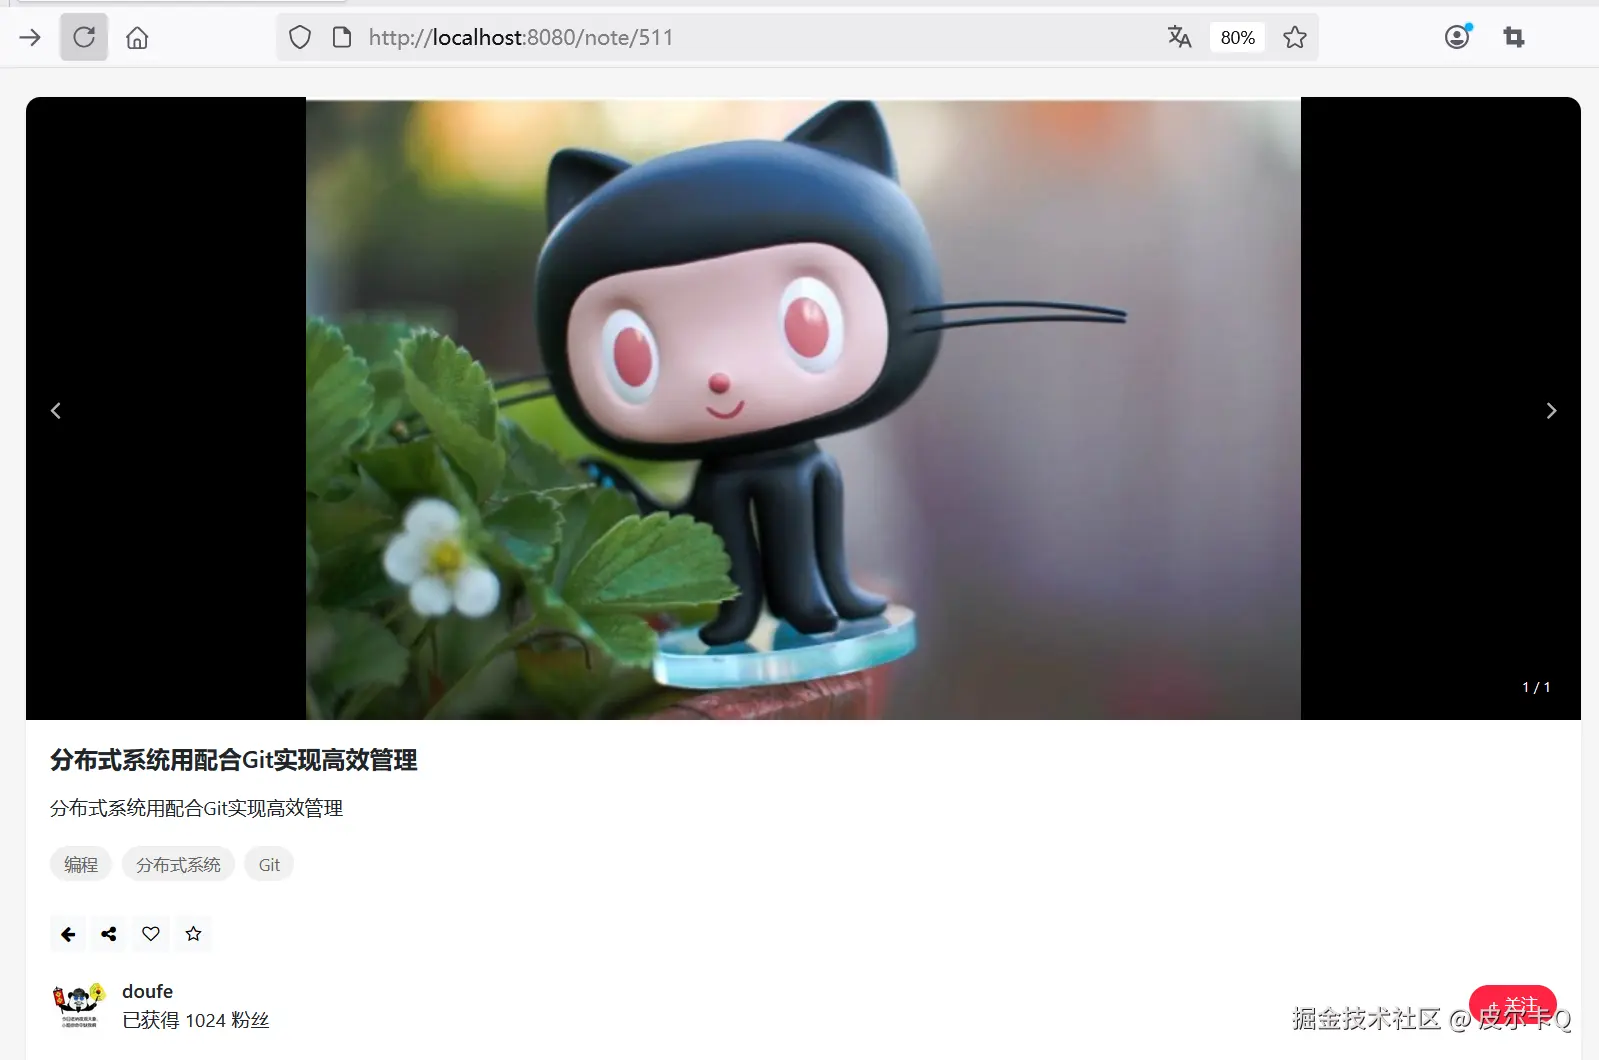
在笔记详情页面操作栏上已经预留了编辑、删除笔记的按钮。如下图10-4所示。
接下来实现从编辑、删除笔记的按钮执行触发编辑、删除笔记的请求。
修改编辑的按钮事件,在<button>外层再套一个<a>即可:
<!-- 编辑 -->
<a th:href="@{/note/{noteId}/edit(noteId=${note.noteId})}">
    <button class="btn btn-light btn-sm" th:if="${#authentication.name == note.author.username}">
        <i class="fa fa-edit"></i>
    </button>
</a>
修改删除的按钮事件,在<button>设置id属性和onclick事件处理:
<!-- 删除 -->
<button class="btn btn-light btn-sm" th:if="${#authentication.name == note.author.username}"
    th:onclick="deleteNote([[${note.noteId}]])">
    <i class="fa fa-trash"></i>
</button>
deleteNote()函数定义如下:
// 处理笔记删除
function deleteNote(noteId) {
    if (confirm("确定要删除此笔记吗?")) {
        fetch(`/note/${noteId}`, {
            method: 'DELETE'
        })
        .then(response => {
            if (response.ok) {
                response.json().then(data => {
                    // 从响应中获取提示信息
                    alert(data.message || '删除成功');

                    // 从响应中获取重定向URL
                    window.location.href = data.redirectUrl;
                });
            } else  {
                response.json().then(data => {
                    alert(data.message || '删除失败,请重试');
                });
            }
        })
        .catch(error => {
            console.error('删除失败:', error);
            alert('删除失败,请稍后重试');
        })
    }
}
通过fetch()来发送DELETE请求。fetch 是一个现代化的 JavaScript API,用于发送网络请求并获取资源。它是浏览器提供的全局方法,可以替代传统的 XMLHttpRequest。fetch 支持 Promise,因此更易用且代码更清晰。
@DeleteMapping针对DELETE请求的特殊处理在原有的NoteController基础上,增加方法以实现相关功能。
/**
 * 处理删除笔记的请求
 */
@DeleteMapping("/{noteId}")
public ResponseEntity<DeleteResponseDto> deleteNote(@PathVariable Long noteId) {
    // 检查笔记是否存在
    Optional<Note> optionalNote = noteService.findNoteById(noteId);
    if (!optionalNote.isPresent()) {
        throw new NoteNotFoundException("");
    }

    Note note = optionalNote.get();

    // 获取当前用户信息
    User user = userService.getCurrentUser();

    // 判定笔记是否属于当前用户,不属于则抛出异常
    if (!note.getAuthor().getUserId().equals(user.getUserId())) {
        throw new NoteNotFoundException("");
    }

    // 使用服务删除笔记
    noteService.deleteNote(note);

    // 返回响应的内容
    DeleteResponseDto deleteResponseDto = new DeleteResponseDto();
    deleteResponseDto.setMessage("笔记删除成功");
    deleteResponseDto.setRedirectUrl("/user/profile");

    return ResponseEntity.ok(deleteResponseDto);
}
注:在 Spring MVC 中使用 @DeleteMapping 处理删除请求后,但不能使用RedirectAttributes进行重定向。这是因为:HTTP 规范中,DELETE 请求不应该有重定向响应。浏览器在处理 DELETE 请求的重定向时可能会遇到各种问题,如安全限制、缓存问题或行为不一致。因此,使用ResponseEntity作为响应体。
ResponseEntity作为响应体所包裹的对象是DeleteResponseDto,代码如下:
package com.waylau.rednote.dto;

import lombok.Getter;
import lombok.Setter;

/**
 * DeleteResponseDto 执行删除的响应对象
 *
 * @author <a href="https://waylau.com">Way Lau</a>
 * @version 2025/06/12
 **/
@Getter
@Setter
public class DeleteResponseDto {
    /**
     * 信息
     */
    private String message;

    /**
     * 重定向URL
     */
    private String redirectUrl;
}
上述对象可以用于任意DELETE请求的场景。
修改NoteRepository增加方法如下:
/**
* 删除笔记
*
* @param note
*/
void delete(Note note);
修改NoteService,增加如下接口:
public interface NoteService {


    /**
     * 删除笔记
     *
     * @param note
     */
    void deleteNote(Note note);
}
``


修改NoteServiceImpl,实现笔记删除的方法:


```java
@Override
@Transactional
public void deleteNote(Note note) {
    // 注意:先删除数据库数据再删图片文件。以防止删除文件异常时,方便回滚数据库数据

    // 先删除数据库数据
    noteRepository.delete(note);

    // 再删图片文件
    List<String> images = note.getImages();
    for (String image : images) {
        fileStorageService.deleteFile(image);
    }
}
需要注意是的,上述方法既有删除文件的,又有删除数据库数据的。因此,需要加@Transactional进行事务管理,同时,先删库再删文件。这样,以在删除文件异常时,方便回滚数据库。
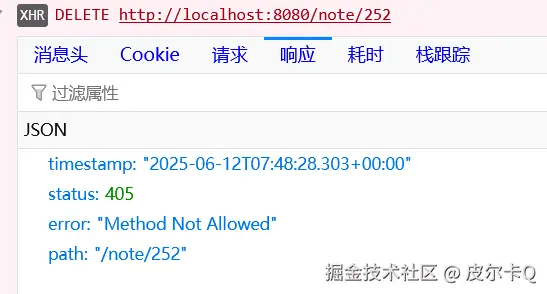
运行应用,试图删除笔记时,报错如下图10-5所示。
同时在控制台日志里面看大如下信息:
2025-06-12T14:34:19.883+08:00 WARN 21324 --- [rednote] [io-8080-exec-10] .w.s.m.s.DefaultHandlerExceptionResolver : Resolved [org.springframework.web.HttpRequestMethodNotSupportedException: Request method 'DELETE' is not supported]
系统已经启用了CSRF保护,在WebSecurityConfig配置如下:
// 启用 CSRF 防护
.csrf(Customizer.withDefaults())
因此,使用JavaScript fetch API所发送的 DELETE 方法需要有效的 CSRF 令牌,否则会报错。
首先,确保在你的 HTML 模板中有一个 meta 标签来存储 CSRF 令牌。Spring Security 默认会提供一个名为 _csrf 的令牌,你可以通过 Thymeleaf 将其插入到 meta 标签中。
修改user-profile.html,增加如下内容:
<!-- 确保有一个meta标签来存储CSRF令牌 -->
<meta name="_csrf" th:content="${_csrf.token}"></meta>
接着,在JavaScript fetch API所发送的 DELETE 方法头信息里面设置 CSRF 令牌:
// 笔记删除
function deleteNote(noteId) {
    if (confirm("确定要删除此笔记吗?")) {
        fetch(`/note/${noteId}`, {
            method: 'DELETE',
            // 添加请求头, 用于Spring Security CSRF
            headers: {
                'X-CSRF-TOKEN': document.querySelector('meta[name="_csrf"]').getAttribute('content')
            }
        })
    // ...为节约篇幅,此处省略非核心内容
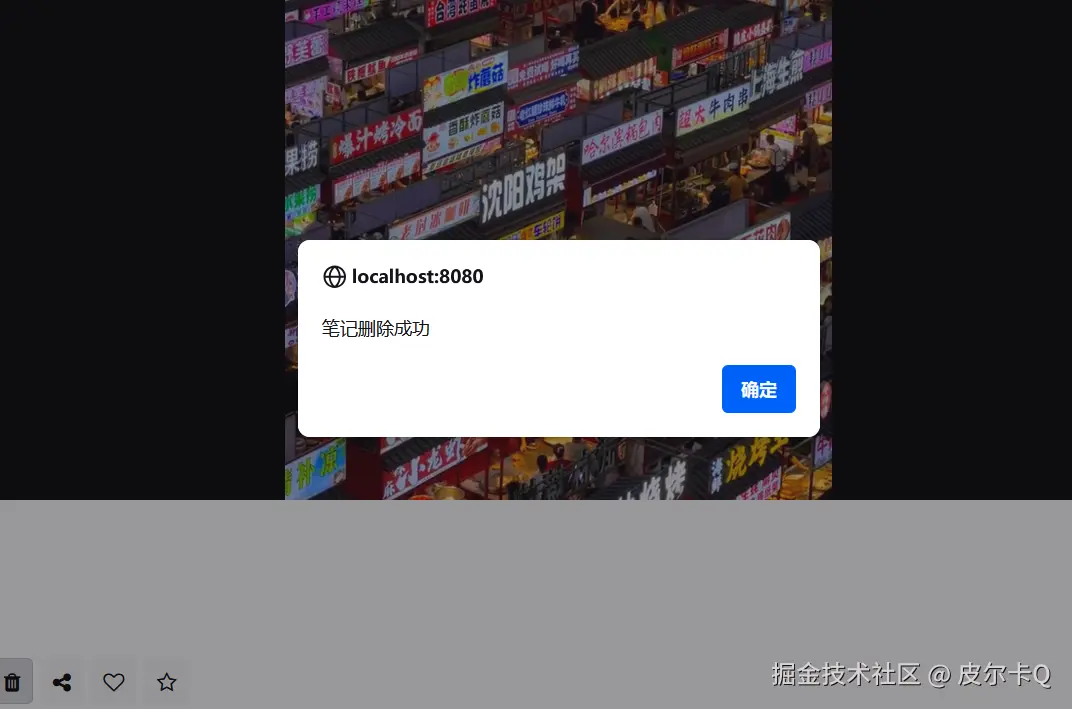
运行应用,删除笔记时,可以看到如下图10-6所示的提示框,说明笔记已经能够成功删除了。
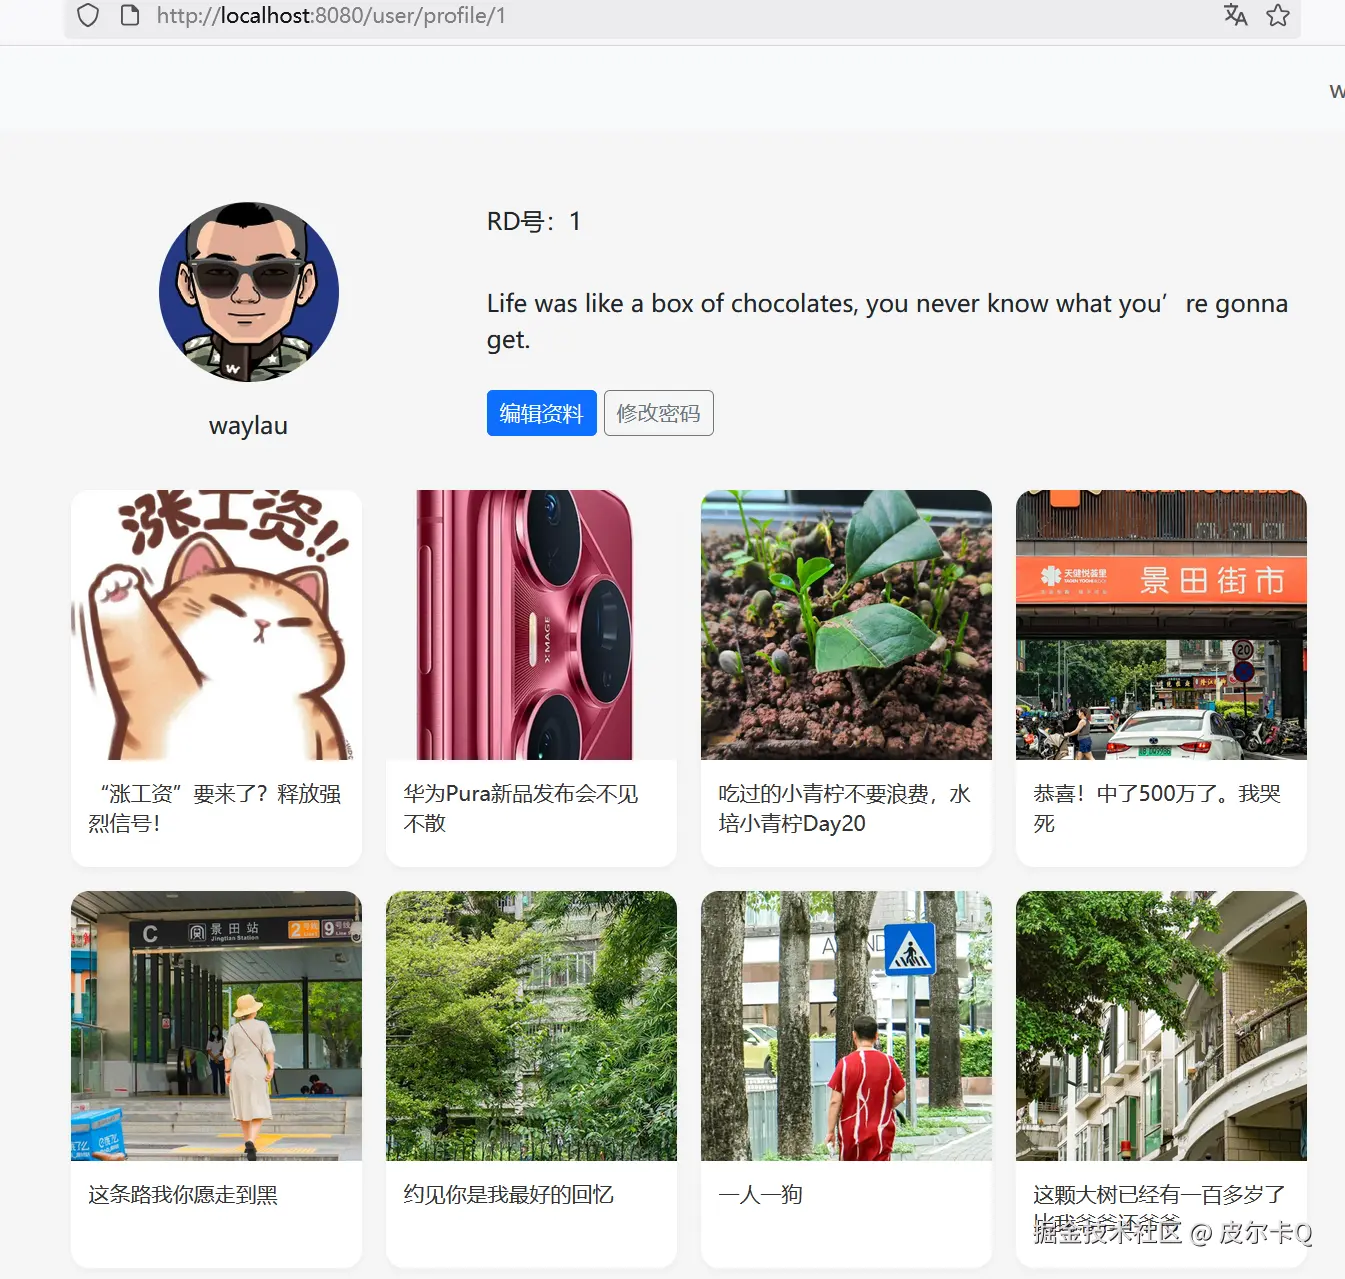
点击提示框“确认”按钮,可以重定向到了用户信息管理界面,如下图10-7所示。
在前面课程中介绍了,在对笔记进行编辑、删除的时候,是加了代码判断,确保只有笔记的作者才能修改、删除笔记的按钮。代码如下:
// 获取当前用户信息
User user = userService.getCurrentUser();

Note note = optionalNote.get();

// 判定笔记是否属于当前用户,不属于则抛出异常
if (!note.getAuthor().getUserId().equals(user.getUserId())) {
    throw new NoteNotFoundException("");
}

// 执行后续业务
但这种编程方式固然可行,但略微繁琐。本节介绍一种通过声明式的方式来实现细粒度的访问控制。
@PreAuthorize 深入解析@PreAuthorize 是 Spring Security 提供的一个强大注解,用于在方法调用前进行权限检查。它允许你基于表达式语言(SpEL)定义细粒度的访问控制规则,是实现方法级安全的核心工具之一。
@PreAuthorize 是一个方法级别的安全注解,用于在方法执行前验证当前用户是否具有执行该方法的权限。如果验证失败,Spring Security 会抛出 AccessDeniedException。
@PreAuthorize("expression")
public void someMethod() {
    // 方法实现
}
基于角色的访问控制
@PreAuthorize("hasRole('ADMIN')")
public void adminOnlyMethod() {
    // 只有ADMIN角色可以访问
}
基于权限的访问控制
@PreAuthorize("hasAuthority('READ_PRIVILEGE')")
public void readData() {
    // 只有拥有READ_PRIVILEGE权限的用户可以访问
}
组合多个条件
@PreAuthorize("hasRole('USER') and hasAuthority('WRITE_PRIVILEGE')")
public void writeData() {
    // 用户必须同时具有USER角色和WRITE_PRIVILEGE权限
}
使用方法参数
@PreAuthorize("#id == authentication.principal.id")
public void deleteUser(@PathVariable Long id) {
    // 只有用户可以删除自己的账户
}
自定义权限检查
@PreAuthorize("@customSecurityService.checkPermission(authentication, #resourceId, 'DELETE')")
public void deleteResource(@PathVariable Long resourceId) {
    // 调用自定义服务检查权限
}
在NoteService中增加接口:
/**
  * 验证用户是否为笔记作者
  *
  * @param noteId
  * @param username
  * @return
  */
boolean isAuthor(Long noteId, String username);
在NoteServiceImpl中增加方法:
@Override
public boolean isAuthor(Long noteId, String username) {
    Optional<Note> optionalNote = noteRepository.findByNoteId(noteId);
    if (!optionalNote.isPresent()) {
        throw new NoteNotFoundException("");
    }

    return username.equals(optionalNote.get().getAuthor().getUsername());
}
修改NoteController,在需要方法级别控制的方法上面加@PreAuthorize注解:
@GetMapping("/{noteId}/edit")
@PreAuthorize("@noteServiceImpl.isAuthor(#noteId, authentication.name)")
public String showEditForm(@PathVariable Long noteId, Model model) {
    // ...为节约篇幅,此处省略非核心内容
}
@PostMapping("/{noteId}")
@PreAuthorize("@noteServiceImpl.isAuthor(#noteId, authentication.name)")
public String updateNote(@PathVariable Long noteId,
                             @Valid @ModelAttribute("note") NoteEditDto noteEditDto,
                             BindingResult result,
                             Model model,
                             RedirectAttributes redirectAttributes) {
    // ...为节约篇幅,此处省略非核心内容
}
@DeleteMapping("/{noteId}")
@PreAuthorize("@noteServiceImpl.isAuthor(#noteId, authentication.name)")
public ResponseEntity<DeleteResponseDto> deleteNote(@PathVariable Long noteId) {
    // ...为节约篇幅,此处省略非核心内容
}
上述@noteServiceImpl中的noteServiceImpl是指NoteServiceImpl在Spring中的Bean的名称。
要使用 @PreAuthorize,需要在配置类上启用方法级安全:
import org.springframework.security.config.annotation.method.configuration.EnableMethodSecurity;

@Configuration
@EnableWebSecurity
// 启用@PreAuthorize等注解
// 等同于老版本的@EnableGlobalMethodSecurity(prePostEnabled = true)
@EnableMethodSecurity
public class WebSecurityConfig {
    // ...为节约篇幅,此处省略非核心内容
}
Spring Security 的@EnableMethodSecurity注解用于开启方法级安全授权(Method Security),替代了旧版本中的@EnableGlobalMethodSecurity。以下是关键信息:
核心功能
与@EnableGlobalMethodSecurity的区别
@EnableMethodSecurity是Spring Security 5.6版本引入的替代方案,而@EnableGlobalMethodSecurity在5.6之前使用。 @EnableMethodSecurity支持更细粒度的配置(如JSR-250、Spring EL表达式等),而@EnableGlobalMethodSecurity仅提供三种预定义机制(prePostEnabled、securedEnabled、jsr250Enabled)。 @PreAuthorize 提供了强大的方法级安全控制能力,通过 SpEL 表达式可以实现非常灵活的权限控制逻辑。它的主要优势包括:
合理使用 @PreAuthorize 可以显著提高应用程序的安全性,同时保持代码的清晰和可维护性。
永远不要信任前端验证:
使用 HTTPS:
会话管理:
日志记录:
CSRF 防护:
参数验证:
@Valid 注解验证请求参数最小权限原则:
性能考虑:
图片编辑功能:
富文本编辑:
标签推荐:
草稿保存:
发布设置:
多级权限控制:
软删除:
操作审计:
@CreatedBy 和 @LastModifiedBy并发控制:
@Version 注解)防止并发修改冲突通过以上实现,可以确保只有笔记的作者才能修改或删除自己的笔记,同时提供良好的用户体验和安全防护。
实现一个仿小红书的首页功能,包含笔记流展示、搜索、分类导航、推荐内容等核心功能。
界面布局:
笔记卡片设计:
交互体验:
响应式设计:
主要分为以下几个部分
在src/main/resources/templates目录下,新建一个explore.html,代表首页笔记探索界面。以下是页面整体布局代码:
<!DOCTYPE html>
<html lang="en" xmlns:th="http://www.thymeleaf.org" xmlns:sec="http://www.thymeleaf.org/extras/spring-security">

<head>
    <meta charset="UTF-8">
    <meta name="viewport" content="width=device-width, initial-scale=1.0">
    <title>RN - 标记我的生活</title>
    <!-- 引入 Bootstrap CSS -->
    <link href="https://cdn.jsdelivr.net/npm/bootstrap@5.3.6/dist/css/bootstrap.min.css"
        th:href="@{/css/bootstrap.min.css}" rel="stylesheet">
    <!-- 引入 Font Awesome -->
    <link href="https://cdn.jsdelivr.net/npm/font-awesome@4.7.0/css/font-awesome.min.css"
        th:href="@{/css/font-awesome.min.css}" rel="stylesheet">
    <!-- TODO 自定义样式 -->
    <style>

    </style>
</head>
<header>
    <!-- TODO 顶部导航栏 -->

</header>
<header>
    <!-- TODO 分类导航 -->

</header>
<body>
    <main>
        <div class="container">
            <!-- TODO 笔记卡片网格 -->

            <!-- TODO 加载更多内容提示 -->


            <!-- TODO 没有更多内容提示 -->

        </div>
    </main>
    <footer>
        <!-- TODO 底部导航栏 -->


    </footer>

    <!-- Bootstrap JS -->
    <script src="https://cdn.jsdelivr.net/npm/bootstrap@5.3.6/dist/js/bootstrap.bundle.min.js"
        th:src="@{/js/bootstrap.bundle.min.js}"></script>
    <script>
         // TODO 程序运行脚本
    </script>
</body>

</html>
<style>
    /* 全局样式 */
    body {
        font-family: -apple-system, BlinkMacSystemFont, "Segoe UI", Roboto, "Helvetica Neue", Arial, sans-serif;
        background-color: #f5f5f5;
    }
</style>

<!-- ...为节约篇幅,此处省略非核心内容 -->
<!-- 顶部导航栏 -->
<header>
    <nav class="navbar navbar-expand-lg">
        <div class="container">
            <a class="navbar-brand" href="/" th:href="@{/}">
                <img src="../static/images/rn_logo.png" th:src="@{/images/rn_logo.png}" alt="RN" height="24">
            </a>

            <!-- 搜索框-->
            <div class="col-md-3">
                <div class="input-group">
                    <input class="form-control" type="text" placeholder="搜索感兴趣的内容" aria-label="Search">
                </div>
            </div>

            <button class="navbar-toggler" type="button" data-bs-toggle="collapse" data-bs-target="#navbarNav"
                    aria-controls="navbarNav" aria-expanded="false" aria-label="Toggle navigation">
                <span class="navbar-toggler-icon"></span>
            </button>

            <div class="collapse navbar-collapse" id="navbarNav">
                <ul class="navbar-nav me-auto">
                </ul>

                <ul class="navbar-nav mb-2 mb-lg-0">
                    <li class="nav-item dropdown">
                        <a class="nav-link dropdown-toggle" href="#" data-bs-target="dropdown" data-bs-toggle="dropdown"
                           aria-expanded="false">
                            [[${#authentication.name}]]
                        </a>

                        <ul class="dropdown-menu" id="dropdown">
                            <li class="dropdown-item">
                                <a class="nav-link" href="/user/profile" th:href="@{/user/profile}">个人资料</a>
                            </li>
                            <li class="dropdown-item">
                                <form th:action="@{/logout}" action="/logout" method="post">
                                    <button type="submit" class="nav-link">退出登录</button>
                                </form>
                            </li>
                        </ul>
                    </li>

                </ul>

            </div>
        </div>
    </nav>
</header>
<!-- ...为节约篇幅,此处省略非核心内容 -->
<!-- ...为节约篇幅,此处省略非核心内容 -->
<style>
    /* ...为节约篇幅,此处省略非核心内容 */

    /* 分类导航 */
    .category-nav {
        background-color: white;
        padding: 8px 0;
        overflow-x: auto;
        white-space: nowrap;
        -webkit-overflow-scrolling: touch;
    }

    .category-item {
        display: inline-block;
        padding: 6px 12px;
        margin-right: 8px;
        border-radius: 20px;
        font-size: 14px;
        cursor: pointer;
        transition: background-color 0.2s;
    }

    .category-item.active {
        background-color: #ff2442;
        color: white;
    }
</style>

</head>
<!-- 顶部导航栏 -->
<header>
    <!-- ...为节约篇幅,此处省略非核心内容 -->
</header>

<!-- 分类导航 -->
<header>
    <div class="container">
        <div class="category-item active">推荐</div>
        <div class="category-item">穿搭</div>
        <div class="category-item">美食</div>
        <div class="category-item">彩妆</div>
        <div class="category-item">影视</div>
        <div class="category-item">职场</div>
        <div class="category-item">情感</div>
        <div class="category-item">家居</div>
        <div class="category-item">游戏</div>
        <div class="category-item">旅行</div>
        <div class="category-item">健身</div>
    </div>
</header>

<!-- ...为节约篇幅,此处省略非核心内容 -->
<!-- ...为节约篇幅,此处省略非核心内容 -->
<style>
    /* ...为节约篇幅,此处省略非核心内容 */

    /* 笔记卡片网格 */
    .notes-grid {
        display: grid;
        grid-template-columns: repeat(auto-fill, minmax(180px, 1fr));
        gap: 8px;
        padding: 8px;
    }

    .note-card {
        background-color: white;
        border-radius: 8px;
        overflow: hidden;
        box-shadow: 0 1px 2px rgba(0, 0, 0, 0.05);
    }

    .note-image-container {
        position: relative;
        padding-bottom: 100%;
        /* 保持正方形比例 */
        overflow: hidden;
        border-radius: 12px;
    }

    .note-image {
        position: absolute;
        top: 0;
        left: 0;
        width: 100%;
        height: 100%;
        object-fit: cover;
    }

    .note-tag {
        position: absolute;
        bottom: 8px;
        left: 8px;
        background-color: rgba(0, 0, 0, 0.5);
        color: white;
        padding: 2px 8px;
        border-radius: 10px;
        font-size: 12px;
    }

    .note-content {
        padding: 8px;
    }

    .note-title {
        font-size: 14px;
        font-weight: 500;
        margin-bottom: 4px;
        line-height: 1.4;
        overflow: hidden;
        text-overflow: ellipsis;
        display: -webkit-box;
        -webkit-line-clamp: 2;
        -webkit-box-orient: vertical;
    }

    .note-author {
        display: flex;
        align-items: center;
        margin-bottom: 4px;
    }

    .author-avatar {
        width: 20px;
        height: 20px;
        border-radius: 50%;
        margin-right: 6px;
    }

    .author-name {
        font-size: 12px;
        color: #666;
    }

    .note-author-stats {
        display: flex;
        justify-content: space-between;
    }

    .note-stats {
        display: flex;
        align-items: center;
        font-size: 12px;
        color: #999;
    }

    .stat-item {
        margin-right: 12px;
    }
</style>

<!-- ...为节约篇幅,此处省略非核心内容 -->

<header>
    <!-- 顶部导航栏 -->
    <!-- ...为节约篇幅,此处省略非核心内容 -->
</header>
<header>
    <!-- 分类导航 -->
    <!-- ...为节约篇幅,此处省略非核心内容 -->
</header>
<body>
    <main>
        <div class="container">
            <!-- 笔记卡片网格 -->
            <div class="notes-grid" id="notesGrid">
                <!-- 笔记卡片将通过JavaScript动态生成 -->
            </div>
            <!-- TODO 加载更多内容提示 -->


            <!-- TODO 没有更多内容提示 -->

        </div>
    </main>
    <!-- ...为节约篇幅,此处省略非核心内容 -->
</body>

</html>
<!-- ...为节约篇幅,此处省略非核心内容 -->
<style>
    /* ...为节约篇幅,此处省略非核心内容 */

    /* 加载更多 */
    .load-more {
        text-align: center;
        padding: 16px 0;
        color: #666;
        font-size: 14px;
    }

</style>
<!-- ...为节约篇幅,此处省略非核心内容 -->

<header>
    <!-- 顶部导航栏 -->
    <!-- ...为节约篇幅,此处省略非核心内容 -->
</header>
<header>
    <!-- 分类导航 -->
    <!-- ...为节约篇幅,此处省略非核心内容 -->
</header>
<body>
    <main>
        <div class="container">
            <!-- 笔记卡片网格 -->
            <!-- ...为节约篇幅,此处省略非核心内容 -->

            <!-- 加载更多内容提示 -->
            <div class="load-more" id="loadMore">
                <i class="fa fa-spinner fa-spin"></i> 加载更多
            </div>

            <!-- TODO 没有更多内容提示 -->

        </div>
    </main>
    <!-- ...为节约篇幅,此处省略非核心内容 -->
</body>

</html>
<!-- ...为节约篇幅,此处省略非核心内容 -->
<style>
    /* ...为节约篇幅,此处省略非核心内容 */

    /* 没有更多 */
    .no-more {
        text-align: center;
        padding: 0 0 50px 0;
        color: #666;
        font-size: 14px;
        display: none;
    }
</style>
</head>
<header>
    <!-- 顶部导航栏 -->
    <!-- ...为节约篇幅,此处省略非核心内容 -->
</header>
<header>
    <!-- 分类导航 -->
    <!-- ...为节约篇幅,此处省略非核心内容 -->
</header>
<body>
    <main>
        <div class="container">
            <!-- 笔记卡片网格 -->
            <!-- ...为节约篇幅,此处省略非核心内容 -->
            <!-- 加载更多内容提示 -->
            <!-- ...为节约篇幅,此处省略非核心内容 -->

            <!-- 没有更多内容提示 -->
            <div class="no-more" id="noMoreContent">
                <p>已经到底啦~</p>
            </div>
        </div>
    </main>
    <footer>
        <!-- TODO 底部导航栏 -->


    </footer>
    <!-- ...为节约篇幅,此处省略非核心内容 -->
</body>

</html>
</body>

</html>
<!-- ...为节约篇幅,此处省略非核心内容 -->
<style>
    /* ...为节约篇幅,此处省略非核心内容 */
    /* 底部导航栏 */
    .bottom-nav {
        position: fixed;
        bottom: 0;
        left: 0;
        right: 0;
        display: flex;
        justify-content: space-around;
        padding: 8px 0;
        box-shadow: 0 -1px 2px rgba(0, 0, 0, 0.05);
        z-index: 100;
        background-color: #f5f5f5;
    }

    .nav-item {
        display: flex;
        flex-direction: column;
        align-items: center;
        color: #666;
        cursor: pointer;
    }

    .nav-item.active {
        color: #ff2442;
    }

    .nav-icon {
        font-size: 20px;
        margin-bottom: 2px;
    }

    .nav-text {
        font-size: 10px;
    }
</style>
</head>
<header>
    <!-- 顶部导航栏 -->

</header>
<header>
    <!-- 分类导航 -->

</header>
<body>
    <main>
        <div class="container">
            <!-- 笔记卡片网格 -->
            <!-- ...为节约篇幅,此处省略非核心内容 -->

            <!-- 加载更多内容提示 -->
            <!-- ...为节约篇幅,此处省略非核心内容 -->

            <!-- 没有更多内容提示 -->
            <!-- ...为节约篇幅,此处省略非核心内容 -->
        </div>
    </main>
    <footer>
        <!-- 底部导航栏 -->
        <div class="container bottom-nav">
            <div class="nav-item active">
                <i class="fa fa-home nav-icon"></i>
                <span class="nav-text">首页</span>
            </div>
            <div class="nav-item">
                <i class="fa fa-compass nav-icon"></i>
                <span class="nav-text">发现</span>
            </div>
            <div class="nav-item">
                <i class="fa fa-plus nav-icon"></i>
                <span class="nav-text">发布</span>
            </div>
            <div class="nav-item">
                <i class="fa fa-comment-o nav-icon"></i>
                <span class="nav-text">消息</span>
            </div>
            <div class="nav-item">
                <i class="fa fa-user-o nav-icon"></i>
                <span class="nav-text">我的</span>
            </div>
        </div>

    </footer>

    <!-- ...为节约篇幅,此处省略非核心内容 -->

    <script>
         // TODO 程序运行脚本
    </script>
</body>

</html>
修改explore.html,在<script>增加如下内容:
<script>
    let currentPage = 0;
    let isLoading = false;
    let hasMore = true;
    loadMoreNotes();

    // 加载更多笔记
    function loadMoreNotes() {
        if (isLoading || !hasMore) {
            // 隐藏加载更多
            hideLoadMore();
            // 显示没有更多内容
            showNoMoreContent();
            return;
        }

        isLoading = true;
        // 显示加载更多
        showLoadMore();

        // 获取当前分类
        let category = document.querySelector('.category-item.active').textContent.trim();

        // 发送请求
        fetch(`/explore/note?page=${currentPage + 1}&category=${category}`)
            .then(response => response.json())
            .then(data => {
                if (data.notes && data.notes.length > 0) {
                    currentPage++;
                    // 添加笔记列表到网格布局中
                    appendNotes(data.notes);
                    hasMore = data.hasMore;
                } else {
                    hasMore = false;
                }

                isLoading = false;
                // 隐藏加载更多
                hideLoadMore();

                if (!hasMore) {
                    // 显示没有更多内容
                    showNoMoreContent();
                }
            })
            .catch(error => {
                console.error('Error:', error);
                isLoading = false;
                // 隐藏加载更多
                hideLoadMore();
            });
    }

    // 隐藏加载更多
    function hideLoadMore() {
        document.getElementById("loadMore").style.display = "none";
    }

    // 显示没有更多内容
    function showNoMoreContent() {
        document.getElementById("noMoreContent").style.display = "block";
    }

    // 显示加载更多
    function showLoadMore() {
        document.getElementById("loadMore").style.display = "block";
    }

    const notesGrid = document.getElementById("notesGrid");
    // 添加笔记列表到网格布局中
    function appendNotes(notes) {
        for (let i = 0; i < notes.length; i++) {
            const note = notes[i];

            // 创建笔记卡片元素
            const noteElement = createNoteElement(note);

            notesGrid.appendChild(noteElement);
        }
    }

    // 创建笔记卡片元素
    function createNoteElement(note) {
        const noteElement = document.createElement("div");
        noteElement.className = "masonry-item";
        noteElement.innerHTML = `
            <div class="note-image-container">
                <img class="note-image" src="${note.cover}" alt="${note.title}">
            </div>
            <div class="note-content">
                <div class="note-title">${note.title}</div>
                <div class="note-author-stats">
                    <div class="note-author">
                        <img class="author-avatar" src="${note.avatar ? note.avatar : '/images/rn_avatar.png'}" alt="${note.username}">
                        <span class="author-name">${note.username}</span>
                    </div>
                    <div class="note-stats">
                        <div class="stat-item">
                            <i class="fa fa-heart-o">1024</i>
                        </div>
                    </div>
                </div>
            </div>
        `;

        return noteElement;
    }


    const categoryItems = document.querySelectorAll('.category-item');

    // 为分页导航添加点击事件
    categoryItems.forEach(item => {
        item.addEventListener('click', () => {
            categoryItems.forEach(item => {
                item.classList.remove('active');
            });
            item.classList.add('active');

            // 重置笔记网格数据
            notesGrid.innerHTML = '';

            // 恢复初始状态值
            currentPage = 0;
            isLoading = false;
            hasMore = true;
            loadMoreNotes();
        });
    });

    // 滚动事件
    window.addEventListener('scroll', function() {
        console.log('scroll');

        if (isLoading || !hasMore) {
            return;
        }

        console.log('scroll before');

        const scrollTop = window.pageYOffset || document.documentElement.scrollTop;
        const windowHeight = window.innerHeight;
        const documentHeight = document.documentElement.scrollHeight;

        console.log('scrollTop: ' + scrollTop);
        console.log('windowHeight: ' + windowHeight);
        console.log('documentHeight: ' + documentHeight);

        if (scrollTop + windowHeight >= documentHeight - 300) {
            loadMoreNotes();
        }

        console.log('scroll after');
    });
</script>
新建一个控制器ExploreController,用于处理首页笔记探索的请求。
新增方法如下。
package com.waylau.rednote.controller;

import org.springframework.stereotype.Controller;
import org.springframework.web.bind.annotation.GetMapping;
import org.springframework.web.bind.annotation.RequestMapping;

/**
 * ExploreController 首页笔记探索
 *
 * @author <a href="https://waylau.com">Way Lau</a>
 * @version 2025/08/20
 **/
@Controller
@RequestMapping("/explore")
public class ExploreController {

    /**
     * 显示笔记探索页面
     */
    @GetMapping
    public String showExplore() {
        return "explore";
    }
}
新增方法如下。
private static final int PAGE_SIZE = 20;
private static final String DEFAULT_CATEGORY = "推荐";

@Autowired
private NoteService noteService;

/**
  * 返回首页笔记探索页面的笔记数据
  */
@GetMapping("/note")
public ResponseEntity<NoteResponseDto> getNotesByCategory(
                                                          @RequestParam(defaultValue = "1") int page,
                                                          @RequestParam(required = false) String category) {
    // 把“推荐”当成空
    if (DEFAULT_CATEGORY.equals(category)) {
        category = null;
    }

    Page<Note> notes = noteService.getNotesByPage(page, PAGE_SIZE, category);

    NoteResponseDto notesResponseDto = new NoteResponseDto();
    notesResponseDto.setHasMore(notes.hasNext());
    notesResponseDto.setNotes(notes.getContent());

    return ResponseEntity.ok(notesResponseDto);
}
上述接口,可以根据分类进行分页查询,并将查询结果通过NoteResponseDto数据结构返回给前端。
如果分类是“推荐”,实际上就是不需要分类,直接赋值为null即可。
新增NoteResponseDto如下。
package com.waylau.rednote.dto;

import com.waylau.rednote.entity.Note;
import lombok.Getter;
import lombok.Setter;

import java.util.List;

/**
 * NoteResponseDto 探索笔记的响应对象
 *
 * @author <a href="https://waylau.com">Way Lau</a>
 * @version 2025/08/20
 **/
@Getter
@Setter
public class NoteResponseDto {
    /**
     * 笔记列表
     */
    private List<Note> notes;

    /**
     * 是否还有更多
     */
    private boolean hasMore;
}
首页重定向到首页笔记探索页面:
package com.waylau.rednote.controller;

import org.springframework.stereotype.Controller;
import org.springframework.web.bind.annotation.GetMapping;
import org.springframework.web.bind.annotation.RequestMapping;

/**
 * IndexController 首页控制器
 *
 * @author <a href="https://waylau.com">Way Lau</a>
 * @version 2025/08/20
 **/
@Controller
@RequestMapping("/")
public class IndexController {
    @GetMapping
    public String index() {
        // 重定向到首页笔记探索页面
        return "redirect:/explore";
    }
}
修改WebSecurityConfig如下:
@Bean
public SecurityFilterChain filterChain(HttpSecurity http) throws Exception {
    http
            // ...为节约篇幅,此处省略非核心内容
            .authorizeHttpRequests(authorize -> authorize
                    // ...为节约篇幅,此处省略非核心内容

                    // 允许USER角色的用户访问 /explore/** 的资源
                    .requestMatchers("/explore/**").hasRole("USER")
                    // 其他请求需要认证
                    .anyRequest().authenticated()
            )


    ;

    return http.build();
}
修改NoteRepository,增加如下接口:
/**
  * 根据分类、分页查询笔记
  *
  * @param category
  * @param pageable
  * @return
  */
Page<Note> findByCategory(String category, Pageable pageable);

/**
  * 分页查询笔记
  *
  * @param pageable
  * @return
  */
Page<Note> findAll(Pageable pageable);
上述两个接口的区别是,如果不提供分类,实际上就是全查。
修改NoteService,增加如下接口:
/**
  * 分类分页查询笔记
  *
  * @param page
  * @param pageSize
  * @param category
  * @return
  */
Page<Note> getNotesByPage(int page, int pageSize, String category);
修改NoteServiceImpl,实现分类分页查询笔记的方法:
@Override
public Page<Note> getNotesByPage(int page, int pageSize, String category) {
    // 构造Pageable对象,按照创建时间倒序排序
    Pageable pageable = PageRequest.of(page - 1, pageSize, Sort.by("createAt").descending());

    if (category != null && !category.isEmpty()) {
        return noteRepository.findByCategory(category, pageable);
    }

    return noteRepository.findAll(pageable);
}
当前端使用JavaScript fetch API试图访问返回首页笔记探索页面的笔记数据时,会报以下错误:
com.fasterxml.jackson.databind.exc.InvalidDefinitionException: No serializer found for class org.hibernate.proxy.pojo.bytebuddy.ByteBuddyInterceptor and no properties discovered to create BeanSerializer (to avoid exception, disable SerializationFeature.FAIL_ON_EMPTY_BEANS) (through reference chain: com.waylau.rednote.dto.NotesResponseDto["notes"]->java.util.Collections$UnmodifiableRandomAccessList[0]->com.waylau.rednote.entity.Note["author"]->com.waylau.rednote.entity.User$HibernateProxy["hibernateLazyInitializer"])
	at com.fasterxml.jackson.databind.exc.InvalidDefinitionException.from(InvalidDefinitionException.java:77) ~[jackson-databind-2.19.0.jar:2.19.0]
	at com.fasterxml.jackson.databind.SerializerProvider.reportBadDefinition(SerializerProvider.java:1359) ~[jackson-databind-2.19.0.jar:2.19.0]
	at com.fasterxml.jackson.databind.DatabindContext.reportBadDefinition(DatabindContext.java:415) ~[jackson-databind-2.19.0.jar:2.19.0]
	at com.fasterxml.jackson.databind.ser.impl.UnknownSerializer.failForEmpty(UnknownSerializer.java:52) ~[jackson-databind-2.19.0.jar:2.19.0]
	at com.fasterxml.jackson.databind.ser.impl.UnknownSerializer.serialize(UnknownSerializer.java:29) ~[jackson-databind-2.19.0.jar:2.19.0]
	at com.fasterxml.jackson.databind.ser.BeanPropertyWriter.serializeAsField(BeanPropertyWriter.java:732) ~[jackson-databind-2.19.0.jar:2.19.0]
	at com.fasterxml.jackson.databind.ser.std.BeanSerializerBase.serializeFields(BeanSerializerBase.java:760) ~[jackson-databind-2.19.0.jar:2.19.0]
	at com.fasterxml.jackson.databind.ser.BeanSerializer.serialize(BeanSerializer.java:183) ~[jackson-databind-2.19.0.jar:2.19.0]
	at com.fasterxml.jackson.databind.ser.impl.IndexedListSerializer.serializeContents(IndexedListSerializer.java:119) ~[jackson-databind-2.19.0.jar:2.19.0]
	at com.fasterxml.jackson.databind.ser.impl.IndexedListSerializer.serialize(IndexedListSerializer.java:79) ~[jackson-databind-2.19.0.jar:2.19.0]
	at com.fasterxml.jackson.databind.ser.impl.IndexedListSerializer.serialize(IndexedListSerializer.java:18) ~[jackson-databind-2.19.0.jar:2.19.0]
	at com.fasterxml.jackson.databind.ser.BeanPropertyWriter.serializeAsField(BeanPropertyWriter.java:732) ~[jackson-databind-2.19.0.jar:2.19.0]
	at com.fasterxml.jackson.databind.ser.std.BeanSerializerBase.serializeFields(BeanSerializerBase.java:760) ~[jackson-databind-2.19.0.jar:2.19.0]
	at com.fasterxml.jackson.databind.ser.BeanSerializer.serialize(BeanSerializer.java:183) ~[jackson-databind-2.19.0.jar:2.19.0]
	at com.fasterxml.jackson.databind.ser.DefaultSerializerProvider._serialize(DefaultSerializerProvider.java:503) ~[jackson-databind-2.19.0.jar:2.19.0]
	at com.fasterxml.jackson.databind.ser.DefaultSerializerProvider.serializeValue(DefaultSerializerProvider.java:342) ~[jackson-databind-2.19.0.jar:2.19.0]
	at com.fasterxml.jackson.databind.ObjectWriter$Prefetch.serialize(ObjectWriter.java:1587) ~[jackson-databind-2.19.0.jar:2.19.0]
	at com.fasterxml.jackson.databind.ObjectWriter.writeValue(ObjectWriter.java:1061) ~[jackson-databind-2.19.0.jar:2.19.0]
	at org.springframework.http.converter.json.AbstractJackson2HttpMessageConverter.writeInternal(AbstractJackson2HttpMessageConverter.java:485) ~[spring-web-6.2.7.jar:6.2.7]
	at org.springframework.http.converter.AbstractGenericHttpMessageConverter.write(AbstractGenericHttpMessageConverter.java:126) ~[spring-web-6.2.7.jar:6.2.7]
	at org.springframework.web.servlet.mvc.method.annotation.AbstractMessageConverterMethodProcessor.writeWithMessageConverters(AbstractMessageConverterMethodProcessor.java:345) ~[spring-webmvc-6.2.7.jar:6.2.7]
	at org.springframework.web.servlet.mvc.method.annotation.HttpEntityMethodProcessor.handleReturnValue(HttpEntityMethodProcessor.java:263) ~[spring-webmvc-6.2.7.jar:6.2.7]
接口返回的是ResponseEntity.ok(notesResponseDto)。ResponseEntity.ok() 是 Spring 框架中用于构建 HTTP 响应的一个便捷方法。它属于 org.springframework.http.ResponseEntity 类,主要用于封装 HTTP 响应的状态码、头部信息和响应体,提供更灵活的 API 响应控制。ResponseEntity 的内容会自动序列化为 JSON/XML 等格式。从上述报错信息可以知道,默认的自动序列化工具为Jackson。
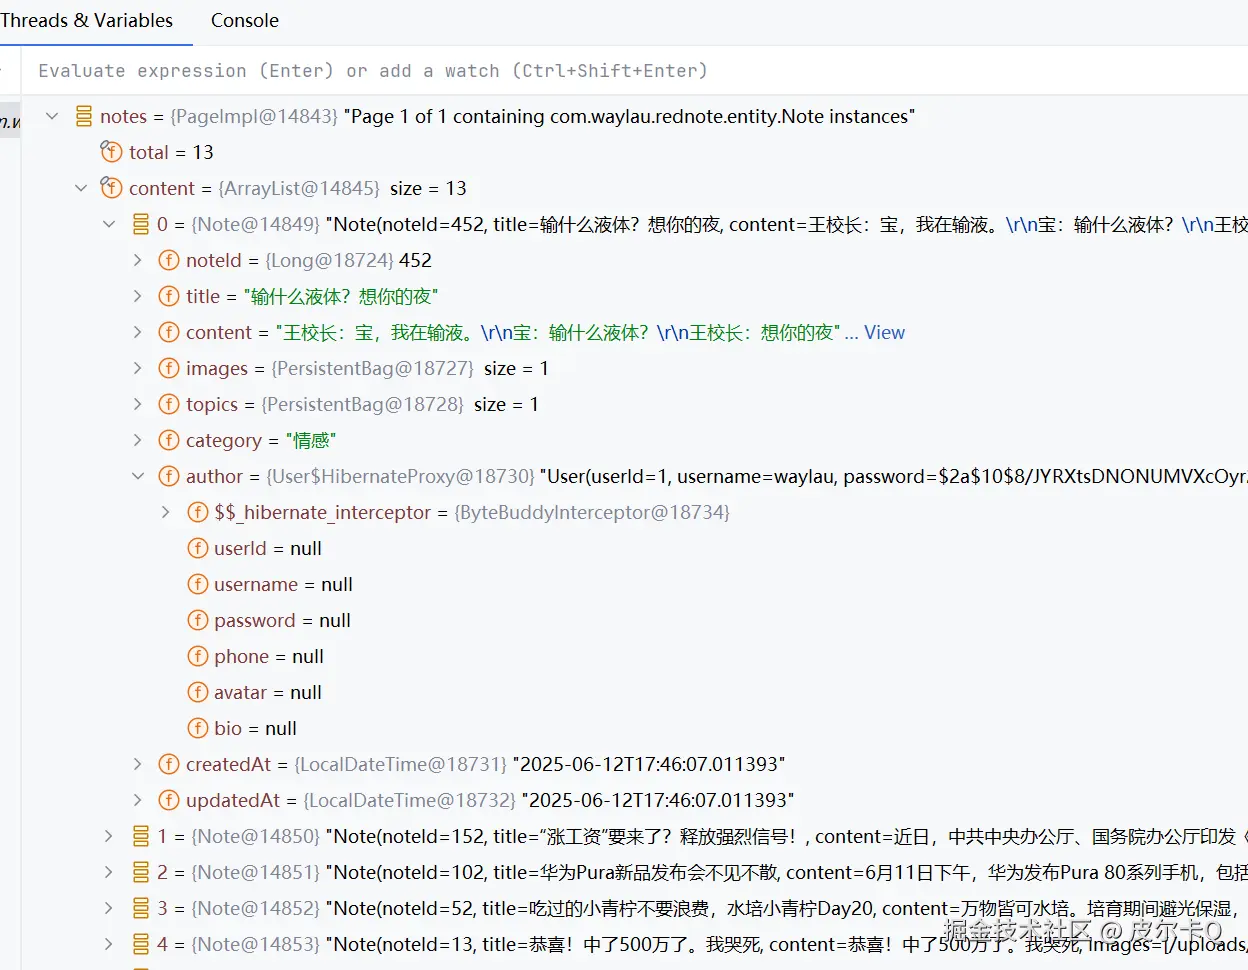
这个错误是典型的Hibernate懒加载与Jackson序列化冲突的问题。具体来说:
User$HibernateProxy)ByteBuddyInterceptor)hibernateLazyInitializer属性触发了序列化错误从代码断点调试可以看到auther对象属性是空的,如下图11-1所示。
解决方案有几下几种。
在本例中,使用的DTO模式。
创建NoteExploreDto,代码如下:
package com.waylau.rednote.dto;

import com.waylau.rednote.entity.Note;
import lombok.Getter;
import lombok.Setter;

/**
 * NoteExploreDto 笔记探索DTO
 *
 * @author <a href="https://waylau.com">Way Lau</a>
 * @version 2025/08/20
 **/
@Getter
@Setter
public class NoteExploreDto {
    private Long noteId;
    private String title;
    /**
     * 封面
     */
    private String cover;
    /**
     * 作者用户名
     */
    private String username;
    /**
     * 作者头像
     */
    private String avatar;

    public static NoteExploreDto toExploreDto(Note note) {
        NoteExploreDto noteExploreDto = new NoteExploreDto();
        noteExploreDto.setNoteId(note.getNoteId());
        noteExploreDto.setTitle(note.getTitle());
        noteExploreDto.setCover(note.getImages().get(0));
        noteExploreDto.setUsername(note.getAuthor().getUsername());
        noteExploreDto.setAvatar(note.getAuthor().getAvatar());

        return noteExploreDto;
    }
}
ExploreController修改如下:
/**
  * 返回首页笔记探索页面的笔记数据
  */
@GetMapping("/note")
public ResponseEntity<NoteResponseDto> getNotesByCategory(
                                                          @RequestParam(defaultValue = "1") int page,
                                                          @RequestParam(required = false) String category) {
    // 把“推荐”当成空
    if (DEFAULT_CATEGORY.equals(category)) {
        category = null;
    }

    Page<Note> notes = noteService.getNotesByPage(page, PAGE_SIZE, category);

    NoteResponseDto notesResponseDto = new NoteResponseDto();
    notesResponseDto.setHasMore(notes.hasNext());
    //notesResponseDto.setNotes(notes.getContent());

    // 处理序列化问题
    List<NoteExploreDto> noteExploreDtoList = new ArrayList<>();
    for (Note note : notes.getContent()) {
        noteExploreDtoList.add(NoteExploreDto.toExploreDto(note));
    }
    notesResponseDto.setNotes(noteExploreDtoList);

    return ResponseEntity.ok(notesResponseDto);
}
NoteResponseDto修改如下:
package com.waylau.rednote.dto;

import com.waylau.rednote.entity.Note;
import lombok.Getter;
import lombok.Setter;

import java.util.List;

/**
 * NoteResponseDto 探索笔记的响应对象
 *
 * @author <a href="https://waylau.com">Way Lau</a>
 * @version 2025/06/13
 **/
@Getter
@Setter
public class NoteResponseDto {
    /**
     * 笔记列表
     */
    // private List<Note> notes;
    private List<NoteExploreDto> notes;

    /**
     * 是否还有更多
     */
    private boolean hasMore;
}
通过以上方法,你应该能够解决Jackson序列化Hibernate代理对象的问题,确保API响应能够正确返回笔记数据。
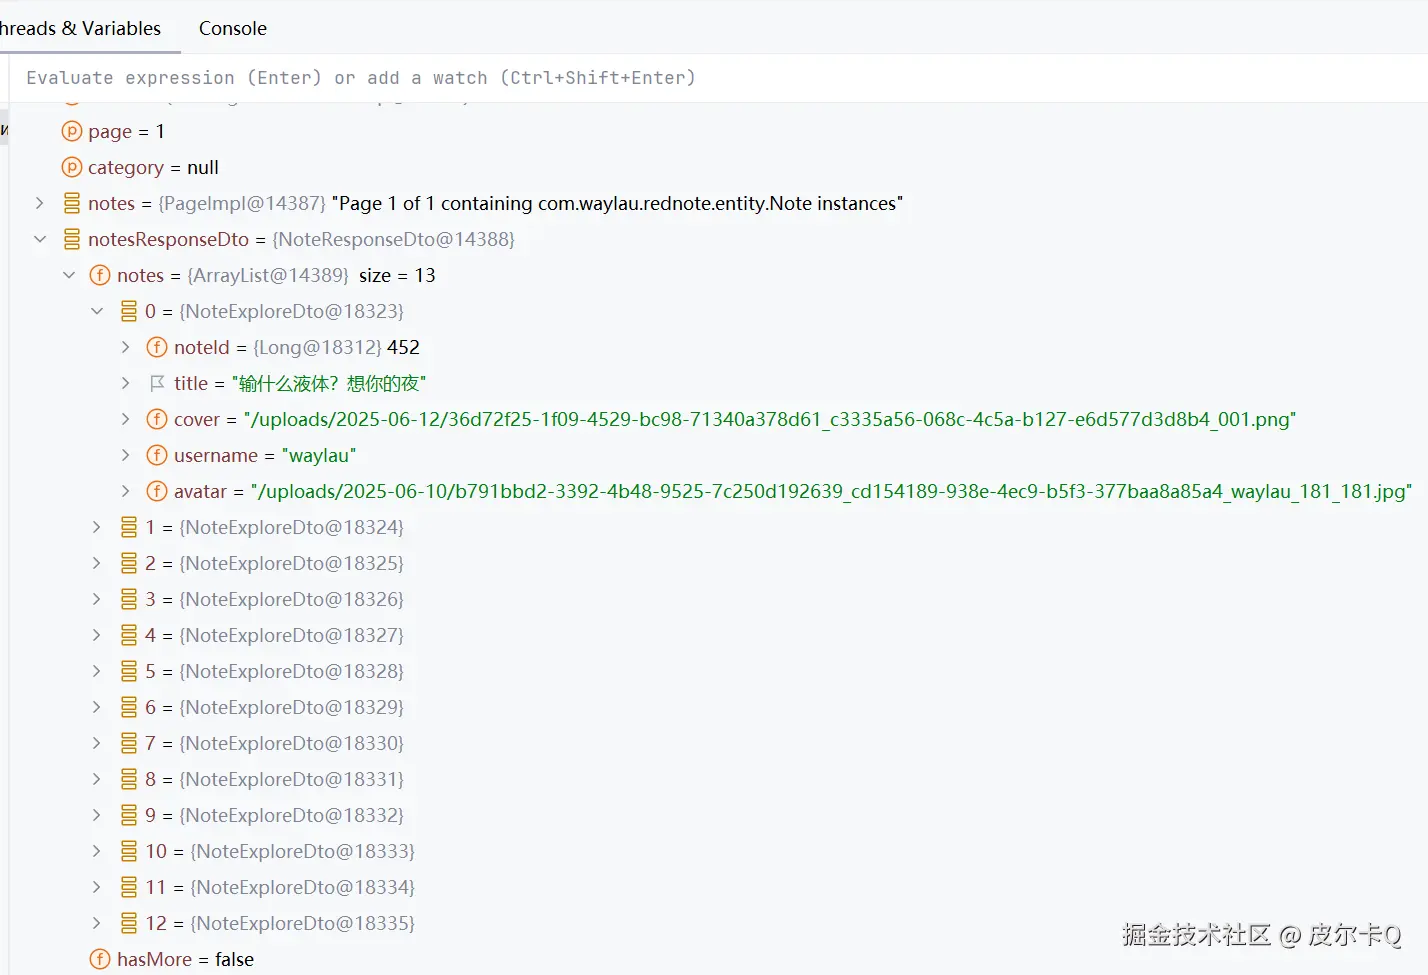
从代码断点调试可以看到DTO对象属性都是有值的,如下图11-2所示。
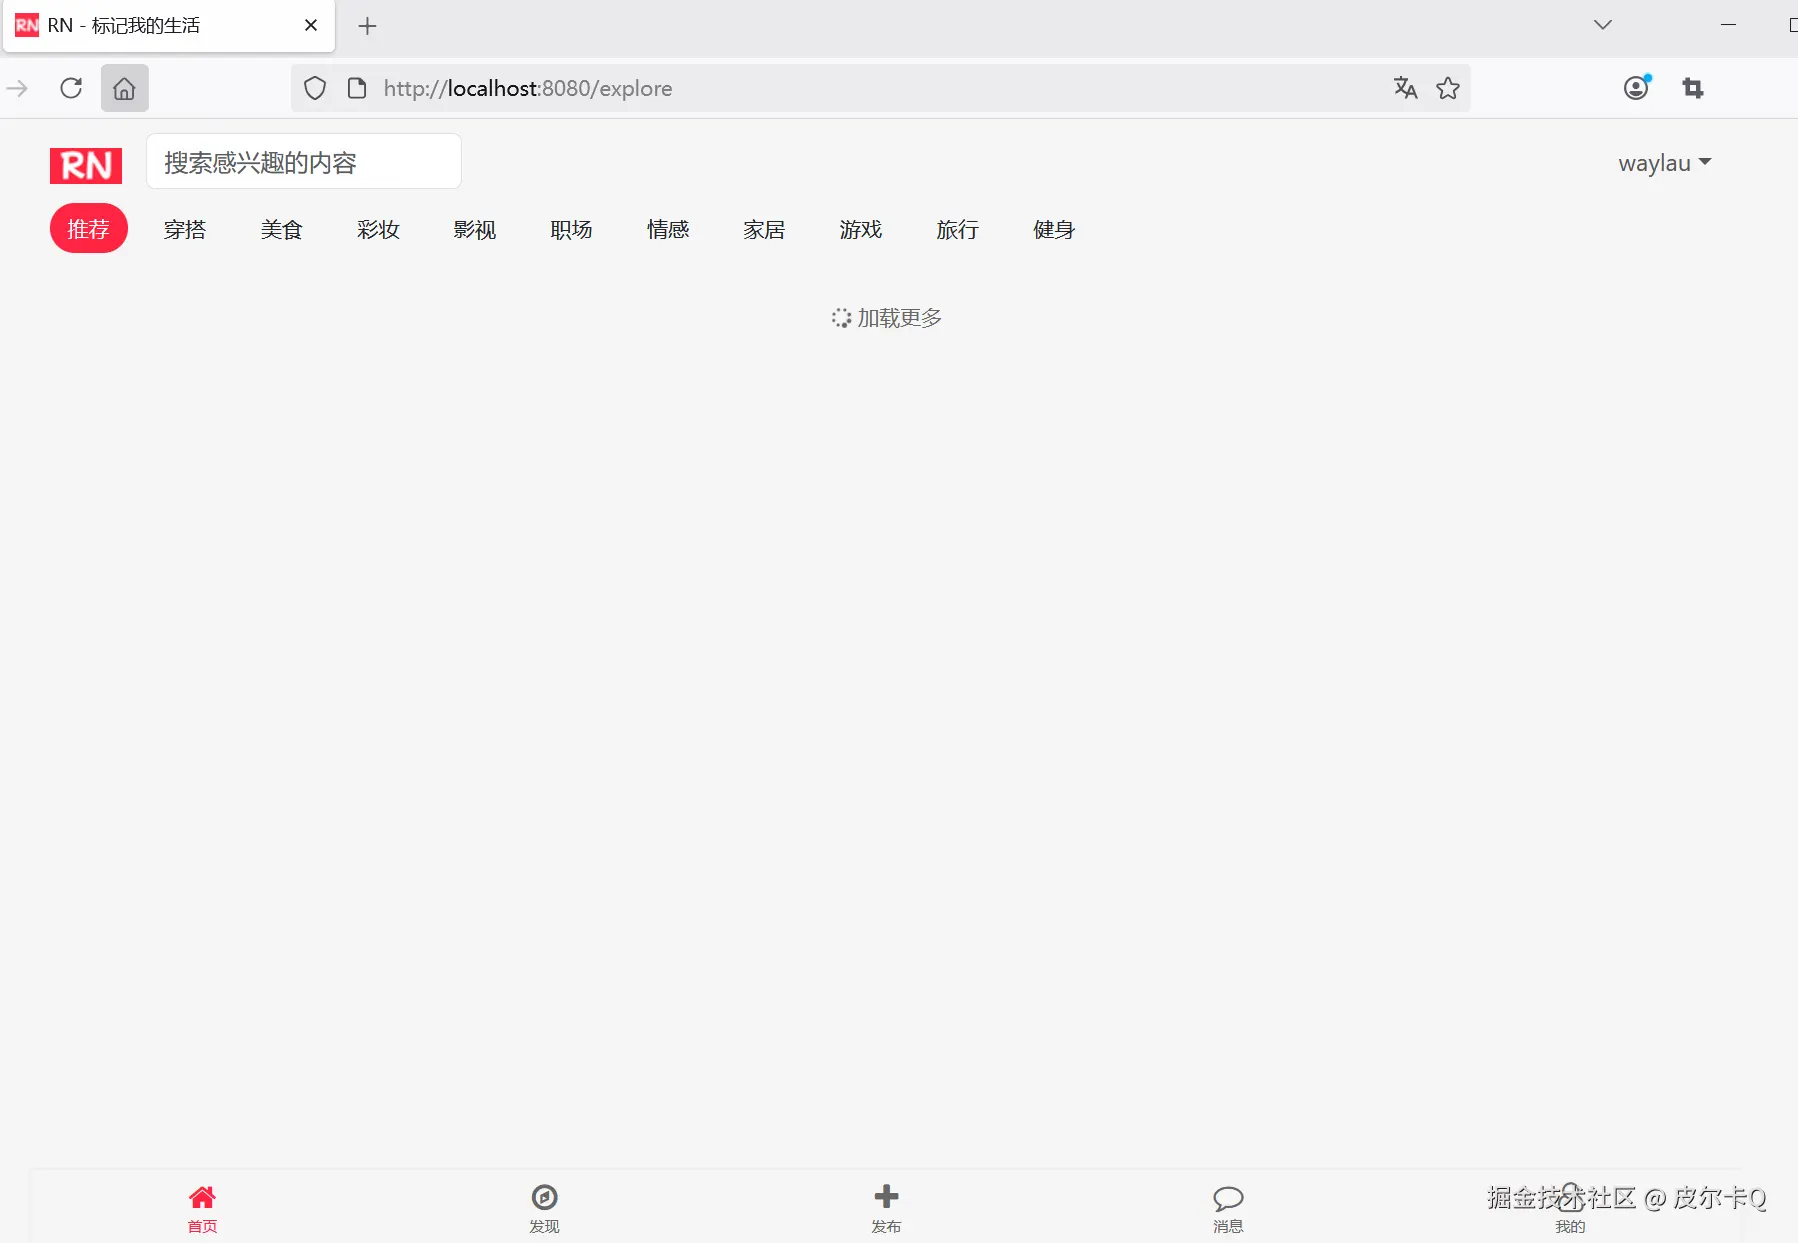
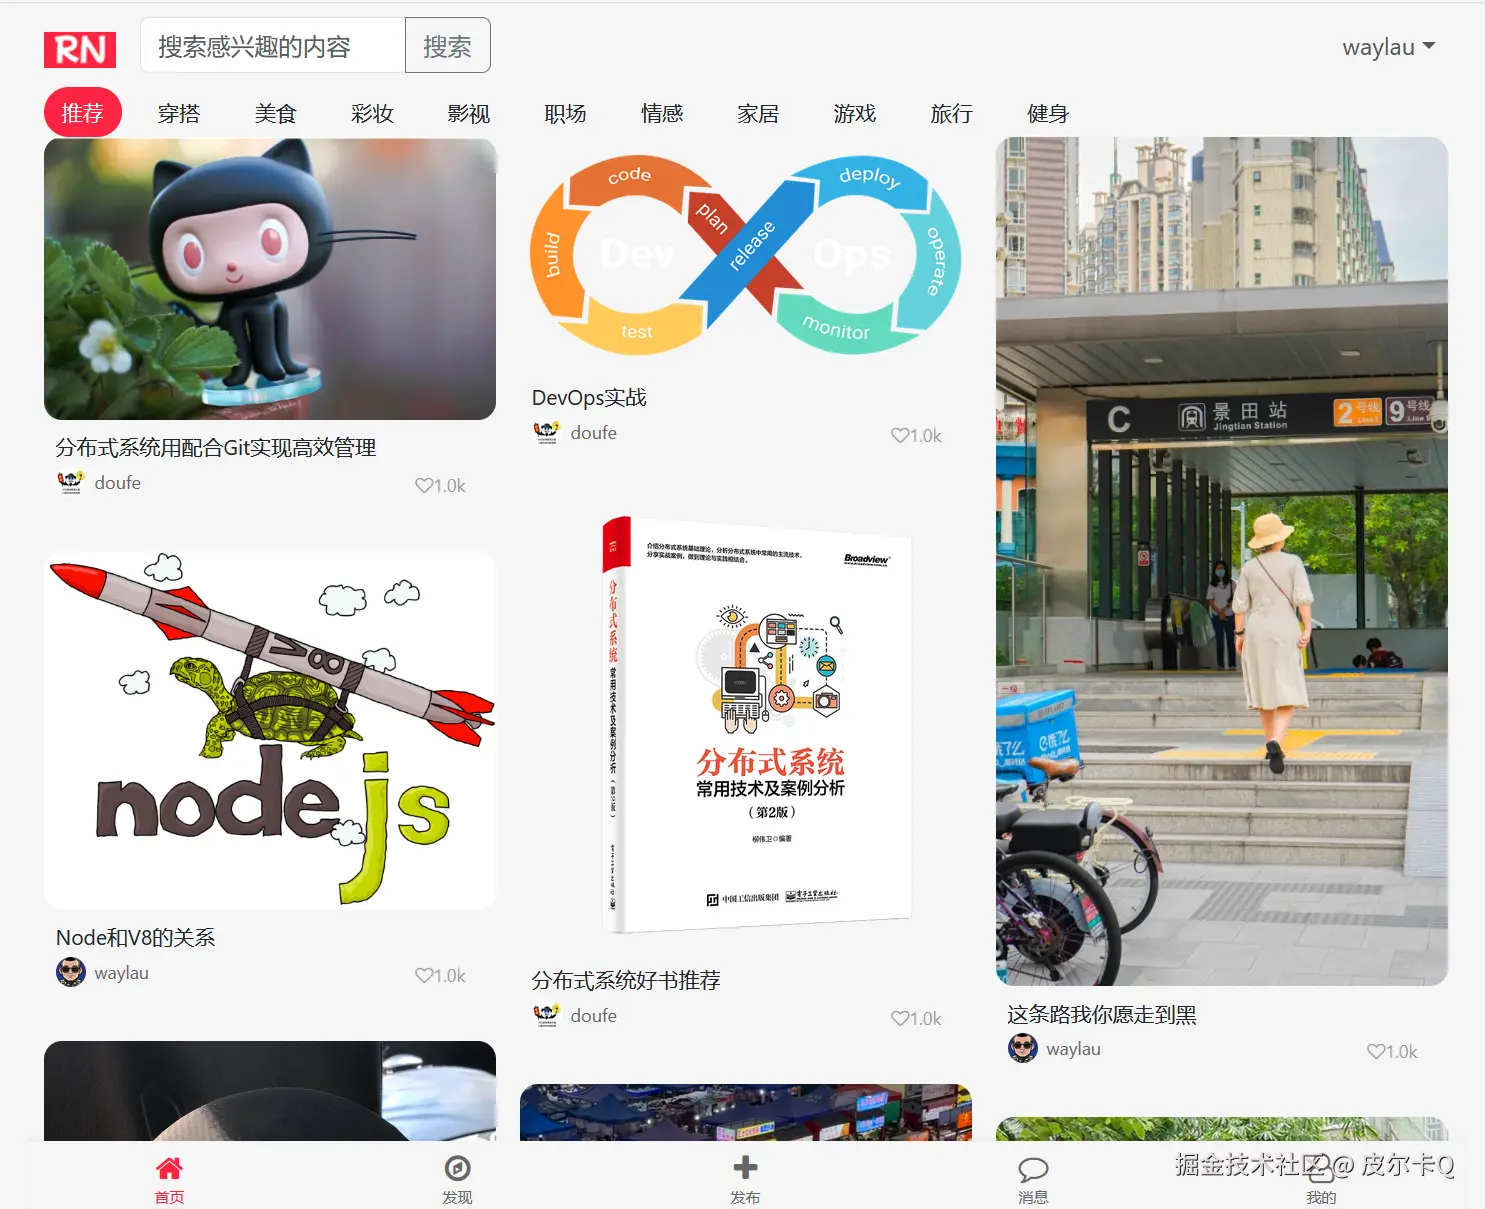
如下图11-3所示的是首次访问首页的效果。
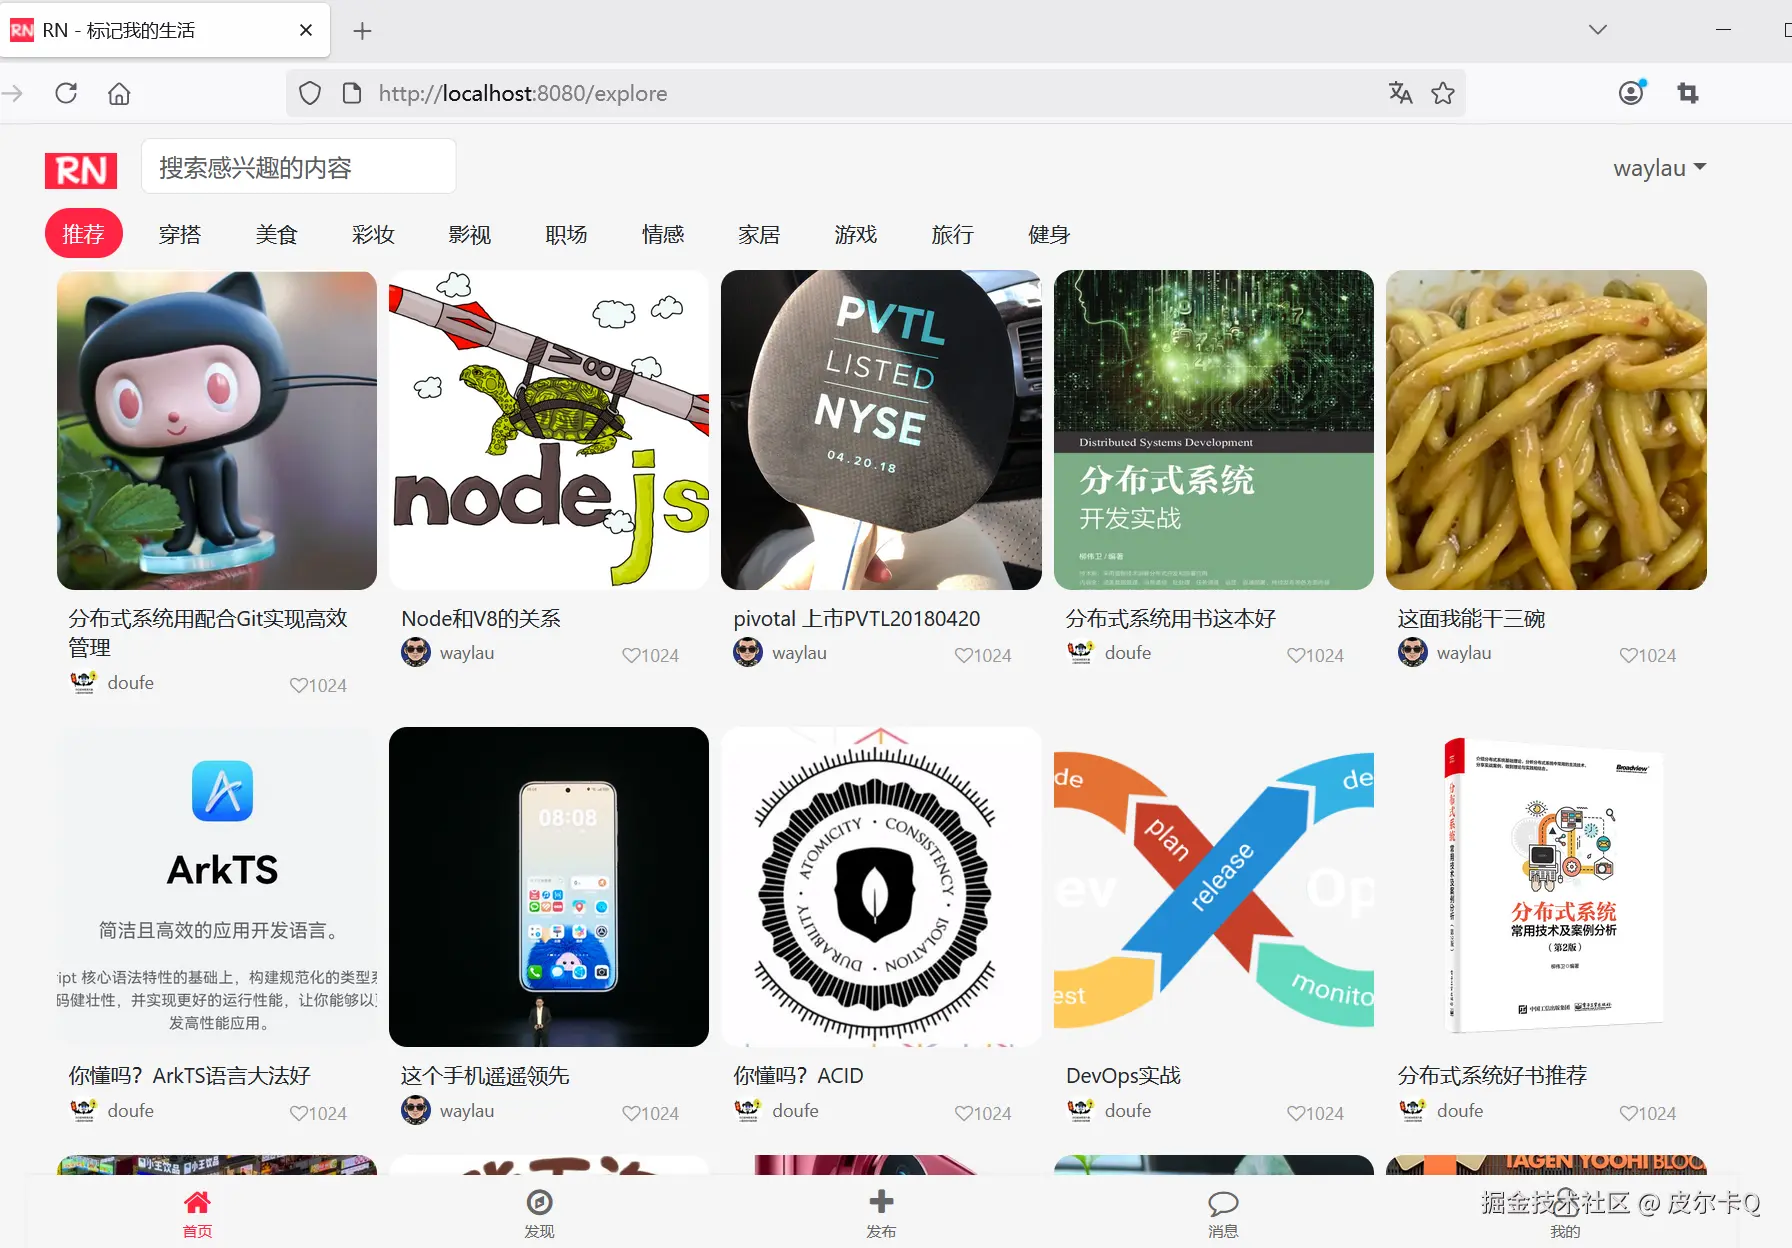
如下图11-4所示的是加载了笔记数据之后的效果。
修改explore.html,在<script>增加如下内容:
<script>
    // ...为节约篇幅,此处省略非核心内容

    // 滚动事件
    window.addEventListener('scroll', function() {
        console.log('scroll');

        if (isLoading || !hasMore) {
            return;
        }

        console.log('scroll before');

        const scrollTop = window.pageYOffset || document.documentElement.scrollTop;
        const windowHeight = window.innerHeight;
        const documentHeight = document.documentElement.scrollHeight;

        console.log('scrollTop: ' + scrollTop);
        console.log('windowHeight: ' + windowHeight);
        console.log('documentHeight: ' + documentHeight);

        if (scrollTop + windowHeight >= documentHeight - 300) {
            loadMoreNotes();
        }

        console.log('scroll after');
    });
</script>
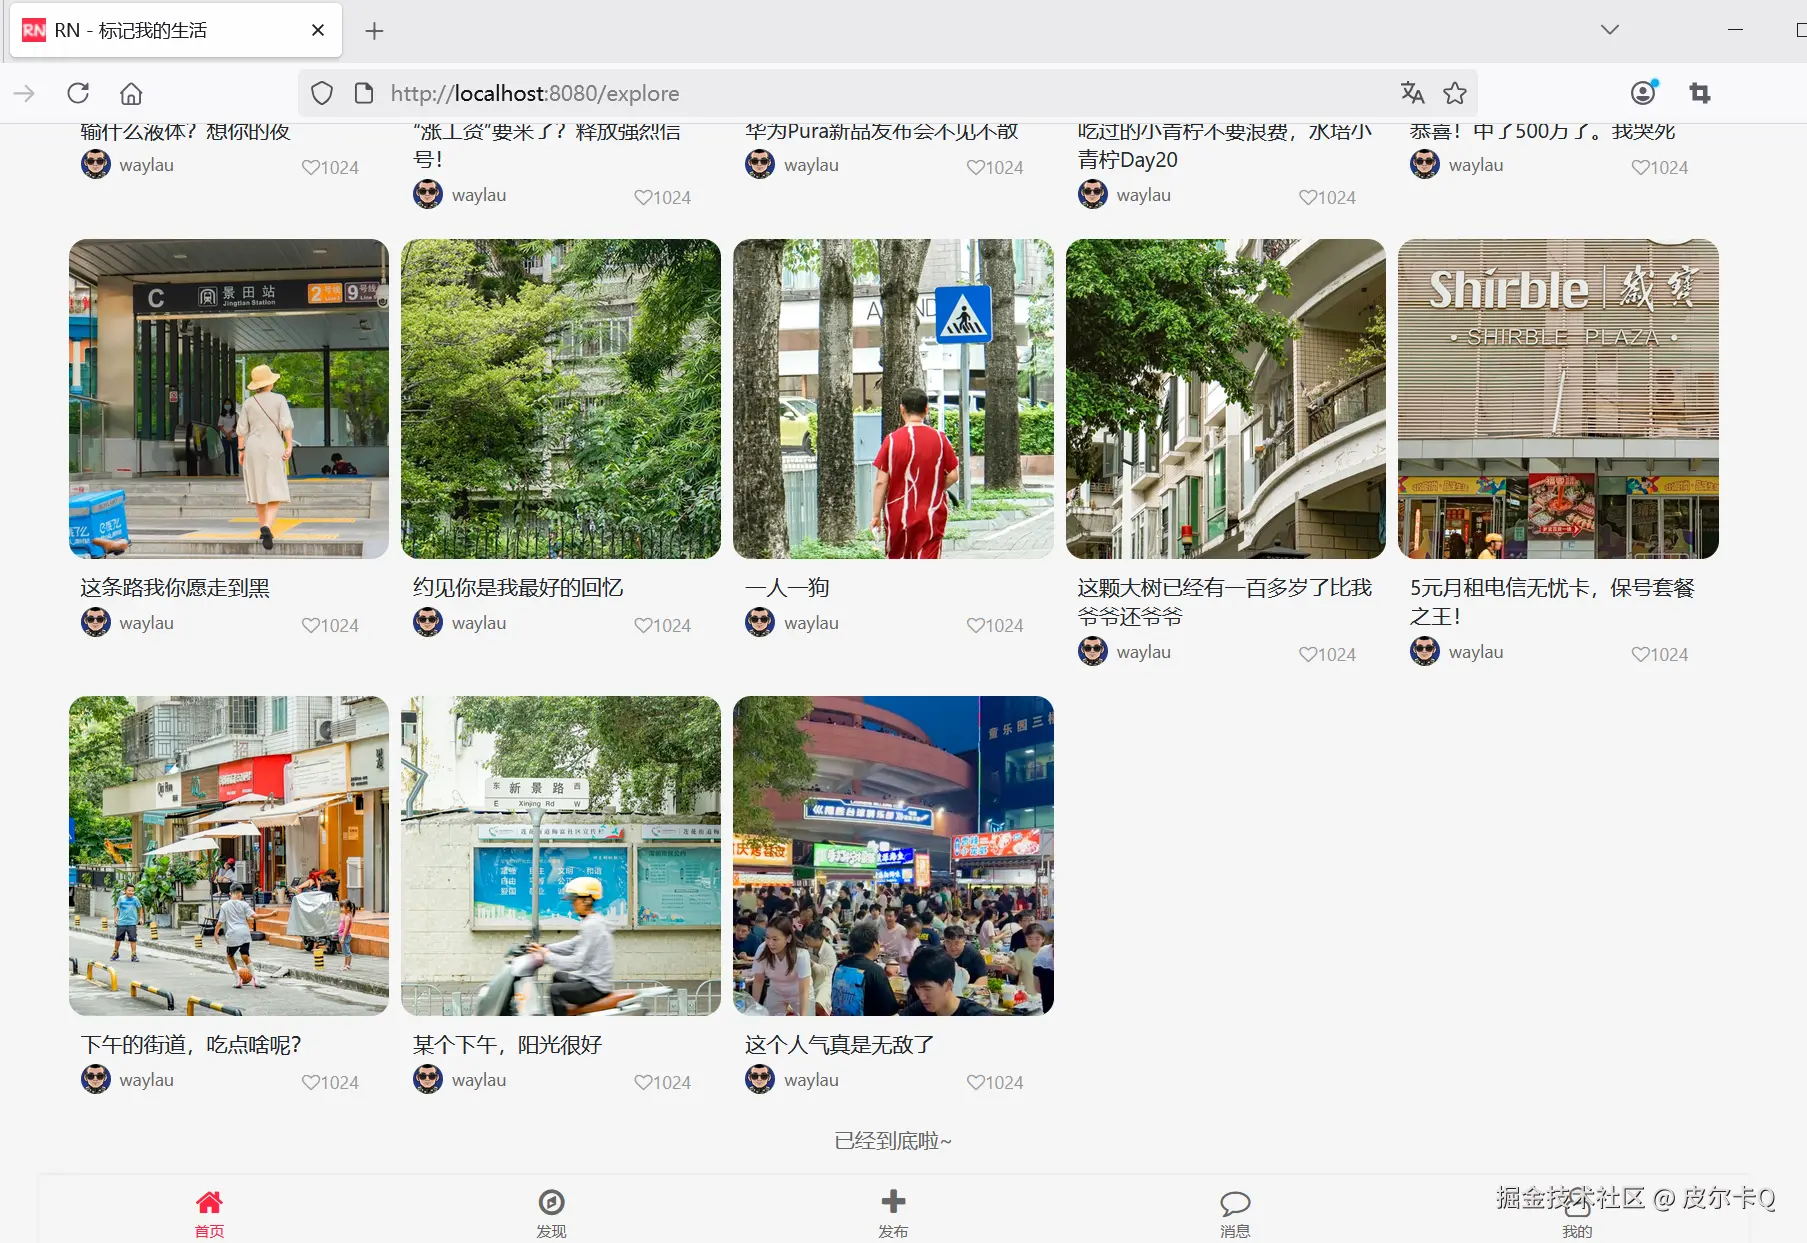
如下图11-5所示的是无限滚动刷新,查询完笔记数据之后的效果。
在数字展示中进行格式化(如将10000显示为1w),本质上是为了优化信息传达的效率和用户体验。这种处理方式并非简单的符号替换,而是基于人类认知规律、场景需求和技术实现的综合考量。以下从多个维度解析其背后的逻辑:
短期记忆容量限制
人类短期记忆通常只能处理7±2个组块(George Miller的“神奇数字”理论)。例如:
量级感知优先于精确值
在许多场景中,用户更关注数字的“量级”而非“精确值”:
| 场景 | 格式化需求 | 示例 | 核心目的 |
|---|---|---|---|
| 社交媒体动态 | 轻量化展示,快速抓取注意力 | 点攒数:2.4w | 减少视觉干扰,突出互动热度 |
| 金融数据大屏 | 兼顾量级与精度,可能需要动态切换单位 | 市值:1.28万亿(自动切换万亿/亿/万) | 适应不同数据规模的展示 |
| 电商商品列表 | 简洁化展示,避免价格信息碎片化 | 价格:¥1.5k | 促进购买决策效率 |
| 科学论文图表 | 严格保留精度,使用标准单位(如10³) | 数据点:1.02×10⁴ | 保证学术严谨性 |
减少数字长度,提升排版美观
引导视觉焦点
格式化后的数字通过“单位缩写”(如w/k/m)形成视觉区分,使用户更易捕捉关键数据:
动态单位切换策略
精度控制算法
国际化适配
需要精确值的场景
小数字场景
专业领域术语冲突
定义数字格式化函数:
// 数字格式化,自动转换为k、w单位
function numberFormat(num) {
   if (num > 100000) {
      return (num / 10000).toFixed(1) + 'w';
   } else if (num > 1000) {
      return (num / 1000).toFixed(1) + 'k';
   } else {
      return num;
   }
}
使用函数:
// 创建笔记卡片元素
function createNoteElement(note) {
   const noteElement = document.createElement("div");
   noteElement.className = "masonry-item";
   noteElement.innerHTML = `
      <div class="note-image-container">
            <img class="note-image" src="${note.cover}" alt="${note.title}">
      </div>
      <div class="note-content">
            <div class="note-title">${note.title}</div>
            <div class="note-author-stats">
               <div class="note-author">
                  <img class="author-avatar" src="${note.avatar ? note.avatar : '/images/rn_avatar.png'}" alt="${note.username}">
                  <span class="author-name">${note.username}</span>
               </div>
               <div class="note-stats">
                  <div class="stat-item">
                        <i class="fa fa-heart-o">${numberFormat(1024)}</i>
                  </div>
               </div>
            </div>
      </div>
   `;

   return noteElement;
}
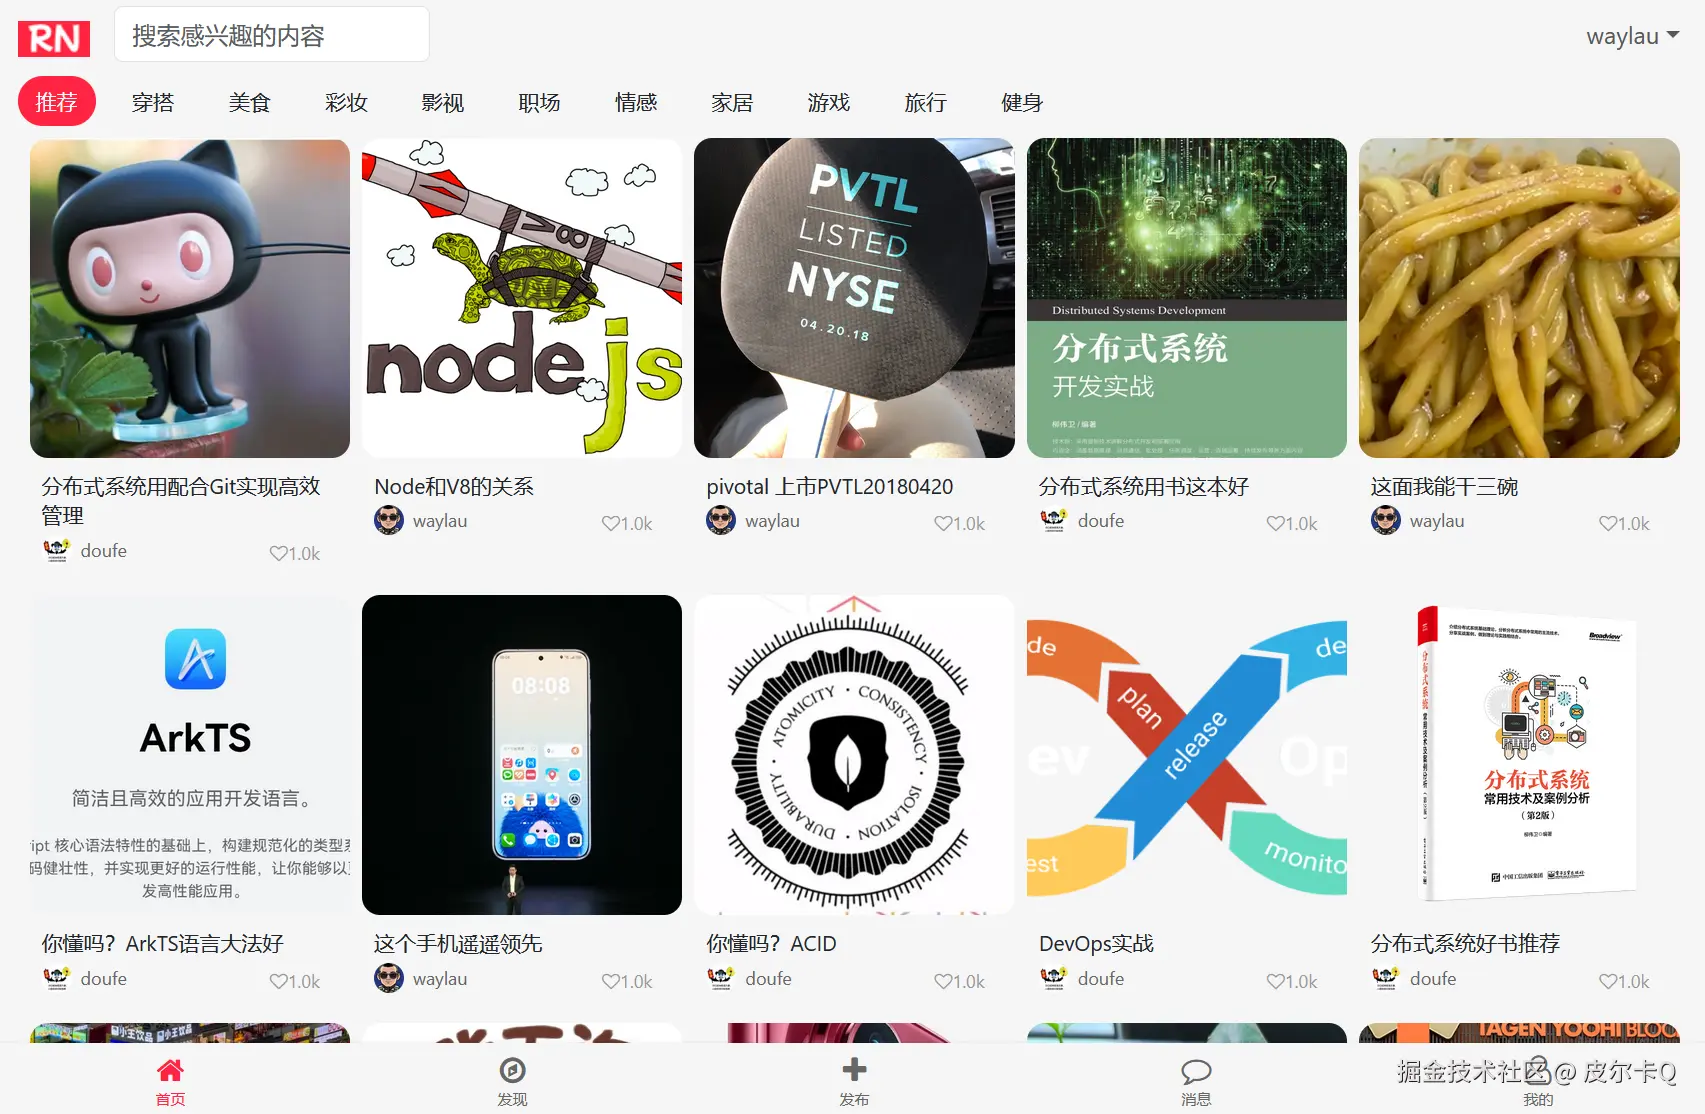
如下图11-6所示的是无限滚动刷新,查询完笔记数据之后的效果。
数字格式化本质是一种“信息压缩”技术,通过牺牲部分精度来换取更高的传达效率。其核心价值在于:
在实际应用中,需根据业务场景、用户群体和数据特性定制格式化规则,避免因过度简化导致信息失真。
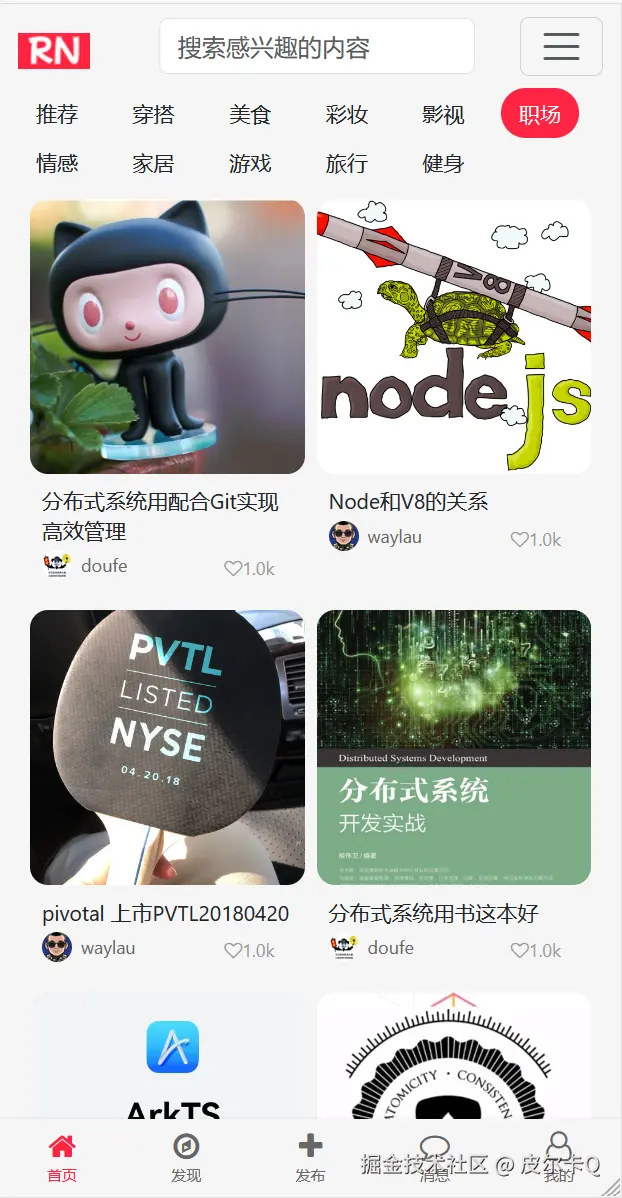
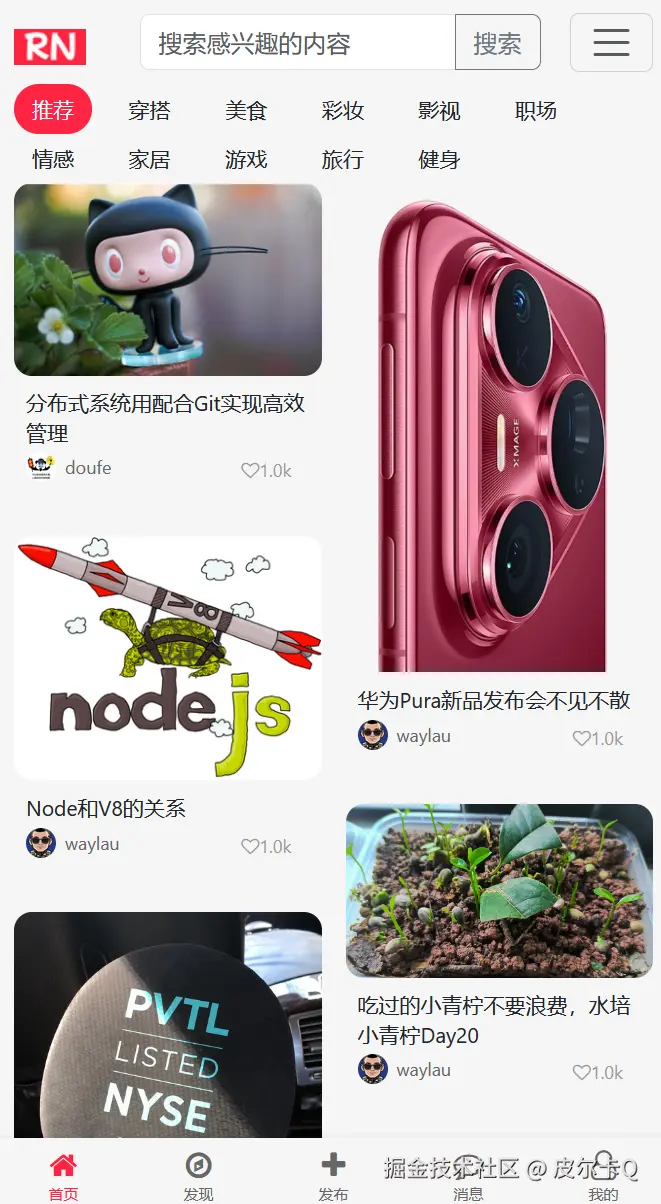
如下图11-7所示的是适配移动设备之后的效果。
个性化推荐:
搜索功能:
内容筛选:
视频内容:
内容安全:
性能优化:
在网页中实现 <input> 搜索功能通常涉及以下几个核心步骤:用户输入、搜索逻辑处理、结果展示和交互反馈。以下从前端实现到后端交互的完整流程进行解析,并提供代码示例。
修改explore.html中搜索框的内容:
<!-- 搜索框-->
<div class="col-md-3">
    <div class="input-group">
        <input class="form-control" type="text" placeholder="搜索感兴趣的内容" aria-label="Search"
                id="searchInput">
        <button class="btn btn-outline-secondary" type="button" id="searchButton">
            搜索
        </button>
    </div>
</div>
修改点:
<input>增加了id属性<button>input 事件用户输入,实时获取到搜索内容以下代码实时获取到搜索内容,并缓存在searchContent变量中:
// 缓存搜索的内容(确保在loadMoreNotes()执行前声明)
let searchContent = '';

// ...为节约篇幅,此处省略非核心内容

// 获取搜索输入框的值
const searchInput = document.getElementById('searchInput');
searchInput.addEventListener('input', function() {
        searchContent = this.value;
});
以下代码当点击搜索按钮时,触发执行搜索:
// 搜索按钮执行搜索
document.getElementById('searchButton').addEventListener('click', function() {
    // 获取搜索输入框的值
    searchContent = document.getElementById('searchInput').value;

    // 执行搜索
    performSearch();
});

// 执行搜索
function performSearch() {
    // 重置笔记网格数据
    notesGrid.innerHTML = '';

    // 恢复初始状态值
    currentPage = 0;
    isLoading = false;
    hasMore = true;

    // 加载更多笔记
    loadMoreNotes();
};
将与performSearch()代码逻辑一致的部分,重构为performSearch()。
// 为分页导航添加点击事件
categoryItems.forEach(item => {
    item.addEventListener('click', () => {
        categoryItems.forEach(item => {
            item.classList.remove('active');
        });
        item.classList.add('active');

        // 以下代码重构为performSearch()
        /*
        // 重置笔记网格数据
        notesGrid.innerHTML = '';

        // 恢复初始状态值
        currentPage = 0;
        isLoading = false;
        hasMore = true;
        loadMoreNotes();
        */
        performSearch();

    });
});
重构loadMoreNotes()函数:
// 加载更多笔记
function loadMoreNotes() {
        if (isLoading || !hasMore) {
            // 隐藏加载更多
            hideLoadMore();
            // 显示没有更多内容
            showNoMoreContent();
            return;
        }

        isLoading = true;
        // 显示加载更多
        showLoadMore();

        // 获取当前分类
        let category = document.querySelector('.category-item.active').textContent.trim();

        // 发送请求
        /*fetch(`/explore/note?page=${currentPage + 1}&category=${category}`)*/
        fetch(`/explore/note?page=${currentPage + 1}&category=${category}&query=${searchContent}`)

        // ...为节约篇幅,此处省略非核心内容
}
在发送AJAX请求时,传递query参数,值是searchContent。
修改getNotesByCategory()方法,增加了query参数。
/**
  * 返回首页笔记探索页面的笔记数据
  */
@GetMapping("/note")
public ResponseEntity<NoteResponseDto> getNotesByCategory(
                                                          @RequestParam(defaultValue = "1") int page,
                                                          @RequestParam(required = false) String category,
                                                          @RequestParam(required = false) String query) {
    // 把“推荐”当成空
    if (DEFAULT_CATEGORY.equals(category)) {
        category = null;
    }

    Page<Note> notes = null;

    // 区分是关键字搜索还是分类查询
    if (query == null || query.isEmpty()) {
        notes = noteService.getNotesByPage(page, PAGE_SIZE, category);
    } else {
        notes = noteService.getNotesByPageAndQuery(page, PAGE_SIZE, category, query);
    }


    NoteResponseDto notesResponseDto = new NoteResponseDto();
    notesResponseDto.setHasMore(notes.hasNext());

    // 处理序列化问题
    List<NoteExploreDto> noteExploreDtoList = new ArrayList<>();
    for (Note note : notes.getContent()) {
        noteExploreDtoList.add(NoteExploreDto.toExploreDto(note));
    }
    notesResponseDto.setNotes(noteExploreDtoList);

    return ResponseEntity.ok(notesResponseDto);
}
如果没有传入query参数值,则执行原有的NoteService.getNotesByPage()方法;否则,执行NoteService.getNotesByPageAndQuery()新方法。
修改NoteService,增加如下接口:
/**
 * 搜索分页查询笔记
 *
 * @param page
 * @param pageSize
 * @param category
 * @param query
 * @return
 */
Page<Note> getNotesByPageAndQuery(int page, int pageSize, String category, String query);
修改NoteServiceImpl,增加如下方法:
@Override
public Page<Note> getNotesByPageAndQuery(int page, int pageSize, String category, String query) {
    // 构造Pageable对象,按照创建时间倒序排序
    Pageable pageable = PageRequest.of(page - 1, pageSize, Sort.by("createAt").descending());

    if (category != null && !category.isEmpty() && query != null && !query.isEmpty()) {
        return noteRepository.findByCategoryAndTopicsContaining(category, query, pageable);
    } else if (query != null && !query.isEmpty()) {
        return noteRepository.findByTopicsContaining(query, pageable);
    } else {
        return noteRepository.findAll(pageable);
    }
}
如果没有传入category参数值,则执行原有的NoteRepository.findByTopicsContaining()方法;否则,执行NoteRepository.findByCategoryAndTopicsContaining()新方法。
在 Spring Data JPA 中查询List<String>类型的属性需要使用特殊的方法。针对Note实体中的topics属性,新增如下接口:
/**
 * 根据分类和话题标签分页查询笔记
 *
 * @param category
 * @param query
 * @param pageable
 * @return
 */
Page<Note> findByCategoryAndTopicsContaining(String category, String query, Pageable pageable);

/**
 * 根据话题标签分页查询笔记
 *
 * @param query
 * @param pageable
 * @return
 */
Page<Note> findByTopicsContaining(String query, Pageable pageable);
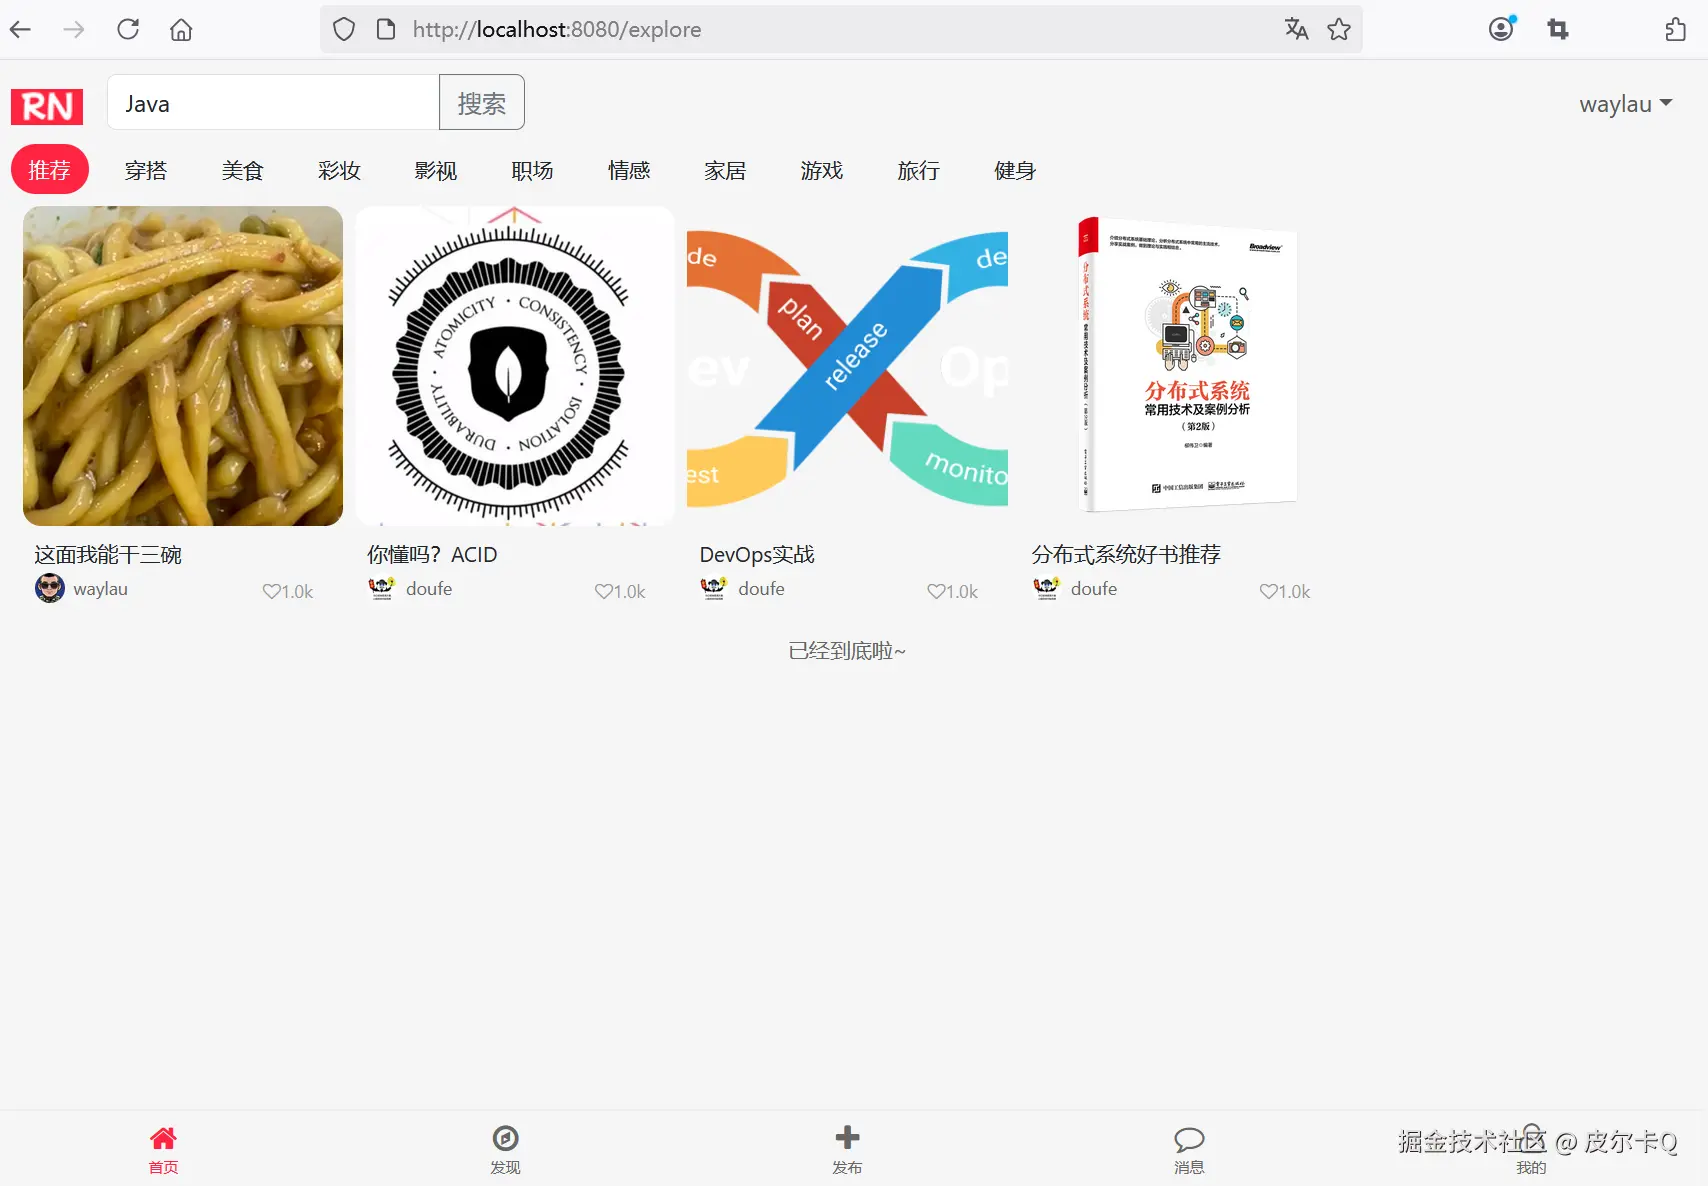
在首页“推荐”分类执行搜素“Java”关键字,效果如下图12-1所示。
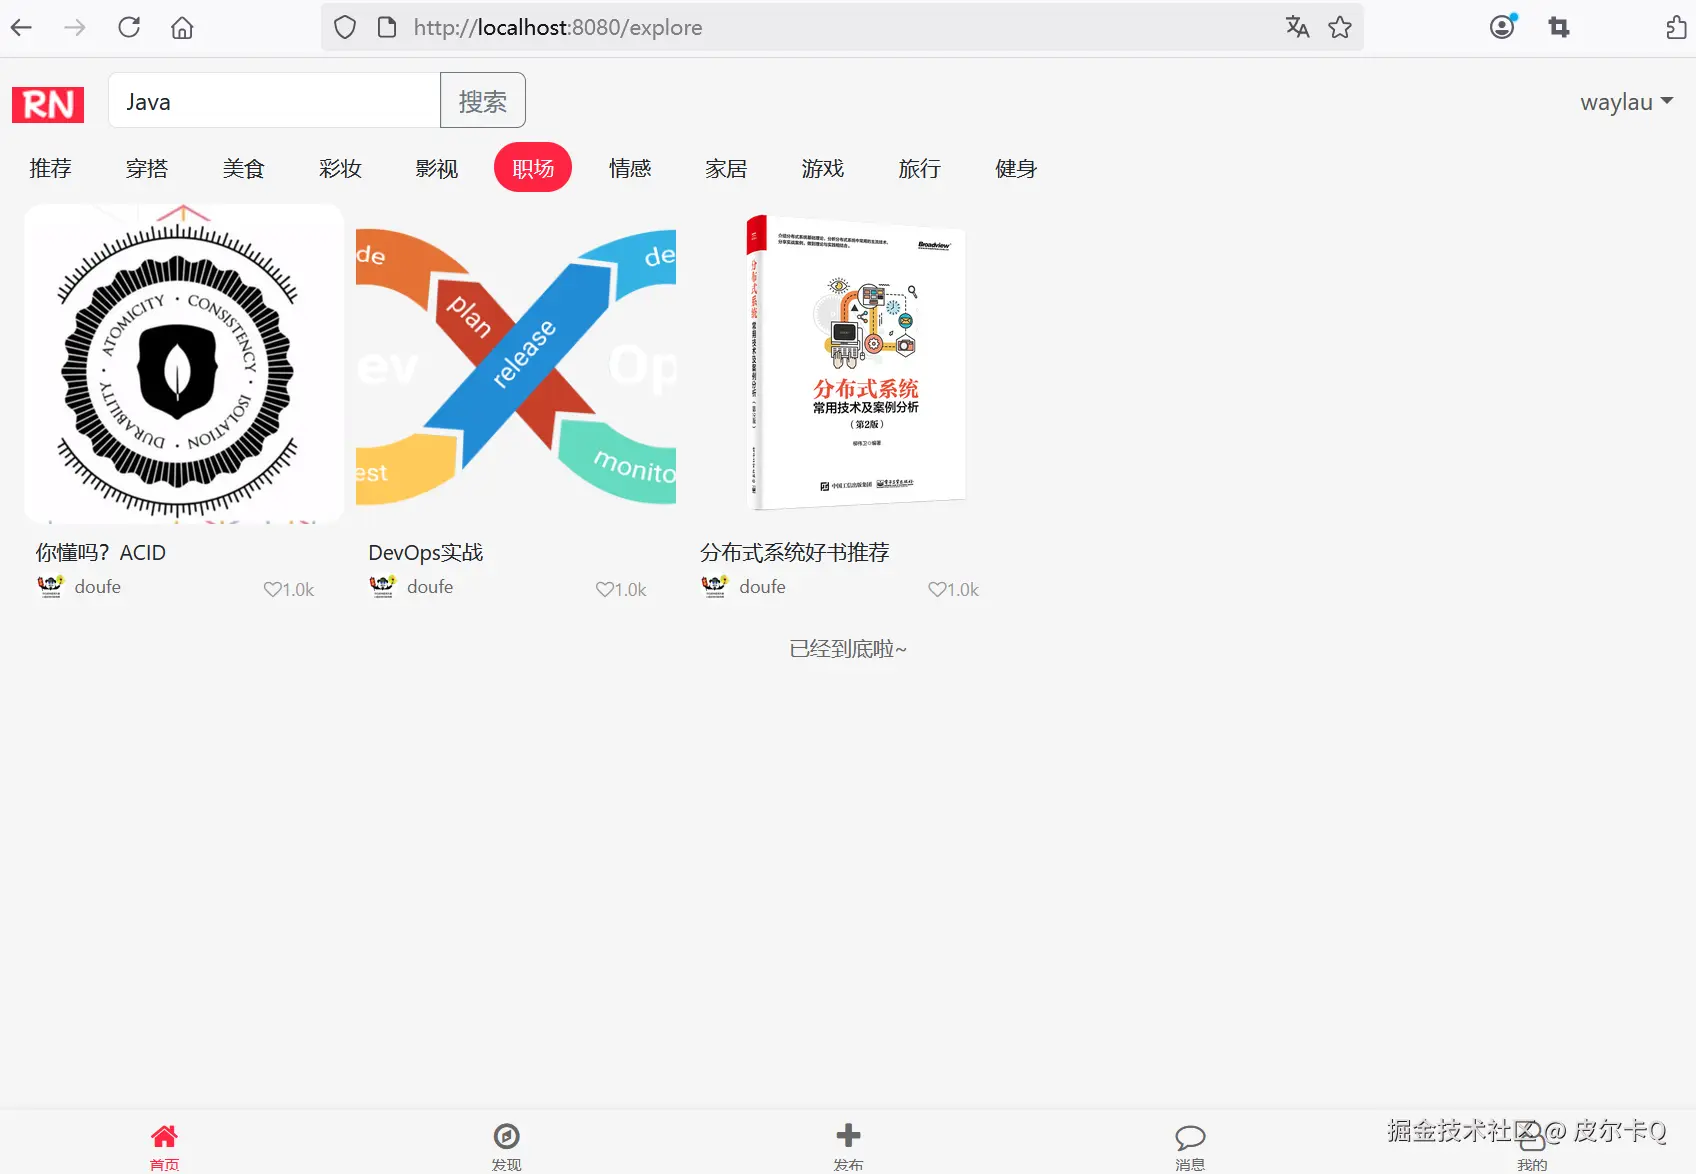
在首页“职场”分类执行搜素“Java”关键字,效果下图12-2所示。
两个搜素结果不一致,说明有些包含“Java”主题的笔记,并不在“职场”分类中。
类似于用户详情页的笔记列表的做法,从首页跳转到笔记详情页,只需要在原有的笔记封面<img>上套一层<a>即可。
// 创建笔记卡片元素
function createNoteElement(note) {
    const noteElement = document.createElement("div");
    noteElement.className = "masonry-item";
    noteElement.innerHTML = `
        <div class="note-image-container">
            <!-- 点击跳转到笔记详情页 -->
            <a href="/note/${note.noteId}">
                <img class="note-image" src="${note.cover}" alt="${note.title}">
            </a>
        </div>
        <div class="note-content">
            <div class="note-title">${note.title}</div>
            <div class="note-author-stats">
                <div class="note-author">
                    <img class="author-avatar" src="${note.avatar ? note.avatar : '/images/rn_avatar.png'}" alt="${note.username}">
                    <span class="author-name">${note.username}</span>
                </div>
                <div class="note-stats">
                    <div class="stat-item">
                        <i class="fa fa-heart-o">${numberFormat(1024)}</i>
                    </div>
                </div>
            </div>
        </div>
    `;

    return noteElement;
}
点击笔记封面,就能跳转到笔记详情页了。
点击笔记的作者头像时,我们希望就能跳转到该作者的详情页。实现方式,只需要在作者信息的<div>上套一层<a>即可。
// 创建笔记卡片元素
function createNoteElement(note) {
    const noteElement = document.createElement("div");
    noteElement.className = "masonry-item";
    noteElement.innerHTML = `
        <div class="note-image-container">
            <!-- 点击跳转到笔记详情页 -->
            <a href="/note/${note.noteId}">
                <img class="note-image" src="${note.cover}" alt="${note.title}">
            </a>
        </div>
        <div class="note-content">
            <div class="note-title">${note.title}</div>
            <div class="note-author-stats">
                <!-- 点击跳转到用户详情页 -->
                <a href="/user/profile/${note.userId}">
                    <div class="note-author">
                        <img class="author-avatar" src="${note.avatar ? note.avatar : '/images/rn_avatar.png'}" alt="${note.username}">
                        <span class="author-name">${note.username}</span>
                    </div>
                </a>

                <div class="note-stats">
                    <div class="stat-item">
                        <i class="fa fa-heart-o">${numberFormat(1024)}</i>
                    </div>
                </div>
            </div>
        </div>
    `;

    return noteElement;
}
跳转到/user/profile页面需要传递用户ID,显然当前的note对象DTO里面并没有这个属性,因此需要做进一步的扩展。
/**
 * 作者用户ID
 */
private Long userId;

public static NoteExploreDto toExploreDto(Note note) {
    NoteExploreDto noteExploreDto = new NoteExploreDto();
    noteExploreDto.setNoteId(note.getNoteId());
    noteExploreDto.setTitle(note.getTitle());
    noteExploreDto.setCover(note.getImages().get(0));
    noteExploreDto.setUsername(note.getAuthor().getUsername());
    noteExploreDto.setAvatar(note.getAuthor().getAvatar());
    noteExploreDto.setUserId(note.getAuthor().getUserId());

    return noteExploreDto;
}
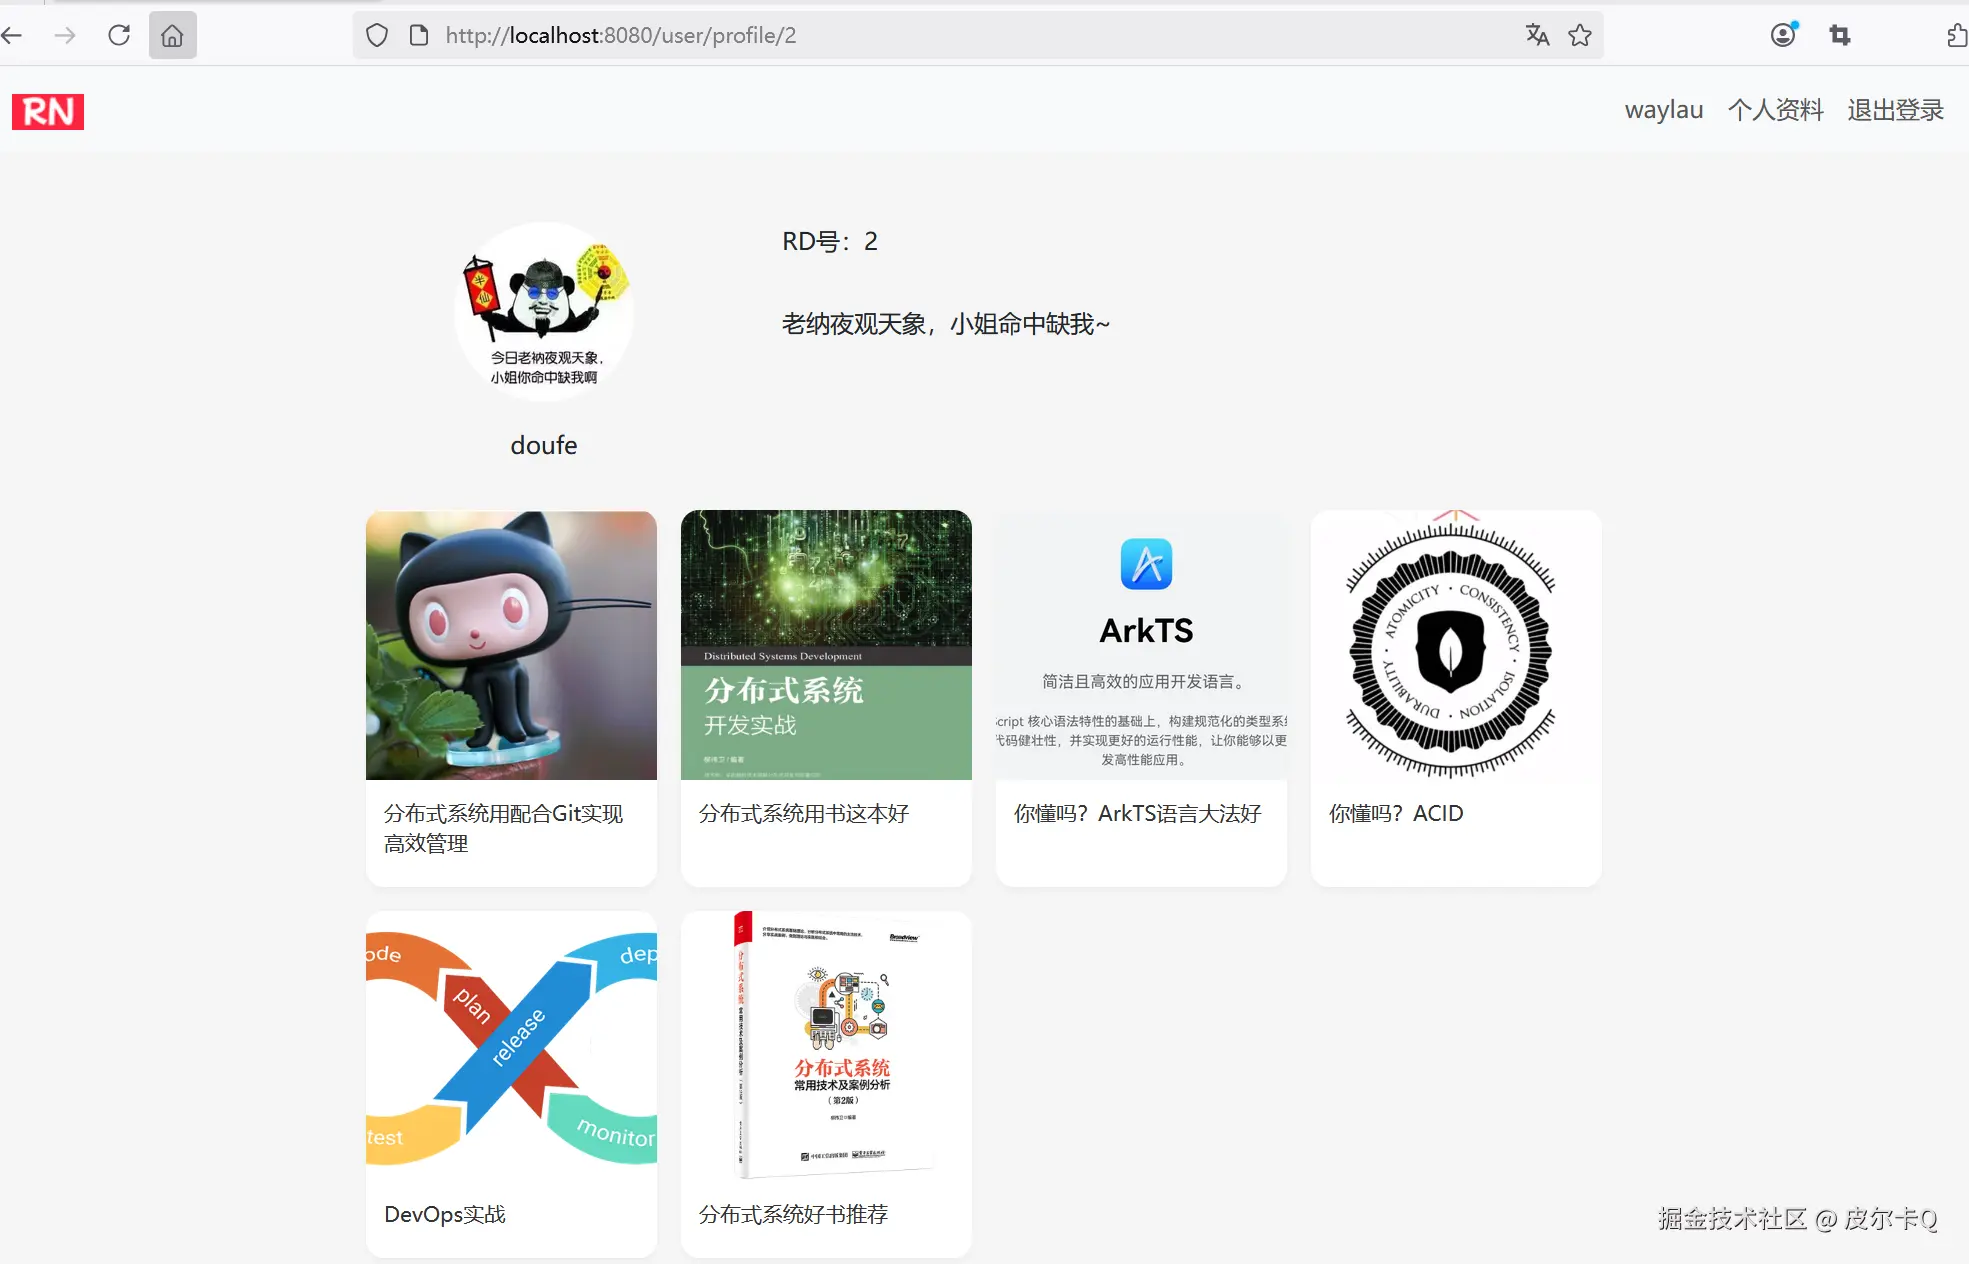
运行应用,效果如下图12-3所示,跳转逻辑没有问题,只是用户名下面有条下划线不是太美观。
去除<a>标签的下划线,只需要加个CSS样式:
<style>
/* 去掉下划线 */
a {
    text-decoration: none;
}
</style>
去除用户名下面下划线的效果如下图12-4所示。
类似上一节的做法,也可以在笔记详情页作者信息区域,设置点击跳转到作者的详情页。
修改note-detail.html。
去除<a>标签的下划线,只需要加个CSS样式:
<style>
/* 去掉下划线 */
a {
    text-decoration: none;
}
</style>
点击笔记的作者头像时,我们希望就能跳转到该作者的详情页。实现方式,只需要在作者头像上的<img>上套一层<a>即可。
<!-- 作者信息 -->
<div class="author-info">
    <!-- 点击作者头像跳转到作者详情页 -->
    <a th:href="@{/user/profile/{userId}(userId=${note.author.userId})}">
        <img class="author-avatar" src="../static/images/rn_avatar.png"
                th:src="${note.author.avatar ?: '/images/rn_avatar.png'}"
                alt="作者头像">
    </a>

    <div>
        <div class="author-name" th:text="${note.author.username}">
            waylau
        </div>
        <div class="author-meta">
            已获得 1024 粉丝
        </div>
    </div>
    <div class="author-follow" th:if="${#authentication.name != note.author.username}">
        + 关注
    </div>
</div>
运行应用,作者头像效果如下图12-6所示。
点击作者头像就可以跳转到作者的详情页了,效果如下图12-7所示。
瀑布流布局是小红书等内容平台常用的设计方式,它可以根据内容高度自动调整位置,形成错落有致的视觉效果,提升用户浏览体验。
视觉优势:
用户体验:
响应式设计:
修改explore.html增加如下样式:
/* 瀑布流布局 */
.masonry {
    column-count: 4;
    column-gap: 1em;
    padding: 10;
}
.masonry-item {
    display: inline-block;
    margin: 0 0 1.5em;
    width: 100%;
}

.masonry-note-image {
    border-radius: 12px;
    width: 100%;
    height: auto;
}

@media only screen and (max-width: 320px) {
    .masonry {
        column-count: 1;
    }
}

@media only screen and (min-width: 321px) and (max-width: 768px){
    .masonry {
        column-count: 2;
    }
}
@media only screen and (min-width: 769px) and (max-width: 1200px){
    .masonry {
        column-count: 3;
    }
}
@media only screen and (min-width: 1201px) {
    .masonry {
        column-count: 4;
    }
}
<!-- 笔记卡片网格 -->
<!--<div class="notes-grid" id="notesGrid">-->
<div class="masonry" id="notesGrid">
    <!-- 笔记卡片是通过JavaScript动态生成 -->
</div>
// 创建笔记卡片元素
function createNoteElement(note) {
    const noteElement = document.createElement("div");
    noteElement.className = "masonry-item";
    noteElement.innerHTML = `
        <!--<div class="note-image-container">-->
            <!-- 点击跳转到笔记详情页 -->
            <a href="/note/${note.noteId}">
                <!--<img class="note-image" src="${note.cover}" alt="${note.title}">-->
                <img class="masonry-note-image" src="${note.cover}" alt="${note.title}">
            </a>
        <!--</div>-->

        <!-- ...为节约篇幅,此处省略非核心内容 -->

    `;

    return noteElement;
}
在img上增加masonry-note-image类型样式,同时去除note-image-container类型的div。
下面是将小红书首页笔记卡片改为瀑布流布局的效果演示方案。
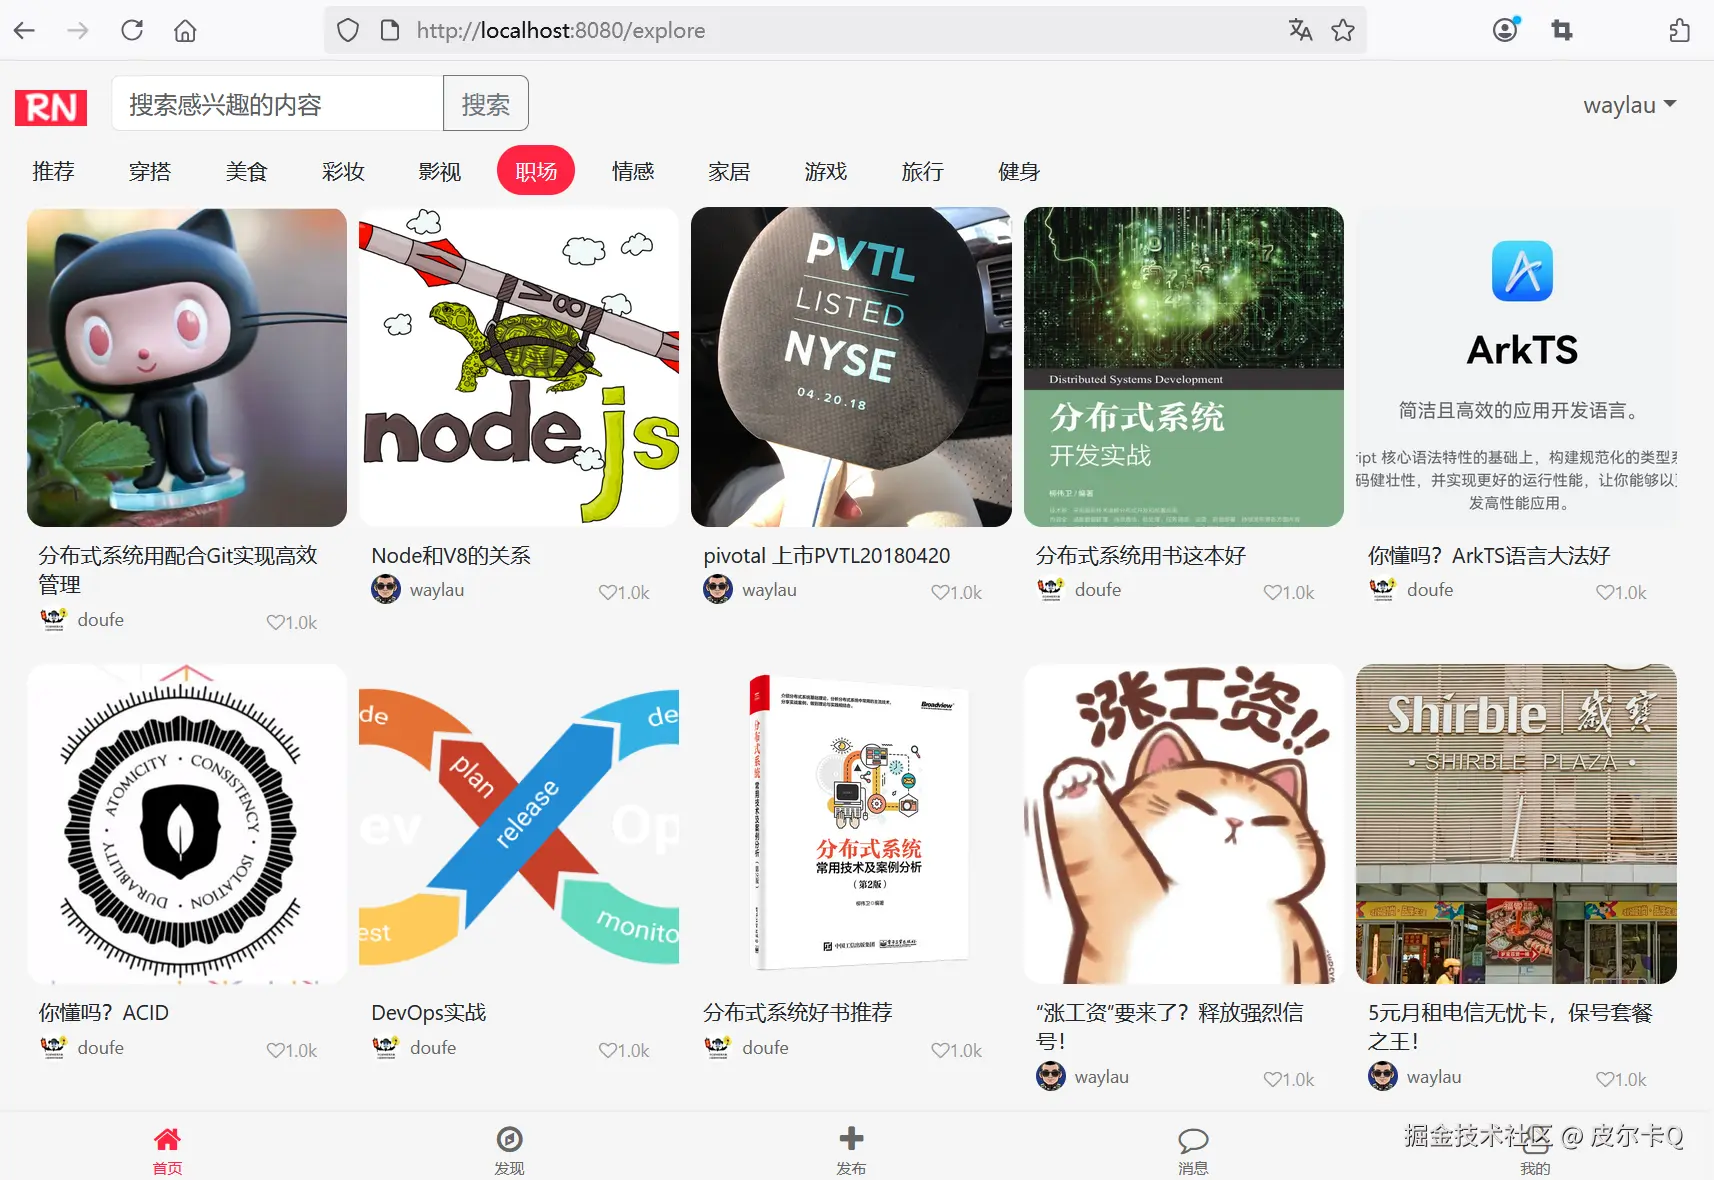
大尺寸设备效果如下图12-8所示。
中等尺寸设备效果如下图12-9所示。
小尺寸设备效果如下图12-10所示。
通过以上实现,你可以将小红书首页的笔记卡片从传统网格布局改为瀑布流布局,提升用户体验和内容展示效果。
修改explore.html,实现从底部导航栏导航到其他页面的功能。
<!-- 底部导航栏 -->
<div class="container bottom-nav">
    <div class="nav-item active" onclick="navigateTo('home')">
        <i class="fa fa-home nav-icon"></i>
        <span class="nav-text">首页</span>
    </div>
    <div class="nav-item" onclick="navigateTo('discover')">
        <i class="fa fa-compass nav-icon"></i>
        <span class="nav-text">发现</span>
    </div>
    <div class="nav-item" onclick="navigateTo('publish')">
        <i class="fa fa-plus nav-icon"></i>
        <span class="nav-text">发布</span>
    </div>
    <div class="nav-item" onclick="navigateTo('message')">
        <i class="fa fa-comment-o nav-icon"></i>
        <span class="nav-text">消息</span>
    </div>
    <div class="nav-item" onclick="navigateTo('profile')">
        <i class="fa fa-user-o nav-icon"></i>
        <span class="nav-text">我的</span>
    </div>
</div>
// 导航函数
function navigateTo(page) {
console.log('navigateTo: ' + page);
if (page === 'home') {
window.location.href = '/';
} else if (page === 'publish') {
window.location.href = '/note/publish';
} else if (page === 'profile') {
window.location.href = '/user/profile';
} else {
// 待实现的功能页面
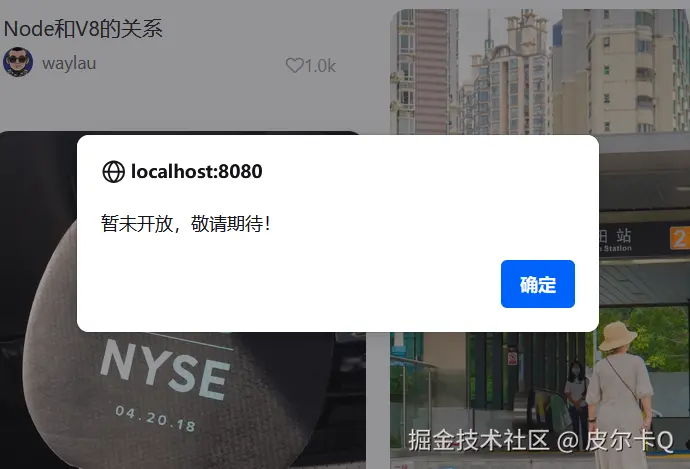
alert('暂未开放,敬请期待!');
return;
}
}
当点击暂未开放的功能时,比如“消息”,提示框效果如下图12-11所示。
// Elasticsearch 查询示例
@Autowired
private RestHighLevelClient client;

public List<Note> elasticSearch(String query) throws IOException {
    SearchRequest searchRequest = new SearchRequest("notes");
    SearchSourceBuilder sourceBuilder = new SearchSourceBuilder();

    QueryBuilder matchQuery = QueryBuilders.multiMatchQuery(query, "title", "content");
    sourceBuilder.query(matchQuery);
    searchRequest.source(sourceBuilder);

    SearchResponse response = client.search(searchRequest, RequestOptions.DEFAULT);
    // 处理结果...
}
实现一个高效的搜索功能需要综合考虑:
通过合理设计和技术选型,可以构建出既满足功能需求又具有良好用户体验的搜索系统。
图片懒加载:
// 使用Intersection Observer实现图片懒加载
const observer = new IntersectionObserver((entries) => {
    entries.forEach(entry => {
        if (entry.isIntersecting) {
            const img = entry.target;
            img.src = img.dataset.src;
            observer.unobserve(img);
        }
    });
});

document.querySelectorAll('img[data-src]').forEach(img => {
    observer.observe(img);
});
性能优化:
动态加载内容:

